As an Amazon Associate we earn from qualifying purchases. Here’s how it works.
Cats don’t need a huge house to live an exciting, enriching life. With a little creativity, even the smallest apartment can become a stylish haven where your feline companion can climb, nap, scratch, observe the world, and play—all without taking over your living space.
The best DIY Cat Corner Ideas strike the perfect balance between function and design. Instead of hiding bulky pet furniture in a spare room, you can create beautiful cat-friendly spaces that complement your home’s aesthetic while giving your cat dedicated areas to relax and explore.
Many of these projects can be completed over a weekend using beginner-friendly tools and affordable materials. Better yet, they’re easy to customize to match your existing décor, whether your style leans modern, Scandinavian, boho, farmhouse, or minimalist.
Throughout this guide, you’ll also find carefully chosen supplies that make each project easier to build and more durable over time—from sturdy floating shelves and wall anchors to soft pet beds, sisal rope, wood stain, baskets, and decorative accessories. Choosing quality materials from the start helps your DIY projects last longer while creating a safer environment for your cat.
Let’s begin with two stylish projects that instantly transform an unused corner into a feline paradise.
DIY Cat Corner Idea # 1 Floating Cat Climbing Corner
Why You’ll Love It?
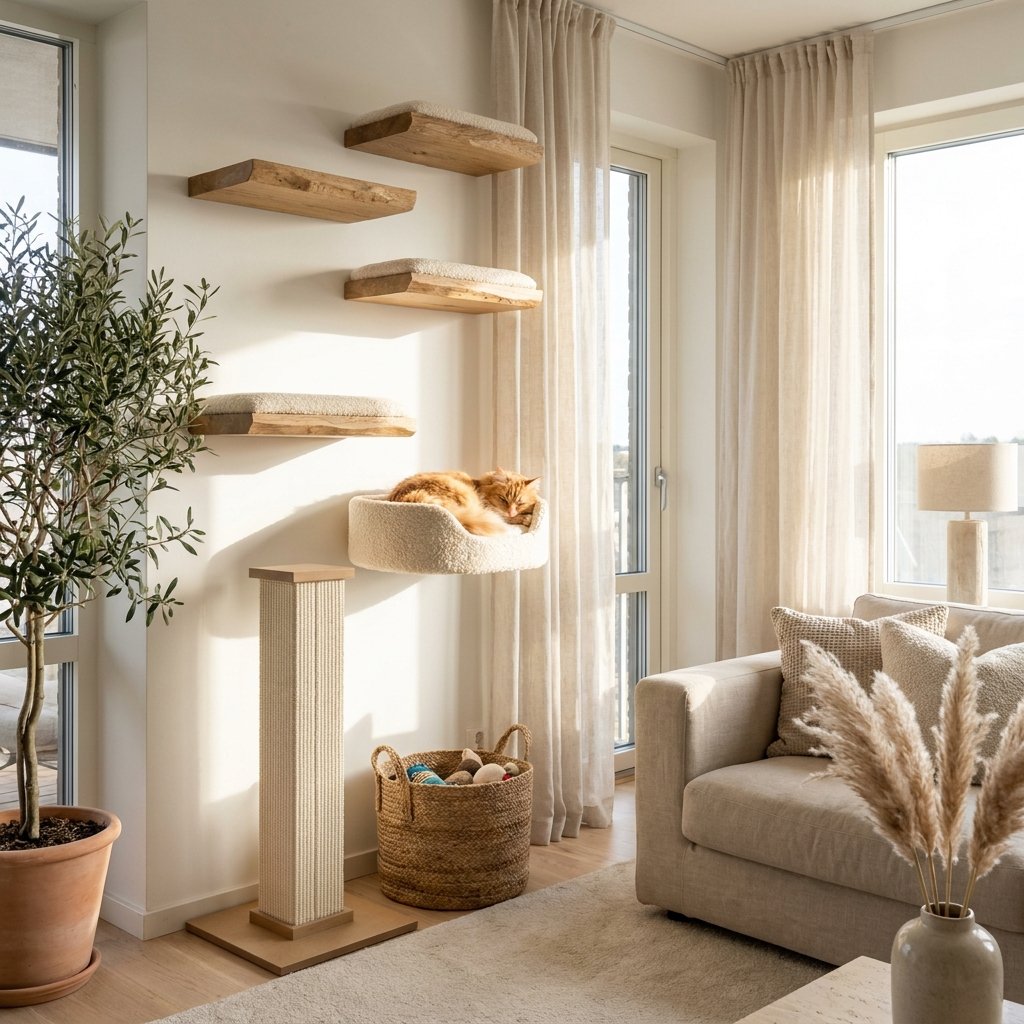
Vertical space is often underused in apartments. Installing floating cat shelves creates an engaging climbing route without taking up precious floor space. This project also doubles as a modern wall feature, making it ideal for contemporary homes.
Difficulty: Easy–Moderate | Time: 3–5 Hours
Perfect For:
- Studio apartments
- Apartments with limited floor space
- Active indoor cats
- Young cats that enjoy climbing
Materials
- Solid wood floating shelves
- Heavy-duty wall anchors
- Stud finder
- Power drill
- Level
- Measuring tape
- Pencil
- Sisal rope
- Non-toxic wood glue
- Carpet remnants or felt pads
- Sandpaper
- Wood stain or paint (optional)
Quality materials make the biggest difference in wall-mounted projects. Look for solid wood floating shelves with high weight capacities, premium wall anchors, durable sisal rope, and soft felt or carpet pads to improve grip and comfort while keeping the finished design looking elegant.


Step 1 – Plan Your Climbing Layout
Before drilling any holes, observe how your cat naturally jumps around your home.
Choose a quiet corner with enough vertical height for multiple shelves while keeping the climbing route away from televisions or fragile decorations.
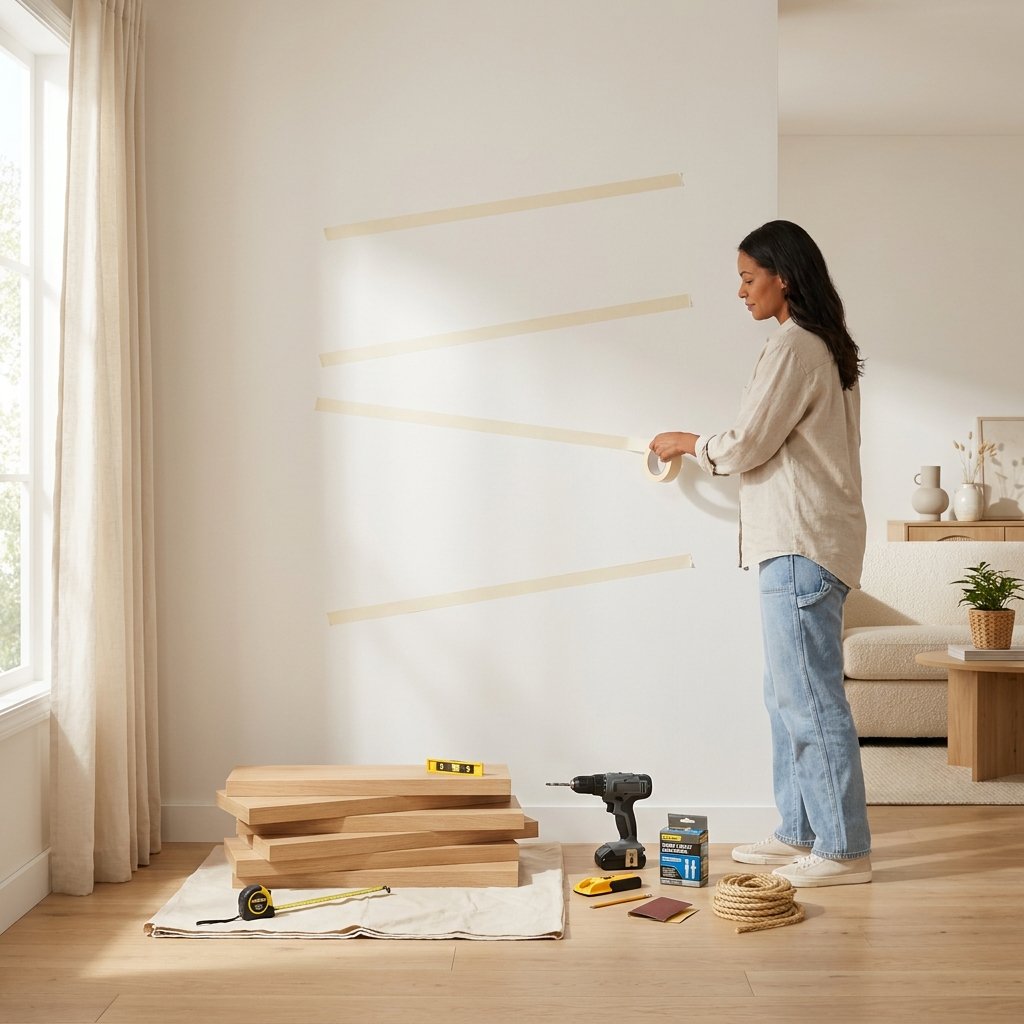
Space each shelf approximately 10–14 inches apart vertically so your cat can comfortably leap from one platform to the next.
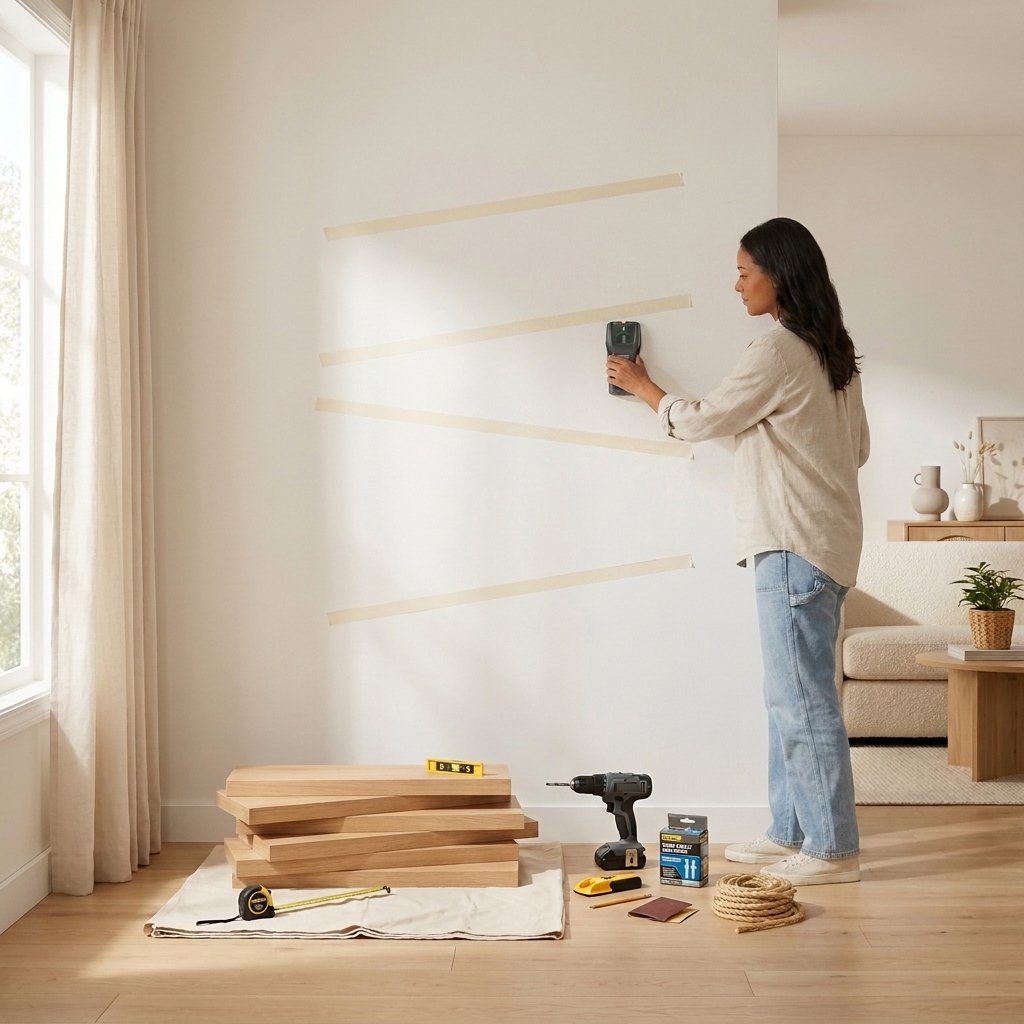
Step 2 – Locate Wall Studs
Use a stud finder to identify secure mounting points.
If studs aren’t available where you need them, install heavy-duty drywall anchors rated well above your cat’s weight.
Safety should always come before aesthetics.

Step 3 – Prepare Each Shelf
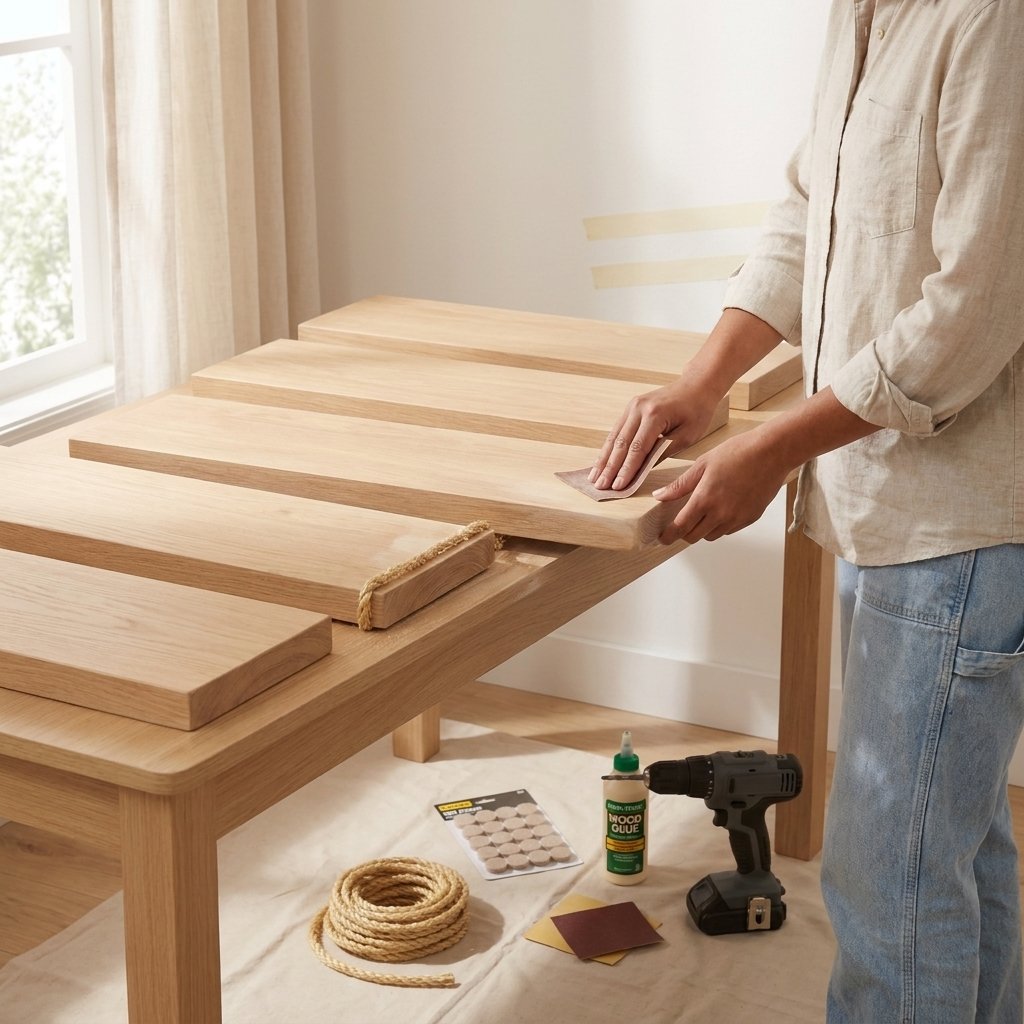
Lightly sand rough edges.
If desired, apply wood stain or paint that complements your home’s décor.
Allow everything to dry completely before installation.
To improve traction, wrap selected areas with sisal rope or attach felt pads using non-toxic adhesive.
Step 4 – Install the Shelves
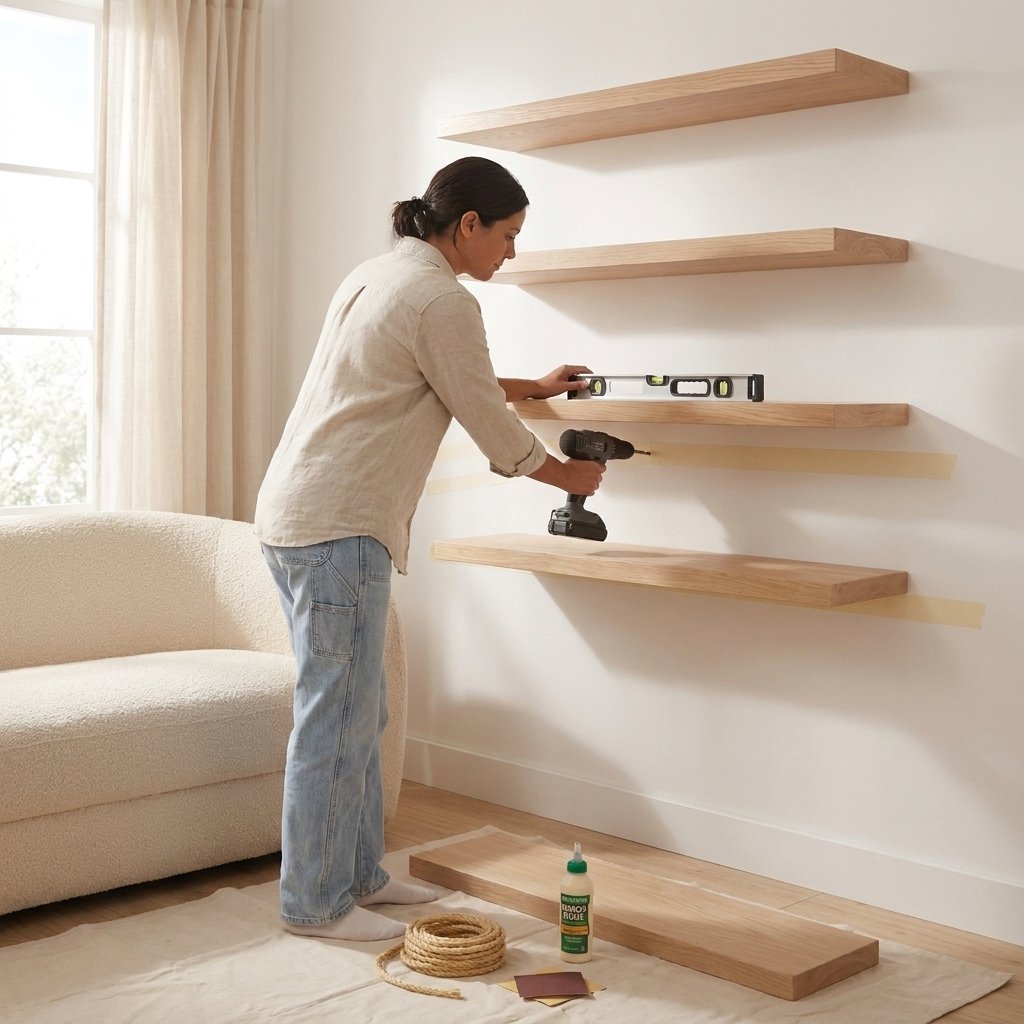
Install the lowest shelf first.
Use a level to ensure every shelf sits perfectly straight before tightening all hardware securely.
Work upward one shelf at a time until your climbing path is complete.
Gently test each shelf with pressure before allowing your cat to explore.

Step 5 – Style the Finished Corner
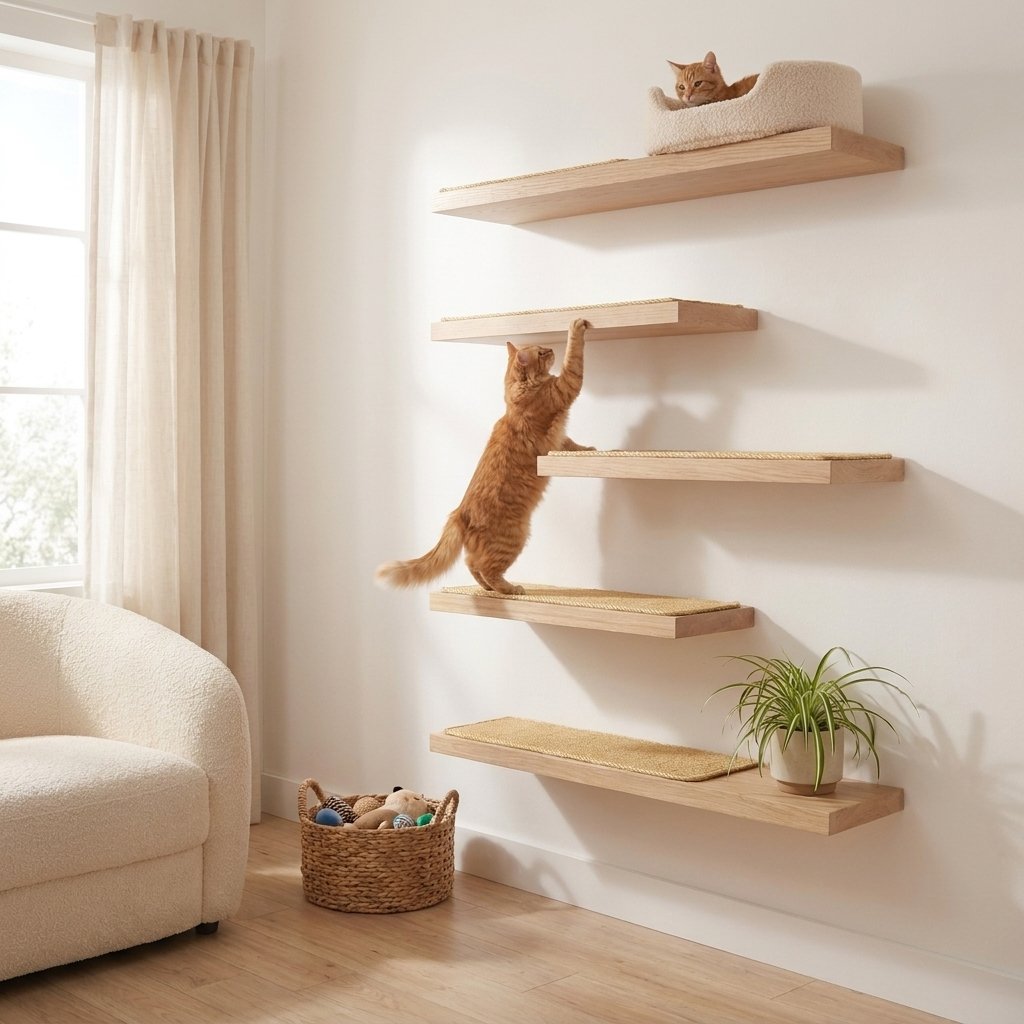
Complete the look by adding:
- Small hanging plant (cat-safe varieties only)
- Woven basket for toys
- Self-Adhesive Cat Scratching Mat on Shelves
- Cozy cat bed on the highest platform


The result is a stylish climbing wall that blends beautifully into your apartment.
Designer Tip: Mix shelf depths to create visual interest while giving your cat multiple lounging options.
Safety Note: Always verify the weight rating of every shelf and anchor before installation. Regularly inspect hardware for looseness, especially if your cat frequently jumps between platforms.
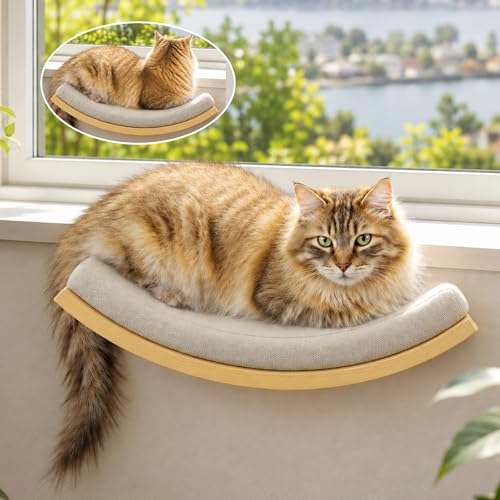
DIY Cat Corner Idea # 2 Cozy Window Cat Lounge
Why You’ll Love It?
Cats naturally love sunshine, bird watching, and elevated viewpoints. Transforming a sunny window corner into a relaxing lounge gives your cat hours of daily entertainment while creating one of the prettiest corners in your apartment.
Difficulty: Easy | Time: 2–3 Hours
Perfect For:
- Apartments with large windows
- Senior cats
- Indoor-only cats
- Minimalist interiors
Materials
- Window-mounted cat hammock or window perch
- Soft washable cushion
- Small floating shelf (optional)
- Lightweight curtains
- Cat-safe indoor plants
- Decorative woven basket
- Storage bin for toys
- Soft throw blanket
Choosing a sturdy window perch with industrial-strength suction cups or secure mounting hardware provides better long-term stability. Pair it with a machine-washable cushion and durable woven storage baskets to keep the space both functional and beautiful.


Step 1 – Choose the Right Window
Select a window that receives gentle morning or afternoon sunlight.
Avoid windows exposed to excessive midday heat unless you use light-filtering curtains.
Bird activity outside makes this space even more engaging.
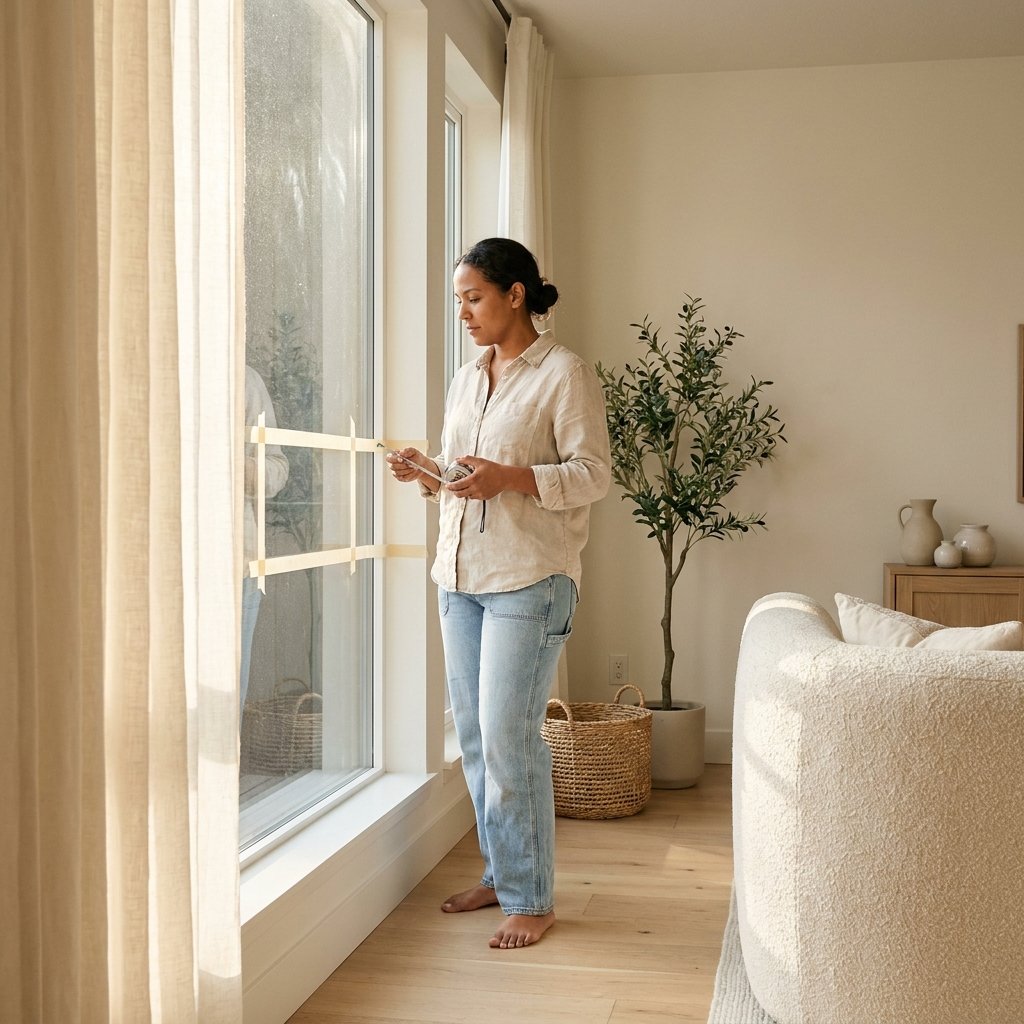
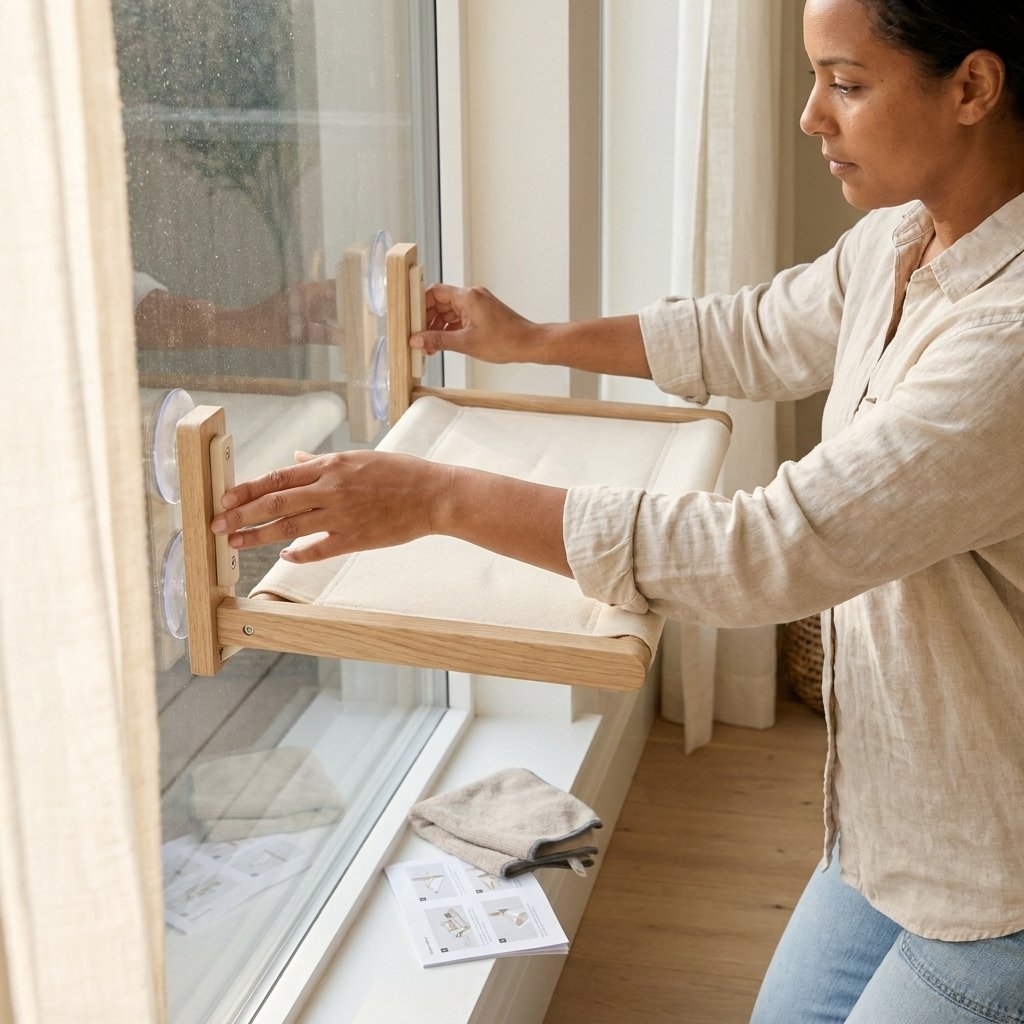
Step 2 – Install the Window Perch
Carefully clean the glass before attaching suction-mounted perches.
If using a mounted version, follow the manufacturer’s installation instructions and double-check stability before use.

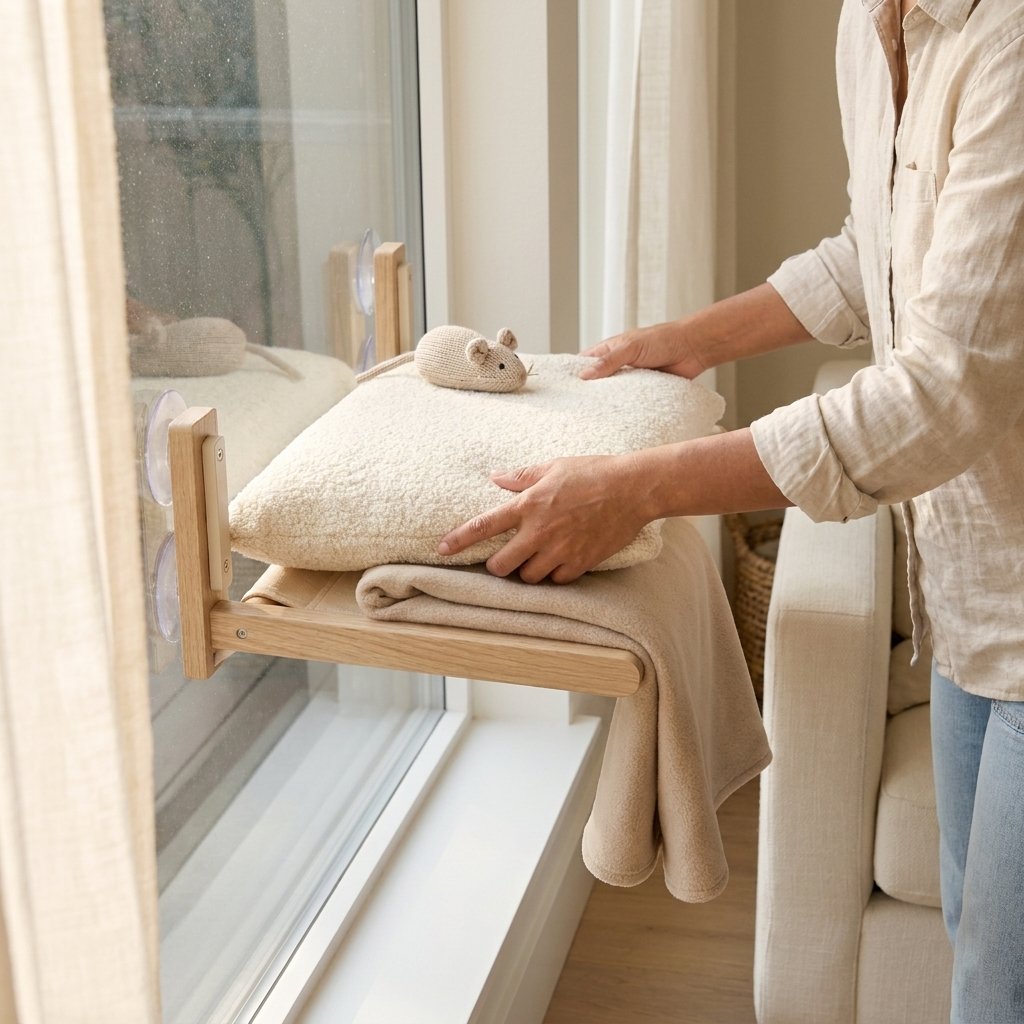
Step 3 – Add Soft Comfort
Layer the perch with:
- Plush washable cushion
- Small fleece blanket
- Favorite cat toy
Soft textures encourage longer naps while making the space feel cozy.


Step 4 – Create a Relaxing Corner
Place a woven basket underneath to store toys and grooming supplies.
Add a cat-safe plant nearby to soften the space visually while maintaining your apartment’s aesthetic.
Keep decorations minimal so your cat has plenty of room to jump comfortably.
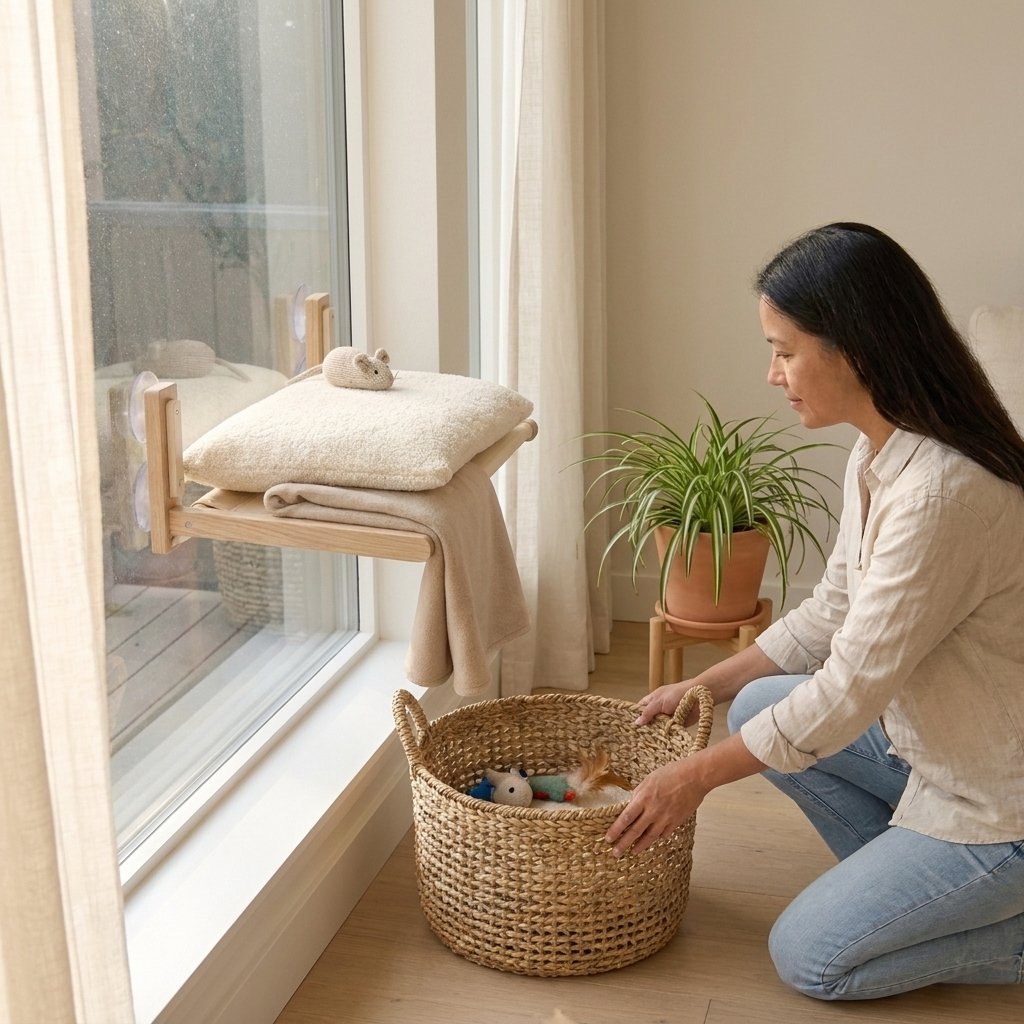

Designer Tip: Coordinate cushion fabrics with your sofa or curtains to make the cat lounge feel like an intentional part of your home’s design rather than a separate pet area.
Safety Note: Regularly inspect suction cups or mounting hardware for wear, especially in areas with fluctuating temperatures. Ensure nearby plants are non-toxic to cats, and keep cords from blinds or curtains secured out of reach.
DIY Cat Corner Idea # 3 Modern Sisal Scratching Post with Storage Base
A scratching post is one of the most important pieces of cat furniture, but many store-bought options can look bulky or clash with your décor. This DIY version combines a sleek scratching post with hidden storage for toys, treats, grooming supplies, or extra blankets. It’s a functional piece that looks right at home in a modern apartment.
Why You’ll Love It?
Instead of sacrificing style for practicality, this project creates a scratching station that blends beautifully with your living room or bedroom. The hidden storage base helps reduce clutter while giving your cat an approved place to stretch and scratch.
Difficulty: Easy | Time: 2–4 Hours
Perfect For:
- Small apartments
- Minimalist interiors
- Cats that scratch furniture
- First-time DIYers
Materials
- Wooden storage cube or sturdy wooden planter box
- Wooden post (approximately 3–4 inches in diameter)
- Premium natural sisal rope
- Heavy-duty screws
- Wood screws
- Power drill
- Wood stain or paint (optional)
- Non-toxic wood glue
- Felt furniture pads
- Decorative basket liner (optional)
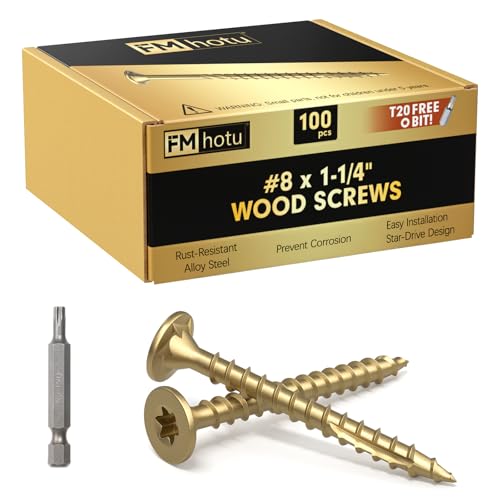
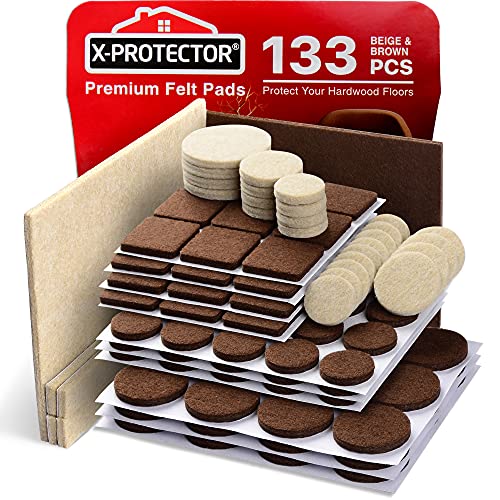
High-quality sisal rope lasts significantly longer than inexpensive alternatives and gives cats a satisfying texture to scratch. Pair it with a solid wood storage cube, durable wood screws, a reliable cordless drill, and furniture-safe felt pads for a sturdy, polished finish that stands up to daily use.


Step 1 – Prepare the Storage Base
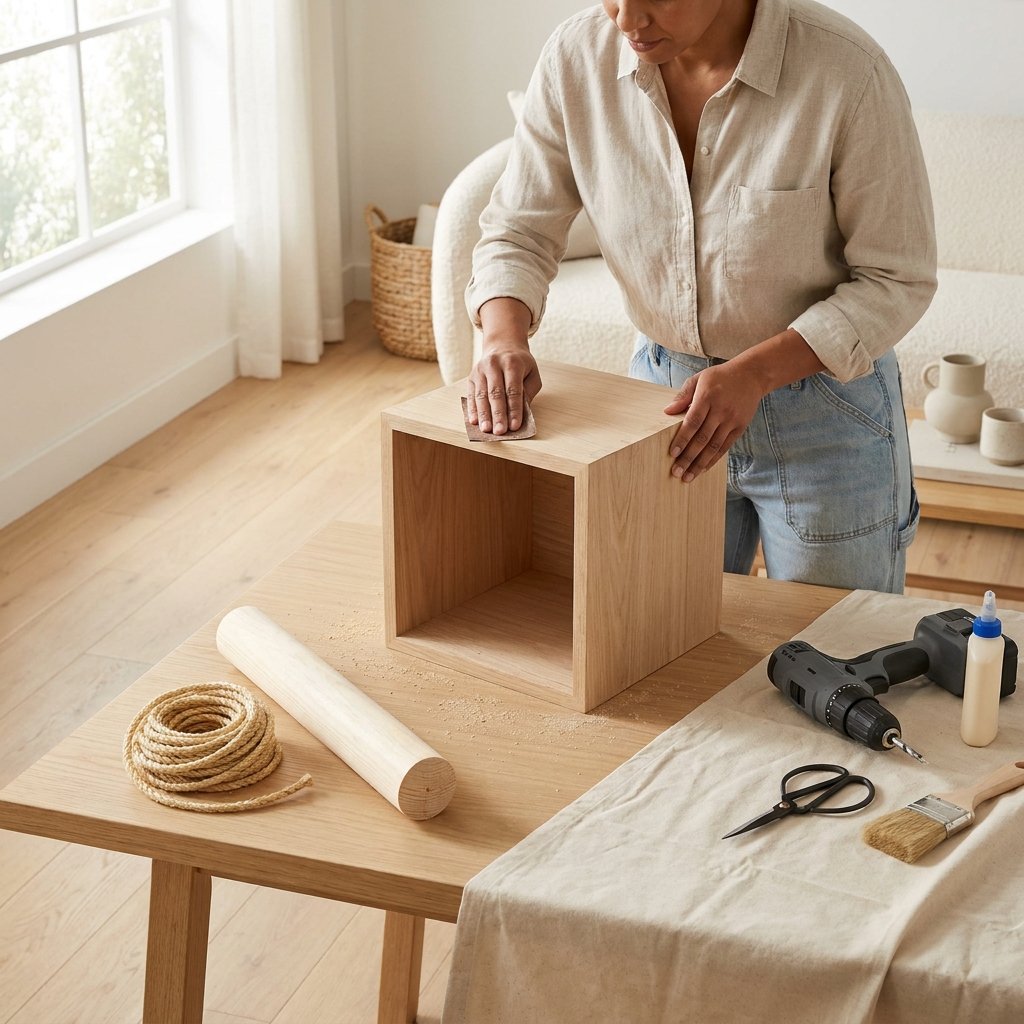
Choose a sturdy wooden cube or box that won’t tip over during use.
If you’d like to match your home’s color palette, lightly sand the surface and apply paint or wood stain before assembly. Allow everything to dry completely.
Step 2 – Attach the Vertical Post
Locate the center of the storage cube’s lid.
Secure the wooden post using long wood screws driven from inside the box upward into the post.
Double-check that the post is perfectly upright before tightening completely.
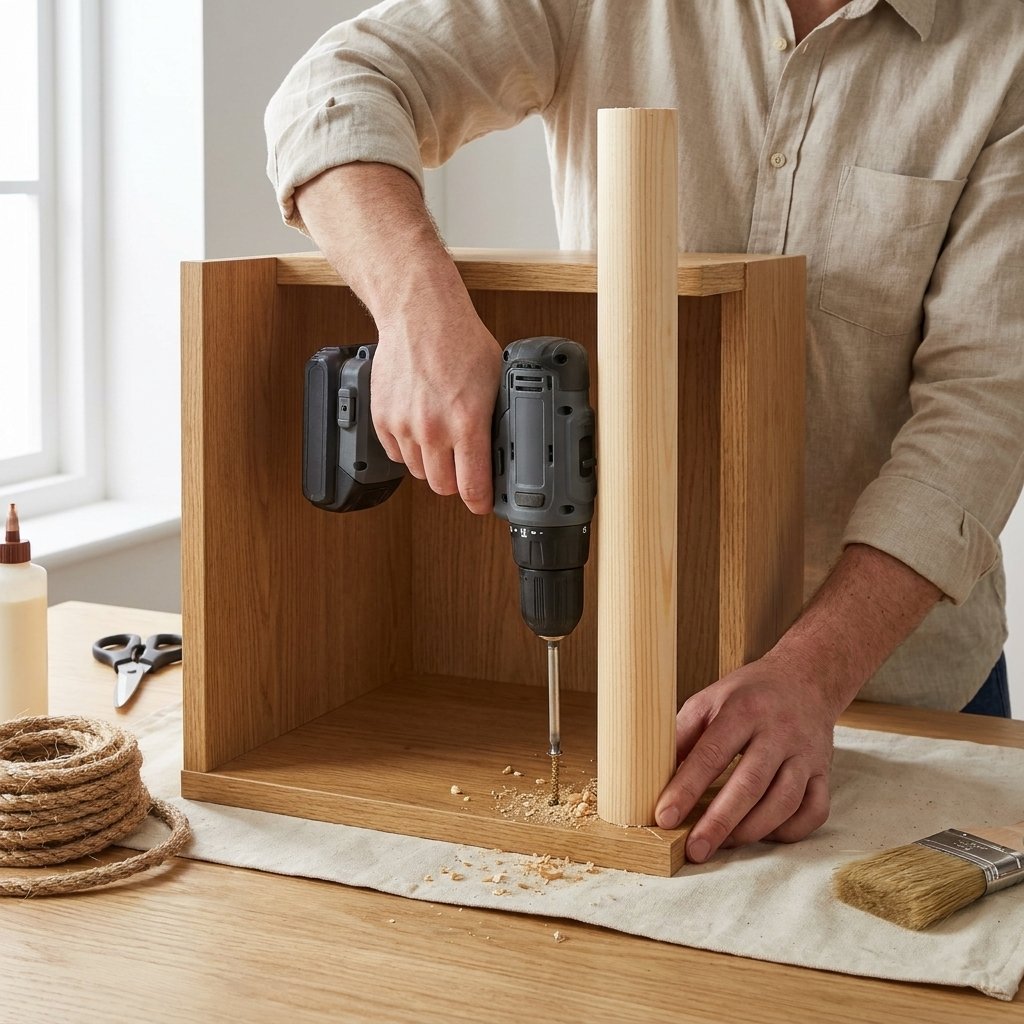

Step 3 – Wrap with Sisal Rope
Apply a small amount of non-toxic wood glue near the base.
Begin wrapping the sisal rope tightly around the post.
Keep every row snug against the previous one to eliminate gaps.
Add another small amount of glue every several inches for extra durability.
Continue until the entire scratching surface is covered.
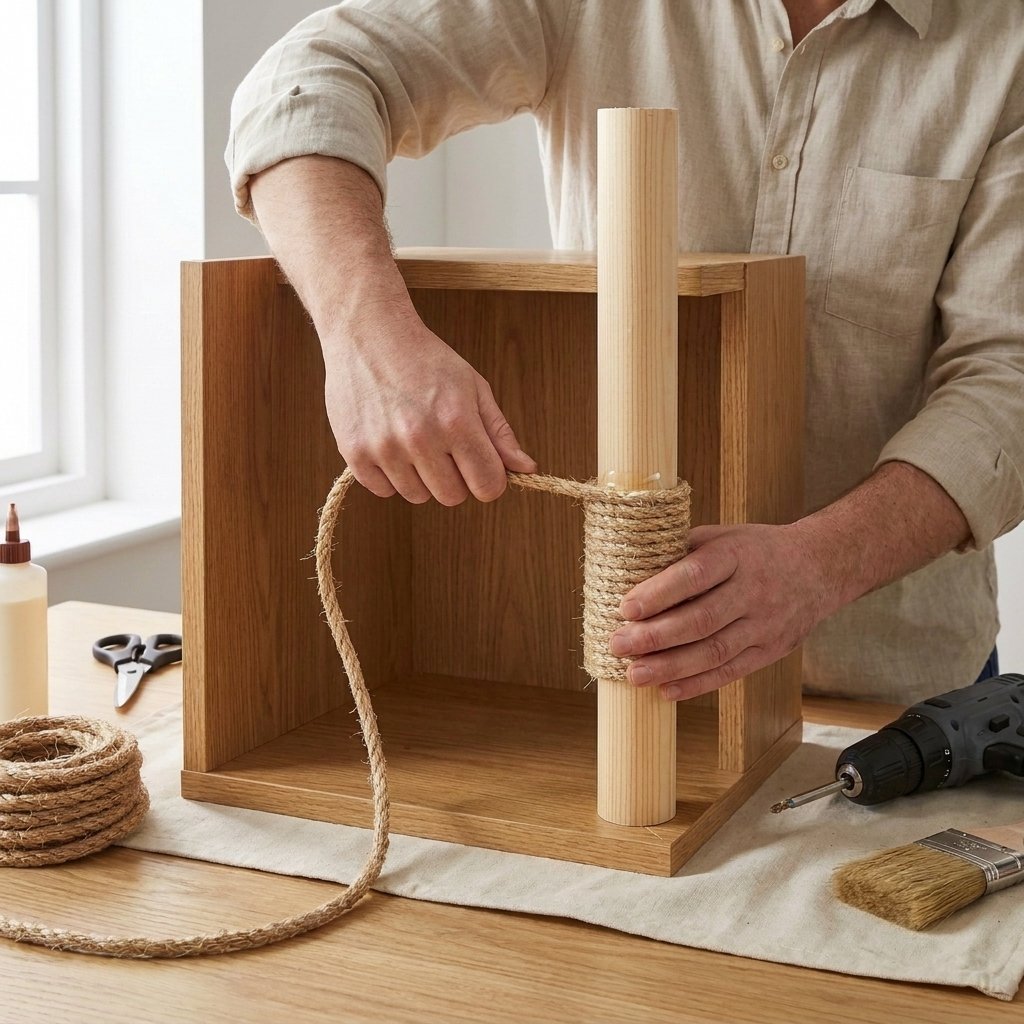
Step 4 – Organize the Storage
Fill the storage compartment with:
- Cat toys
- Grooming brushes
- Extra treats
- Replacement feather toys
- Small blankets
This keeps everyday supplies conveniently hidden while maximizing space.
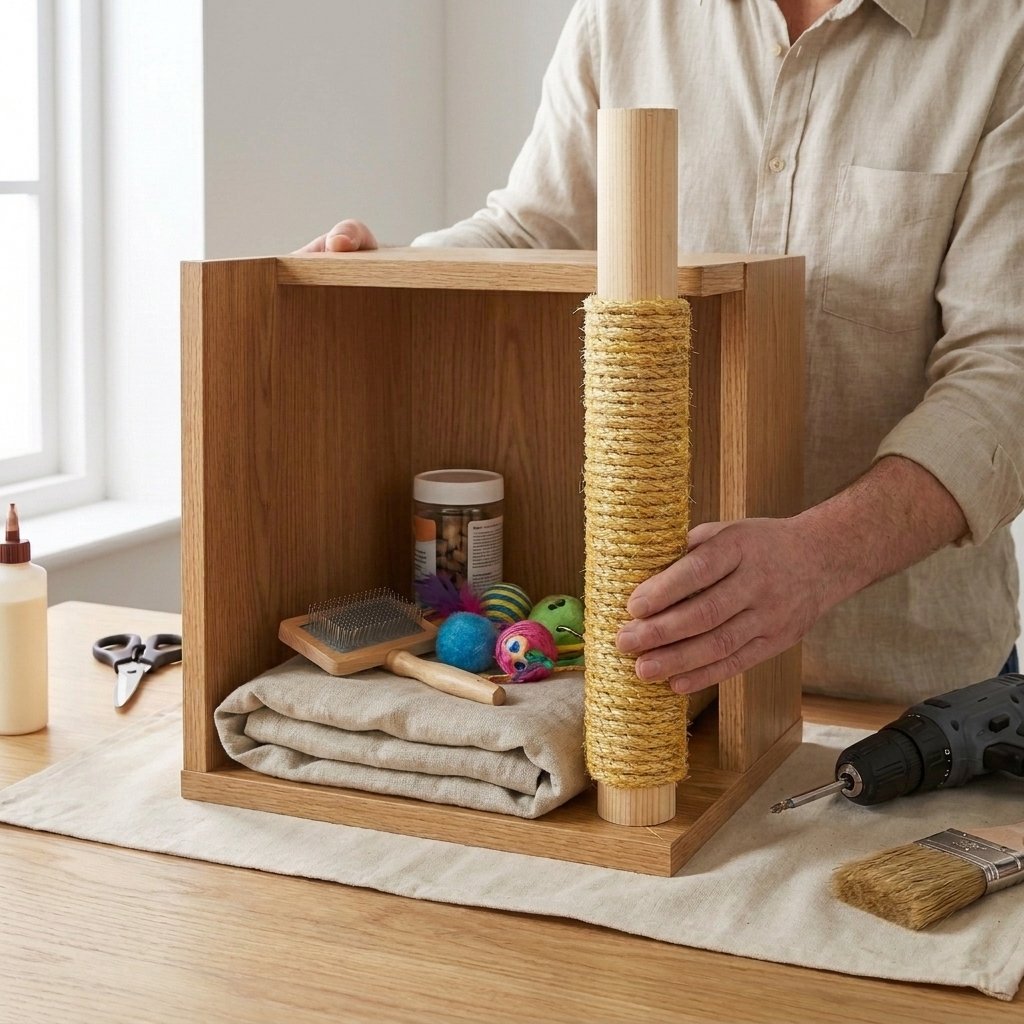
Step 5 – Style Your Cat Corner
Place the scratching post beside:
- A lounge chair
- Floating shelf
- Cat bed
- Indoor cat-safe plant
This creates a complete activity zone your cat will naturally gravitate toward.
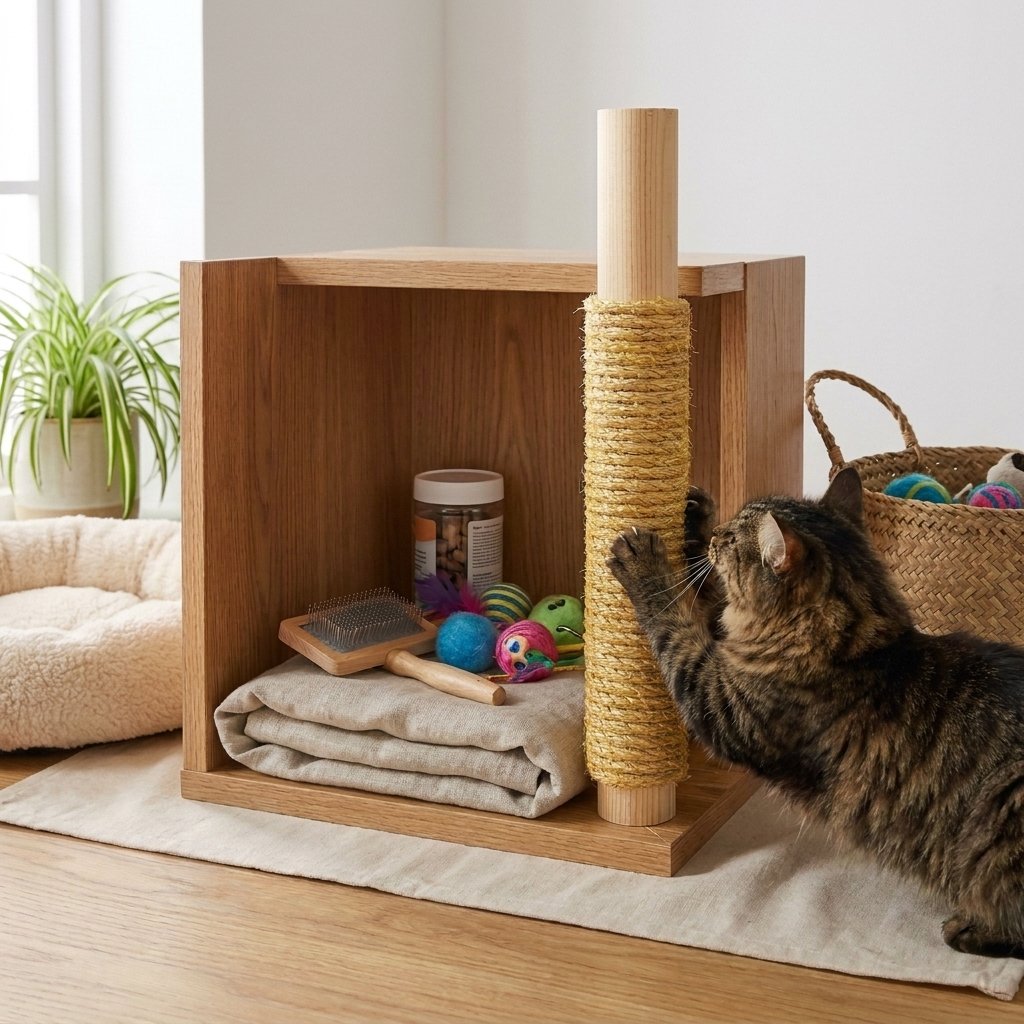
Designer Tip: Wrapping only the center section of the post with sisal while leaving stained wood visible at the top and bottom creates a more refined, furniture-like appearance.
Safety Note: Inspect the sisal rope periodically. Replace loose or frayed sections before long strands become a chewing hazard.
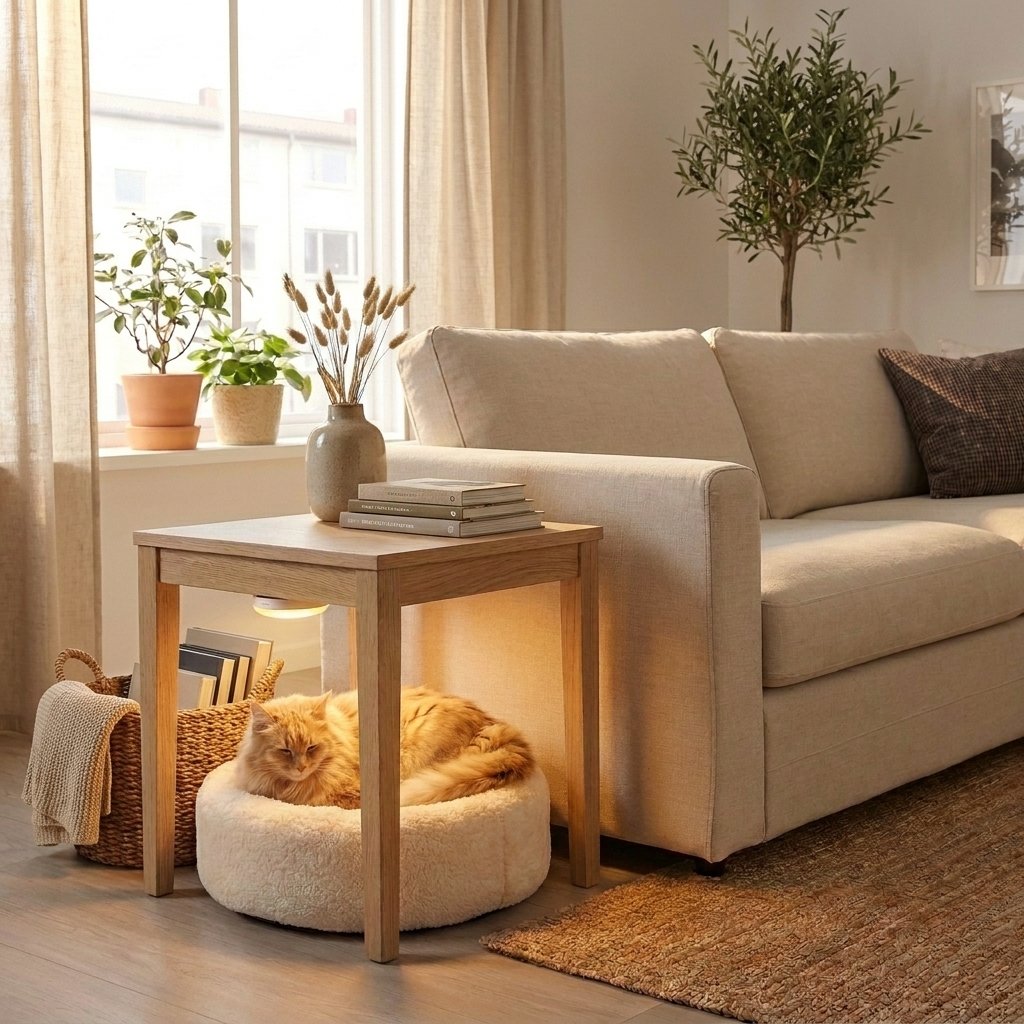
DIY Cat Corner Idea # 4 – Hidden Cat Reading Nook Under a Side Table
Unused space beneath a side table or console can easily become one of your cat’s favorite hideaways. This cozy nook offers privacy, warmth, and comfort while maintaining the clean look of your living room.
Why You’ll Love It?
Cats instinctively seek enclosed spaces where they feel safe. Rather than purchasing a bulky enclosed cat house, you can transform furniture you already own into a stylish retreat.
Difficulty: Beginner | Time: 1–2 Hours
Perfect For
- Shy cats
- Senior cats
- Studio apartments
- Small living rooms
Materials
- Small side table or console table
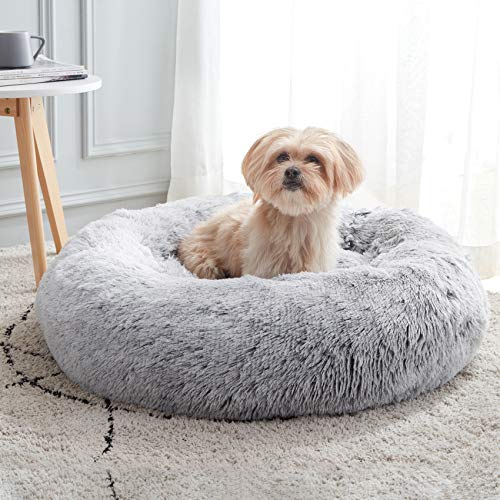
- Round cat bed
- Soft throw blanket
- Decorative basket
- Battery-operated warm LED light
- Peel-and-stick felt pads
- Cat toys
A plush washable cat bed, decorative woven baskets, rechargeable LED puck lights, and durable felt floor protectors are inexpensive upgrades that instantly make this project feel custom-made while keeping maintenance simple.


Step 1 – Select the Perfect Table
Choose a sturdy table with enough clearance for your cat to comfortably stand, turn around, and curl up.
Corners that receive indirect natural light work especially well.
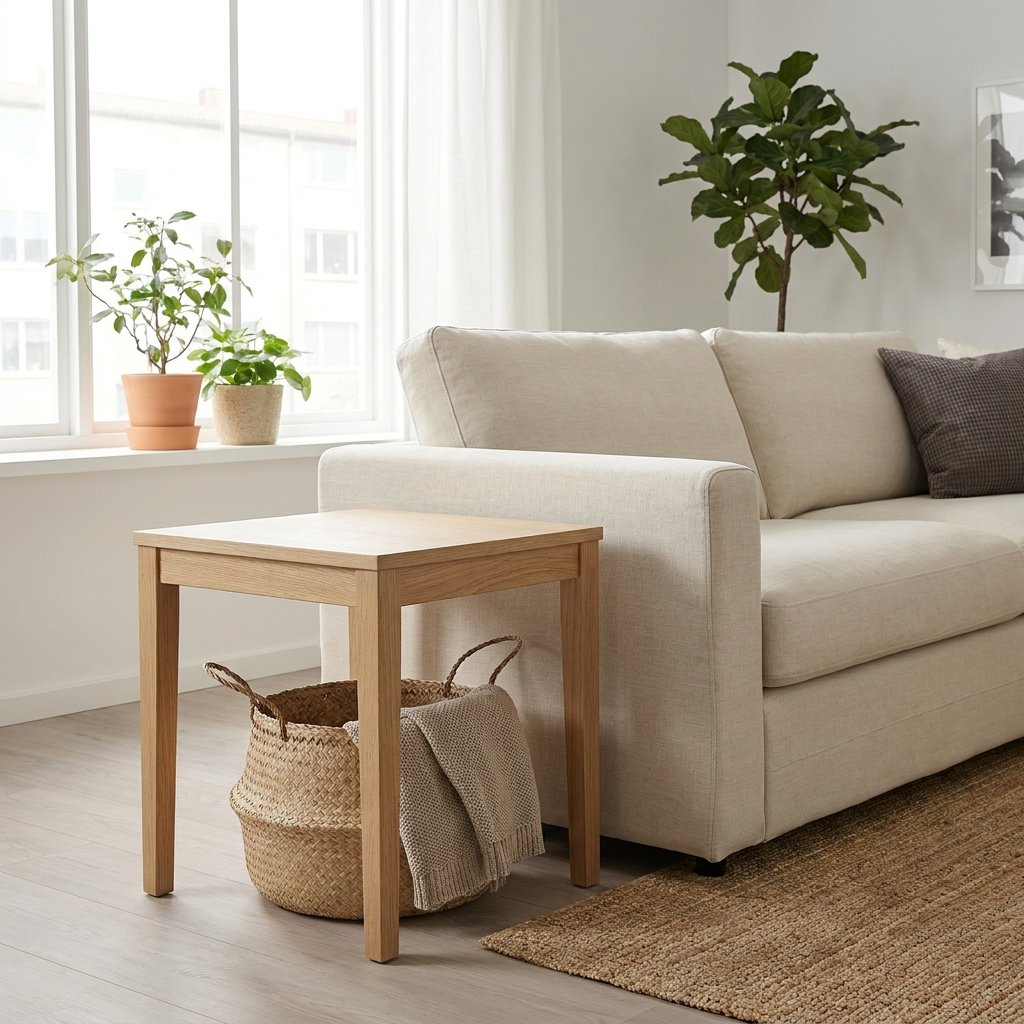
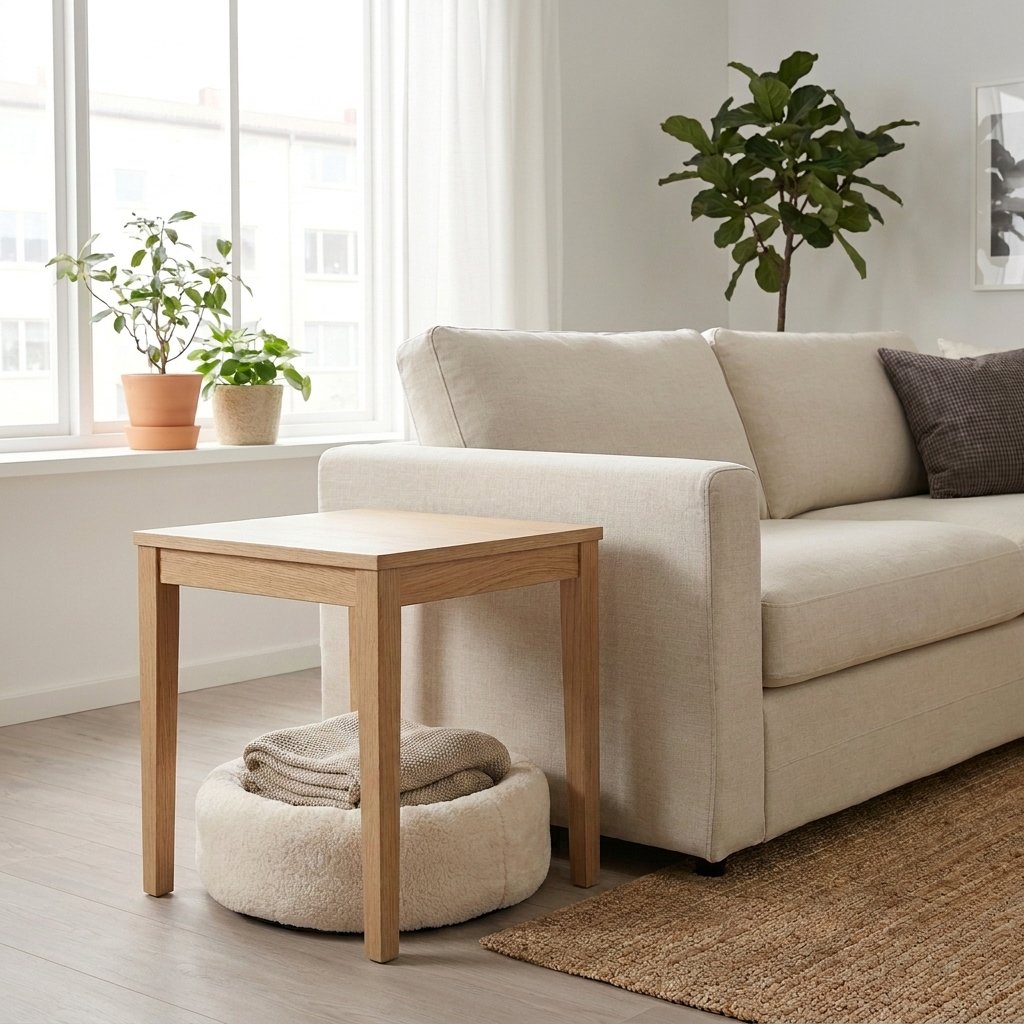
Step 2 – Add a Comfortable Bed
Place a soft cat bed beneath the table.
Layer a cozy blanket inside to create extra warmth and softness.
Leave enough open space for your cat to enter easily.
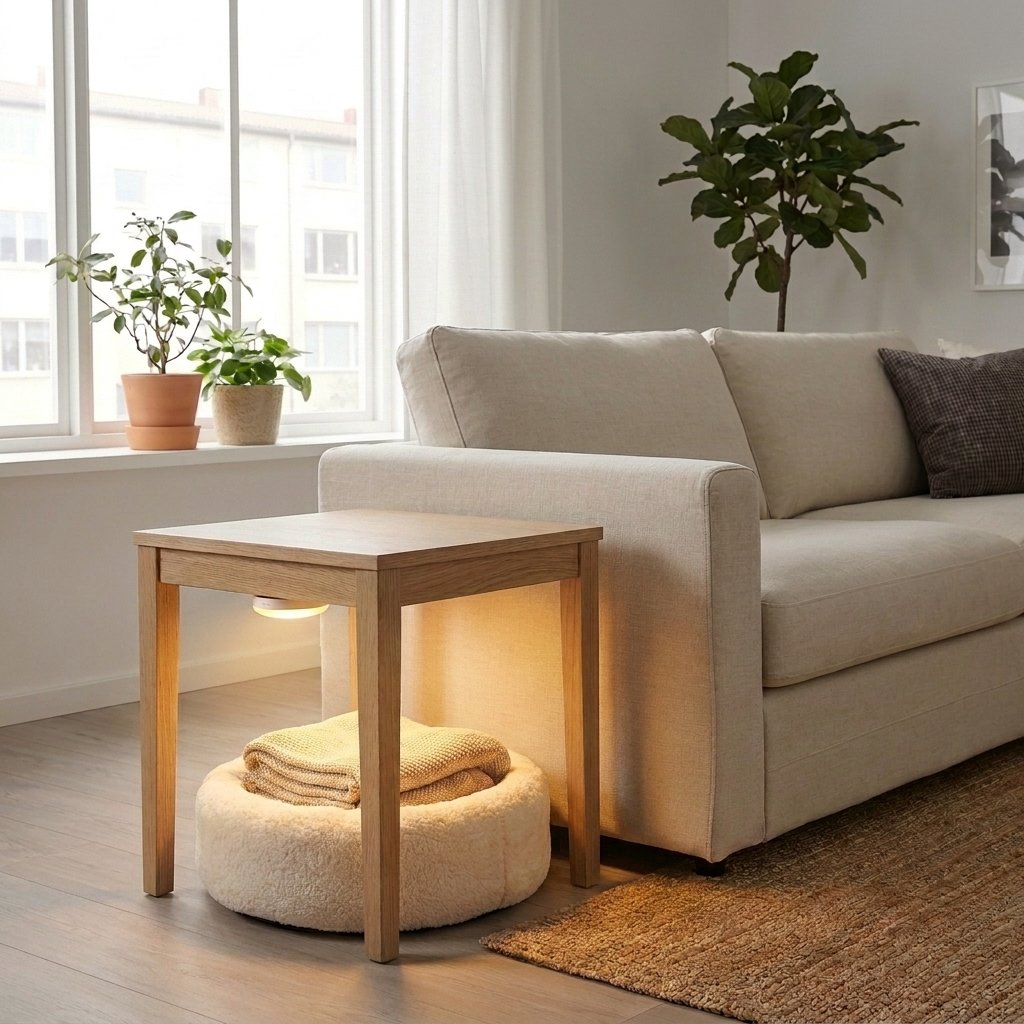
Step 3 – Create a Cozy Atmosphere
Add a rechargeable LED puck light to the underside of the tabletop.
The soft ambient glow creates a relaxing evening retreat without becoming too bright.
Step 4 – Decorate the Surrounding Space
Complete the corner with:
- Woven basket
- Small stack of books
- Ceramic vase
- Cat-safe greenery
The goal is to make the pet area feel integrated into your home’s overall design.


Step 5 – Encourage Exploration
Place one or two favorite toys inside the nook.
A few treats can also help curious cats associate the new space with positive experiences.
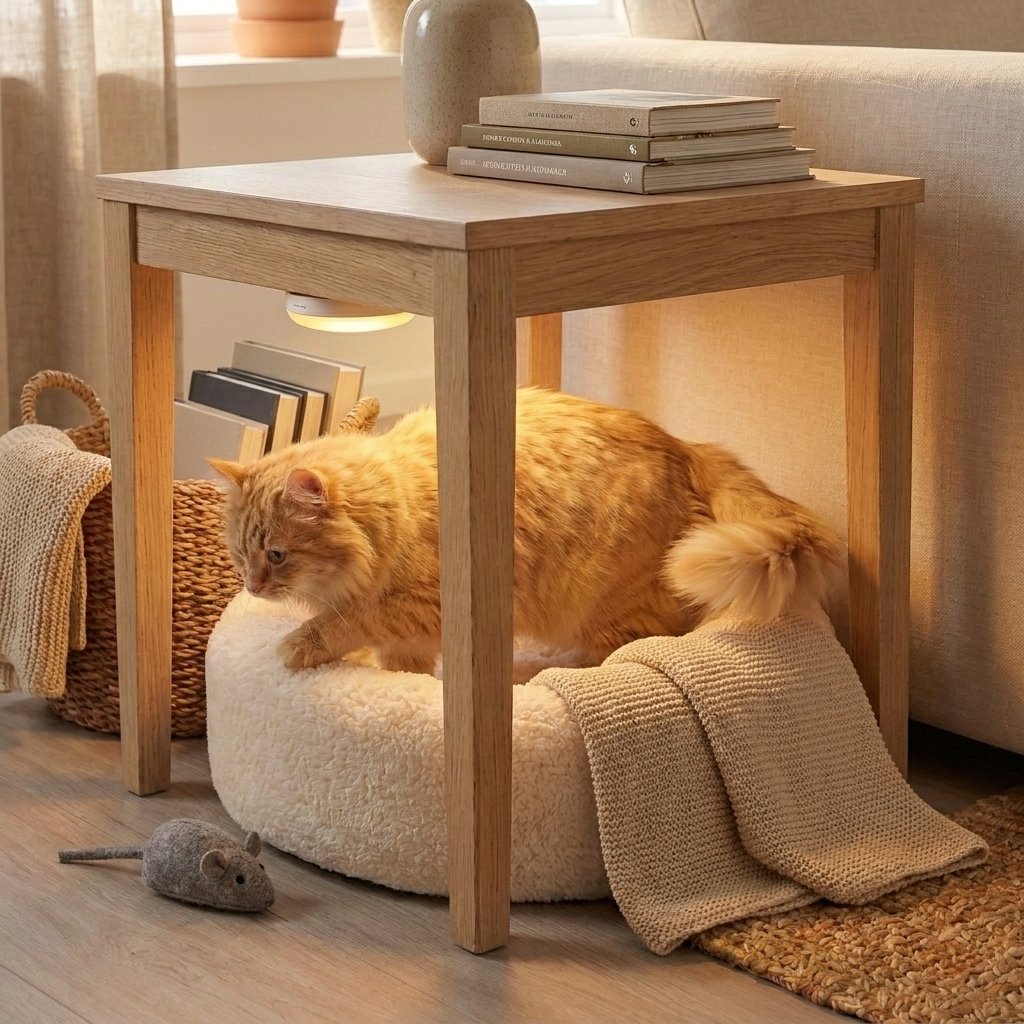
Designer Tip: Choose furniture with open legs instead of heavy cabinets. Open designs keep the corner feeling spacious while making the nook easier to clean.
Safety Note: Avoid placing candles, electrical cords, or fragile decorations on the table if your cat enjoys climbing.
DIY Cat Corner Idea # 5 Floating Cat Hammock Lounge
A wall-mounted hammock combines relaxation with vertical enrichment. It occupies very little floor space while creating an elevated resting place that many cats quickly claim as their favorite nap spot.
Why You’ll Love It?
This project adds softness to a climbing wall while encouraging your cat to rest above ground level—a natural instinct that helps many indoor cats feel secure.
Difficulty: Moderate | Time: 3–5 Hours
Perfect For:
- Modern apartments
- Multi-cat homes
- Vertical climbing walls
- Contemporary interiors
Materials
- Heavy-duty wall brackets
- Hardwood dowels or metal support rods
- Durable canvas or upholstery fabric
- Sewing machine (or heavy-duty fabric adhesive)
- Wall anchors
- Stud finder
- Measuring tape
- Power drill
- Decorative throw pillow (optional)
Look for heavy-duty wall brackets, washable upholstery fabric, premium wall anchors, hardwood dowels, and durable sewing supplies to ensure the hammock remains secure and comfortable through years of everyday use.
Step 1 – Choose the Installation Height
Install the hammock where your cat can easily reach it from:
- Floating shelves
- Cat tree
- Sofa arm
- Window perch
Keeping the hammock connected to other climbing features encourages regular use.
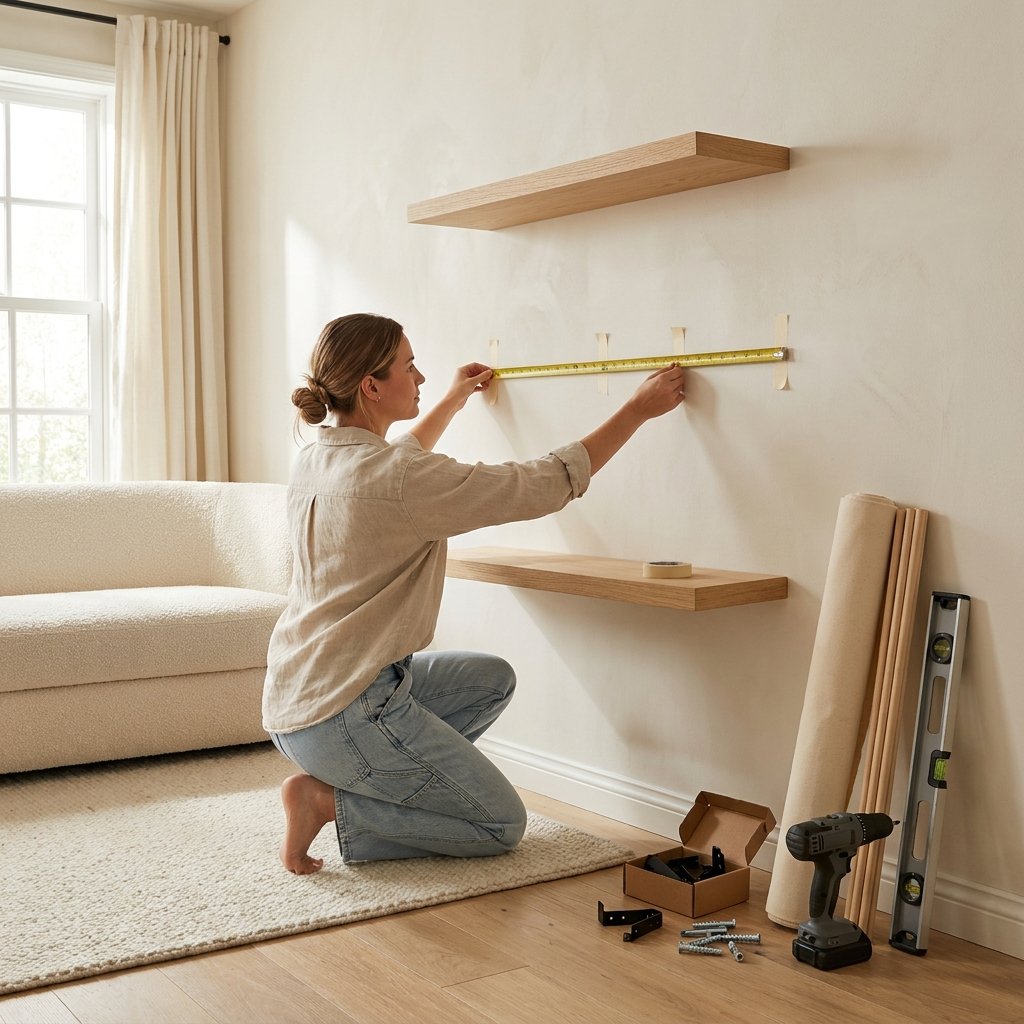
Step 2 – Prepare the Fabric
Cut a rectangle of durable canvas.
Hem the edges to prevent fraying.
Create pockets on both short ends for the support dowels.
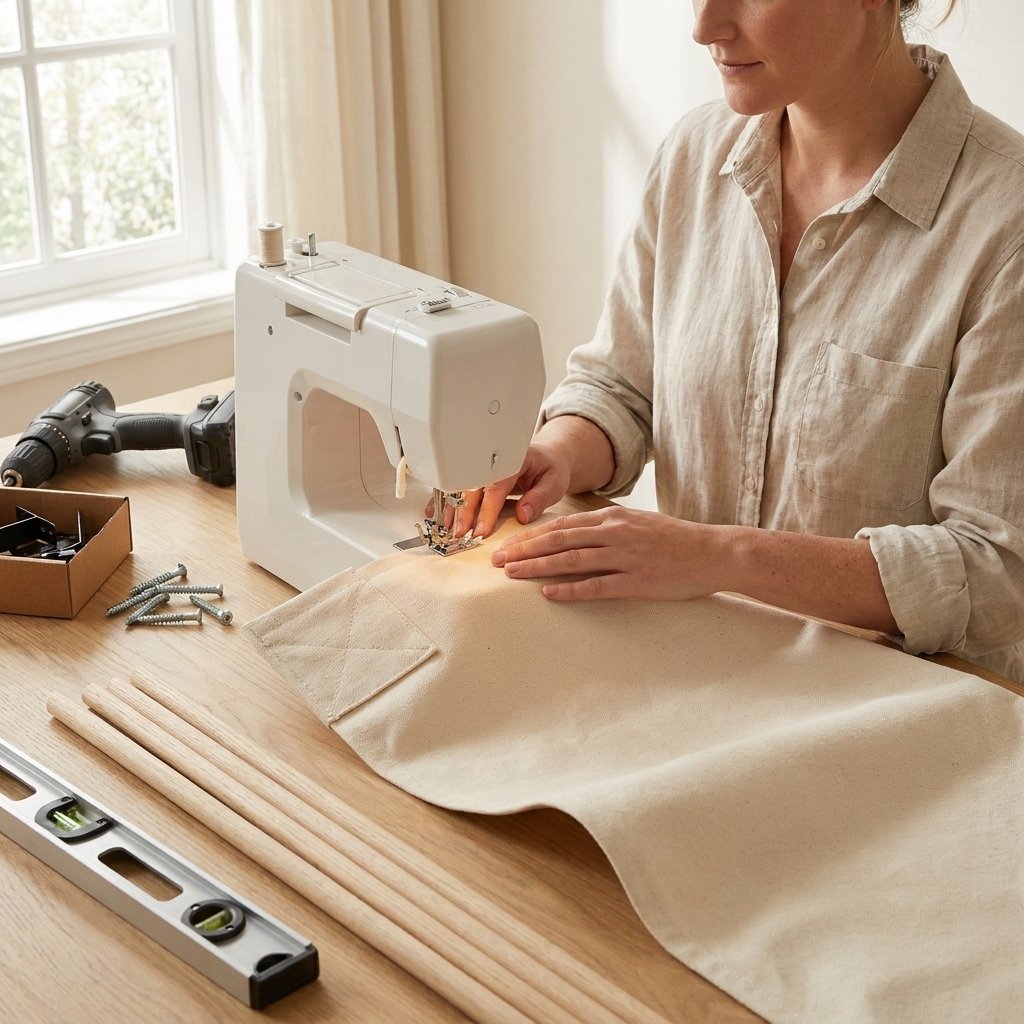
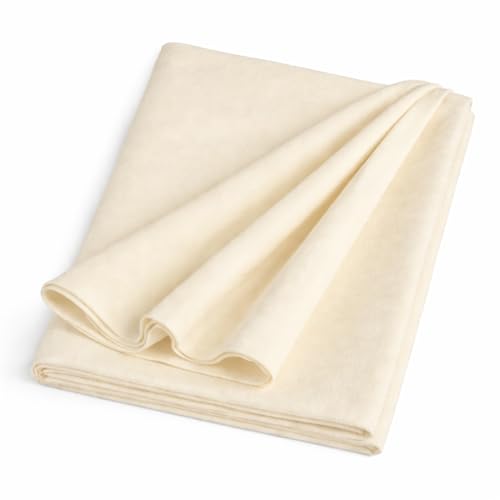

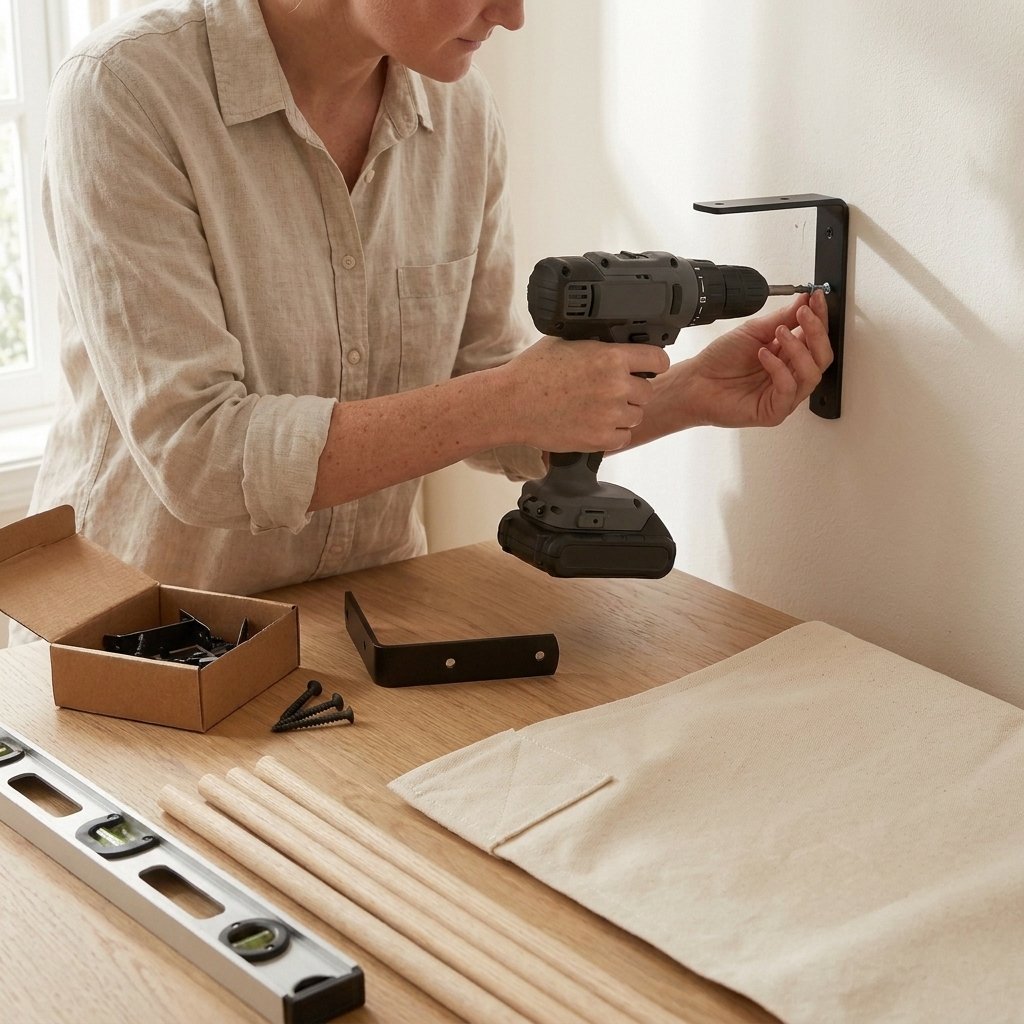
Step 3 – Install the Hardware
Locate wall studs whenever possible.
Secure the brackets firmly.
Insert the support rods through the fabric pockets before mounting.
Test everything carefully before allowing your cat to climb.

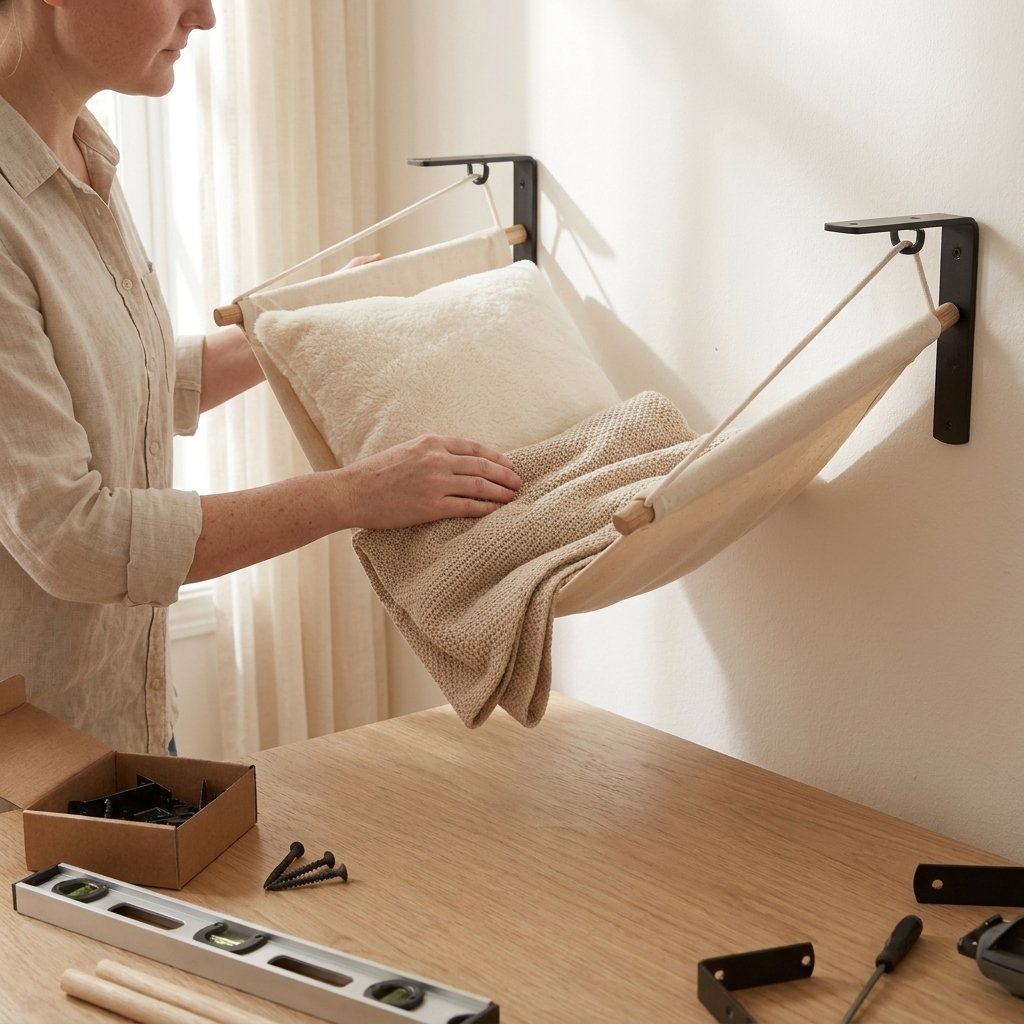
Step 4 – Add Comfort
Place a washable cushion or faux fur blanket inside the hammock.
Soft textures encourage longer naps while making the space visually inviting.

Step 5 – Complete the Cat Corner
Surround the hammock with:
- Floating cat shelves
- Small wall art
- Neutral décor
- Woven storage basket below
Together, these elements create a cohesive feature wall that serves both your cat and your interior design.
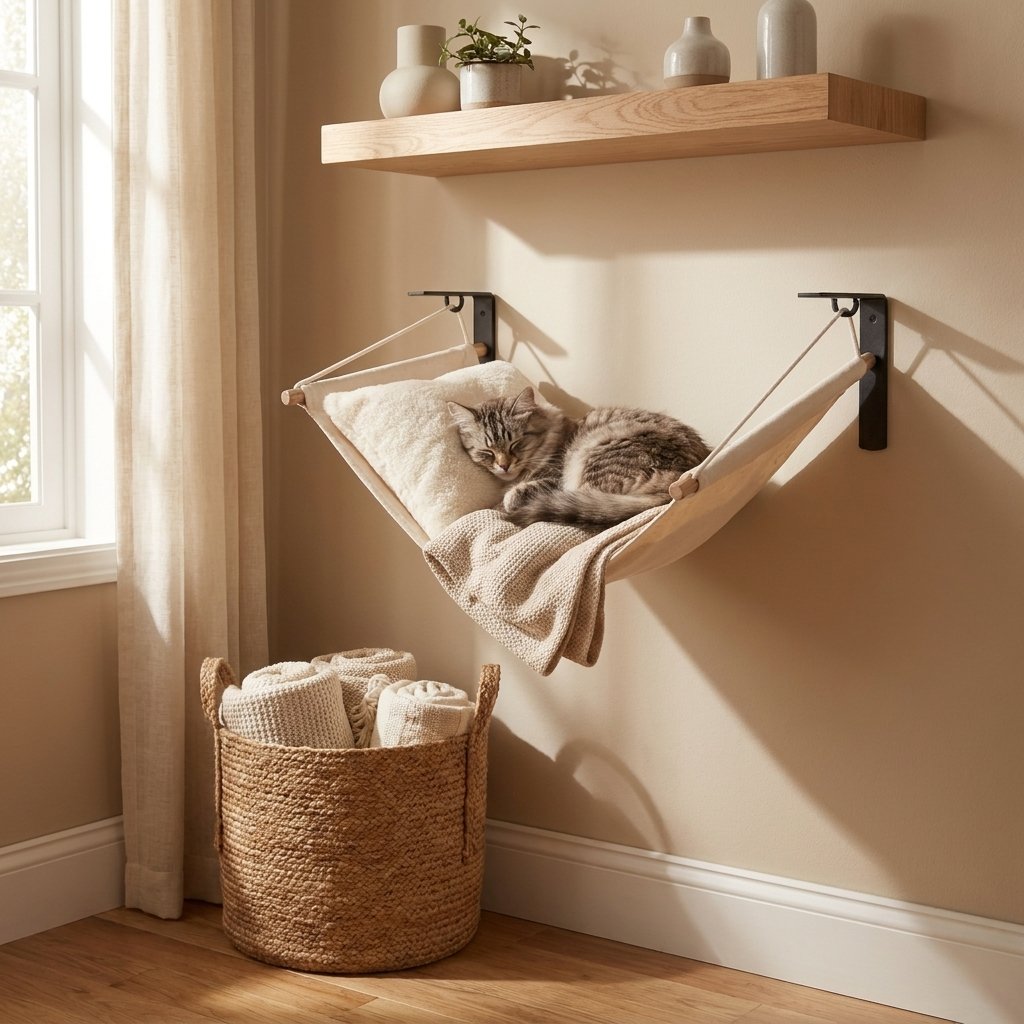
Designer Tip: Choose upholstery fabric that matches your sofa or accent chairs. Coordinating fabrics help the hammock feel like part of the room’s original design.
Safety Note: Always test the hammock with more weight than your cat before first use. Recheck all hardware every few months to ensure everything remains securely fastened.
DIY Cat Corner Idea # 6 Natural Wood Corner Cat Tree
Nothing brings warmth and character to a room quite like natural wood. This DIY corner cat tree uses sturdy tree branches and wooden platforms to create a beautiful climbing structure that feels like a piece of modern furniture rather than traditional pet equipment.
Its vertical design makes excellent use of unused corners, making it one of the best DIY Cat Corner Ideas for apartments where floor space is limited.
Why You’ll Love It?
A natural wood cat tree offers your cat plenty of opportunities to climb, perch, stretch, and observe the room from above. At the same time, the organic materials blend seamlessly with Scandinavian, Japandi, rustic, boho, or modern interiors.
Difficulty: Moderate | Time: 5–7 Hours
Perfect For:
- Small apartments
- Active indoor cats
- Multi-cat households
- Natural home décor lovers
Materials
- Thick hardwood tree branch (completely dry and untreated)
- Plywood or solid wood platforms
- Heavy-duty wood screws
- Power drill
- Orbital sander or sanding block
- Clear non-toxic wood finish
- Sisal rope
- Decorative faux moss (optional)
- Felt furniture pads
- Large wooden planter or heavy wooden base
Choosing kiln-dried hardwood branches, premium wood sealers, durable screws, quality sanders, and heavy-duty drill bits makes this project sturdier, safer, and much easier to complete. Natural sisal rope and felt pads are also worthwhile additions that improve both durability and comfort.


Step 1 – Select a Strong Branch
Choose a branch with several natural forks that create interesting climbing routes.
Avoid branches showing signs of mold, rot, insect damage, or loose bark.
Allow freshly collected branches to dry completely before use.

Step 2 – Sand Every Surface
Carefully remove rough bark and splinters.
Round sharp edges to make climbing safer.
Finish with fine-grit sandpaper until every surface feels smooth.

Step 3 – Seal the Wood
Apply a clear, pet-safe wood finish.
This protects the wood while preserving its beautiful natural grain.
Allow adequate drying time before assembly.

Step 4 – Attach the Platforms
Secure several wooden platforms at different heights.
Alternate the direction of each platform to create an engaging climbing route.
Leave enough space between levels for comfortable jumping.

Step 5 – Secure the Base
Attach the branch firmly to a heavy wooden base.
Test the structure from multiple directions to ensure it doesn’t wobble.
Stability is essential before introducing your cat.


Step 6 – Wrap Selected Areas with Sisal
Wrap sisal rope around lower climbing sections.
This creates scratching zones while adding visual texture.
Leave some natural wood exposed to highlight its organic beauty.


Step 7 – Style the Finished Corner
Complete the corner with:
- Woven storage basket
- Neutral pet bed
- Large indoor cat-safe plant
- Soft area rug
- Minimal wall art
The finished cat tree becomes a stunning focal point that enhances the room rather than competing with it.

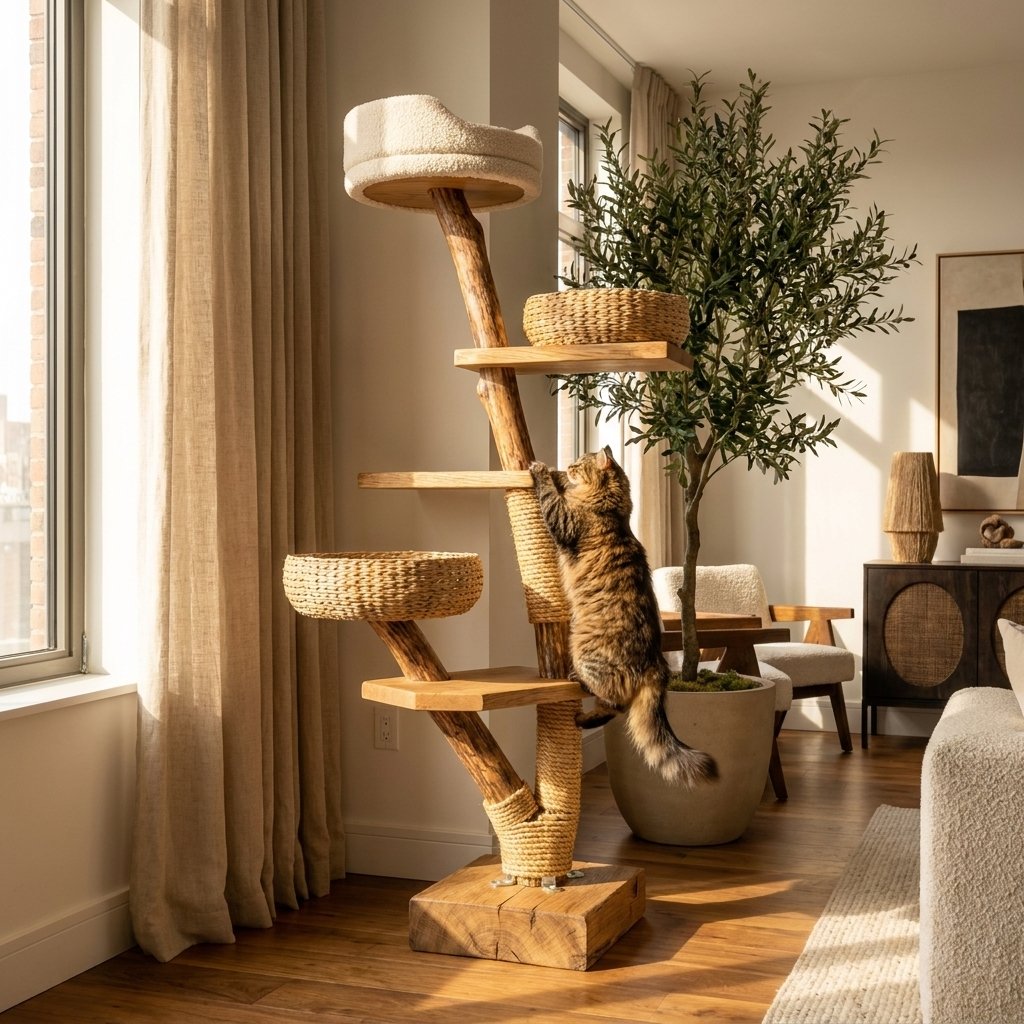
Designer Tip: Keep the wood finish natural instead of painting it. Visible wood grain creates a timeless, furniture-quality appearance that blends beautifully into modern interiors.
Safety Note: Ensure the base is heavy enough to prevent tipping. Check every platform periodically for loose screws or signs of movement.
DIY Cat Corner Idea # 7 Space-Saving Corner Feeding Station
A dedicated feeding area keeps bowls organized, protects flooring from spills, and gives your cat a predictable place for meals. This DIY feeding station also includes discreet storage for food and accessories, making it ideal for compact apartments.
Why You’ll Love It?
This project turns an overlooked corner into a clean, organized feeding zone while helping reduce clutter throughout the rest of your home.
Difficulty: Beginner | Time: 2–3 Hours
Perfect For:
- Studio apartments
- Small kitchens
- Entryway corners
- Organized pet owners
Materials
- Wooden serving tray or butcher block
- Raised pet bowl stand
- Airtight food storage container
- Decorative woven basket
- Silicone feeding mat
- Small floating shelf
- Command hooks
- Labels (optional)
A quality elevated bowl stand, non-slip silicone feeding mat, airtight food storage container, and durable woven baskets make everyday feeding more organized while helping keep food fresh and floors protected.


Step 1 – Pick a Quiet Corner
Choose an area away from heavy foot traffic.
Cats generally prefer eating in peaceful locations where they won’t be startled.
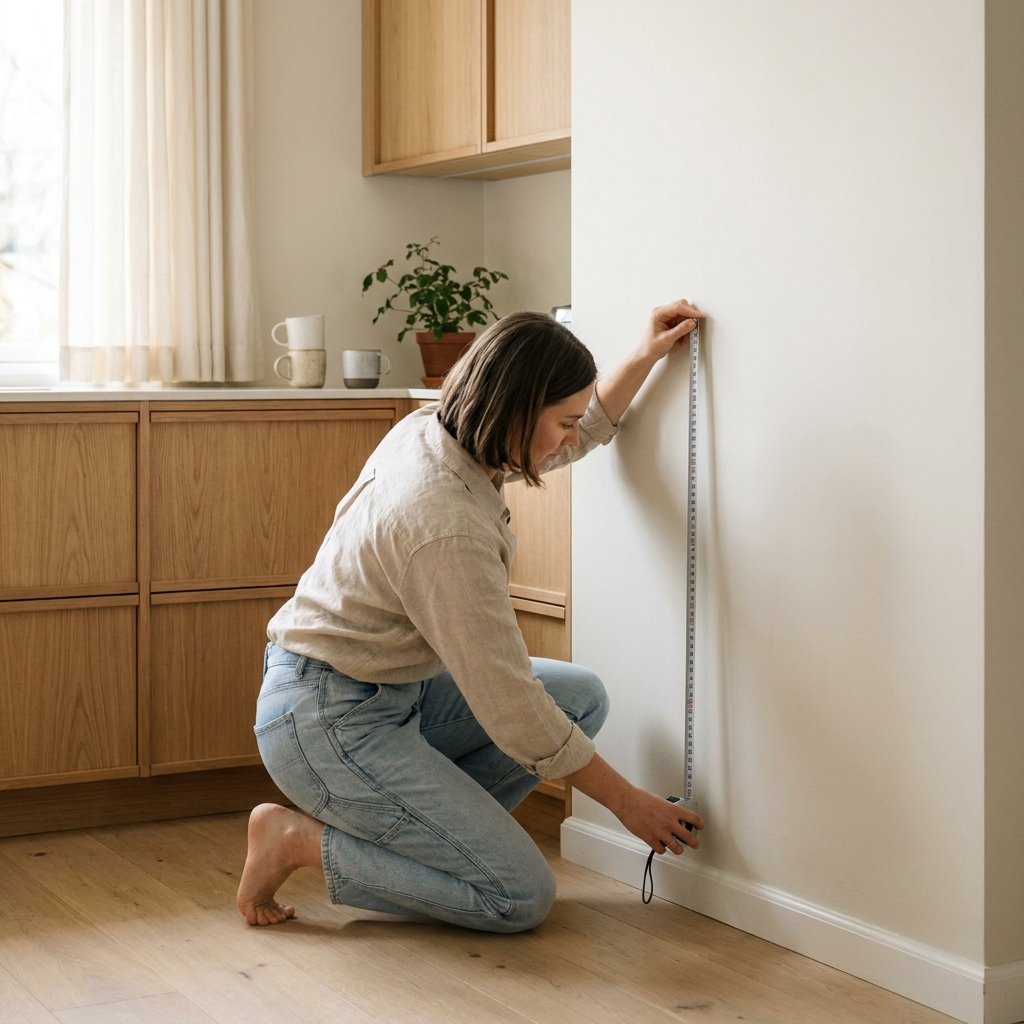
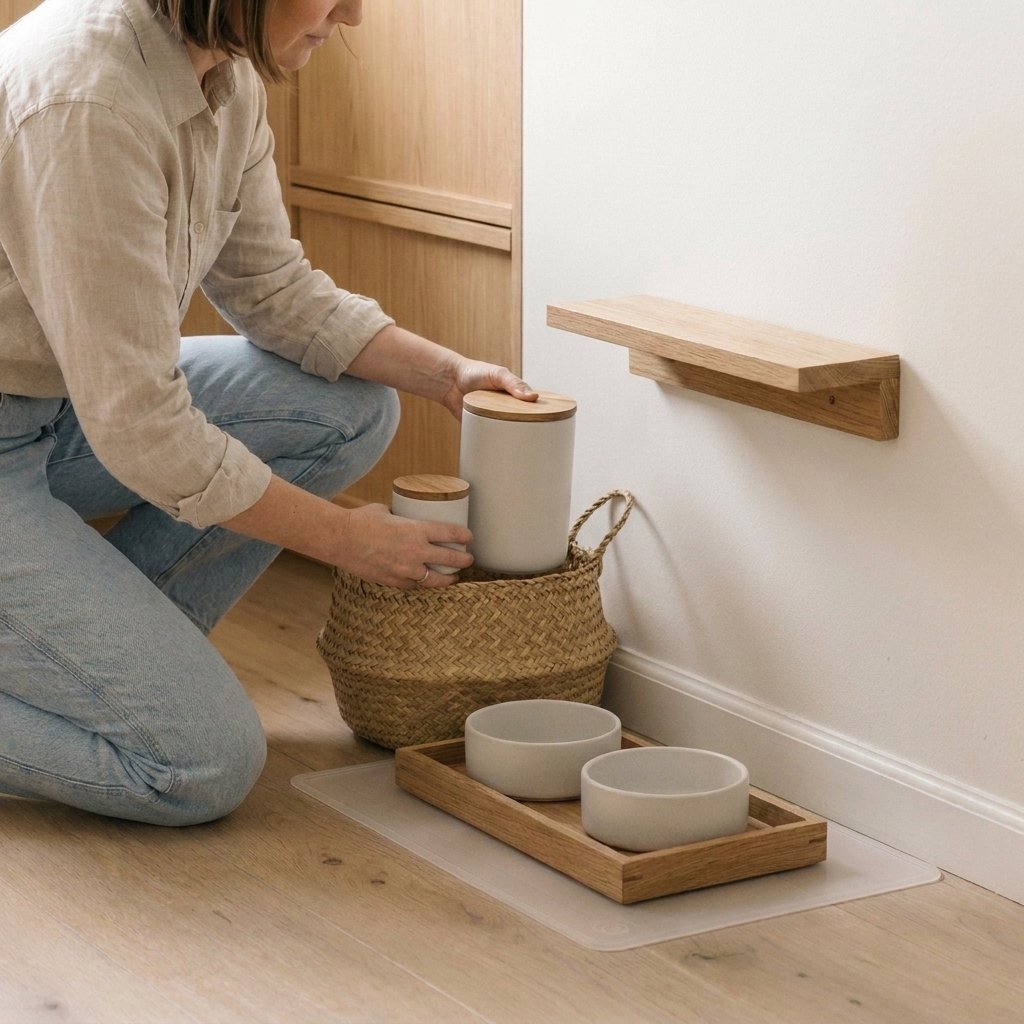
Step 2 – Build the Feeding Platform
Place a wooden tray on top of a silicone feeding mat.
Position elevated bowls securely on the tray.
This setup keeps everything neatly contained and simplifies cleaning.
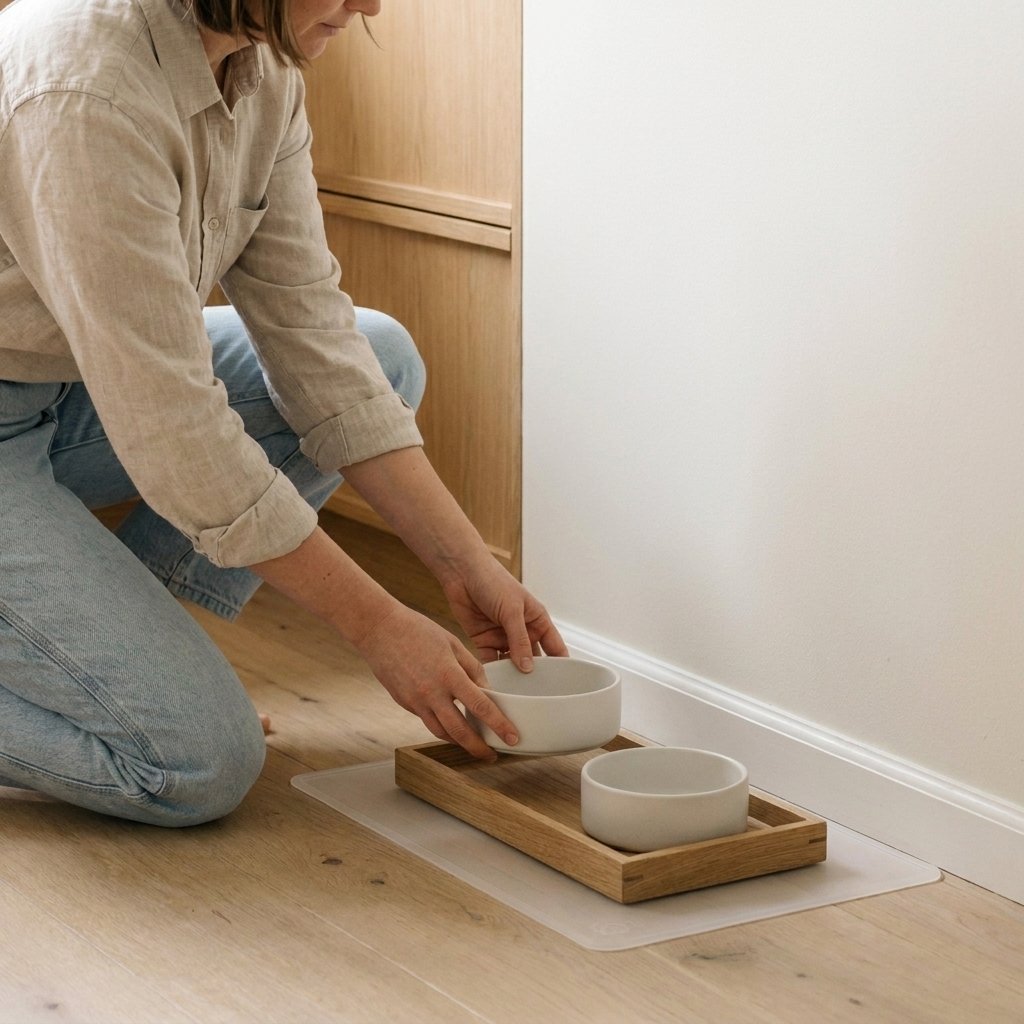
Step 3 – Add Storage Above
Install a small floating shelf above the feeding area.
Use it to store:
- Treat jars
- Decorative containers
- Small framed artwork
- Plant (cat-safe only)


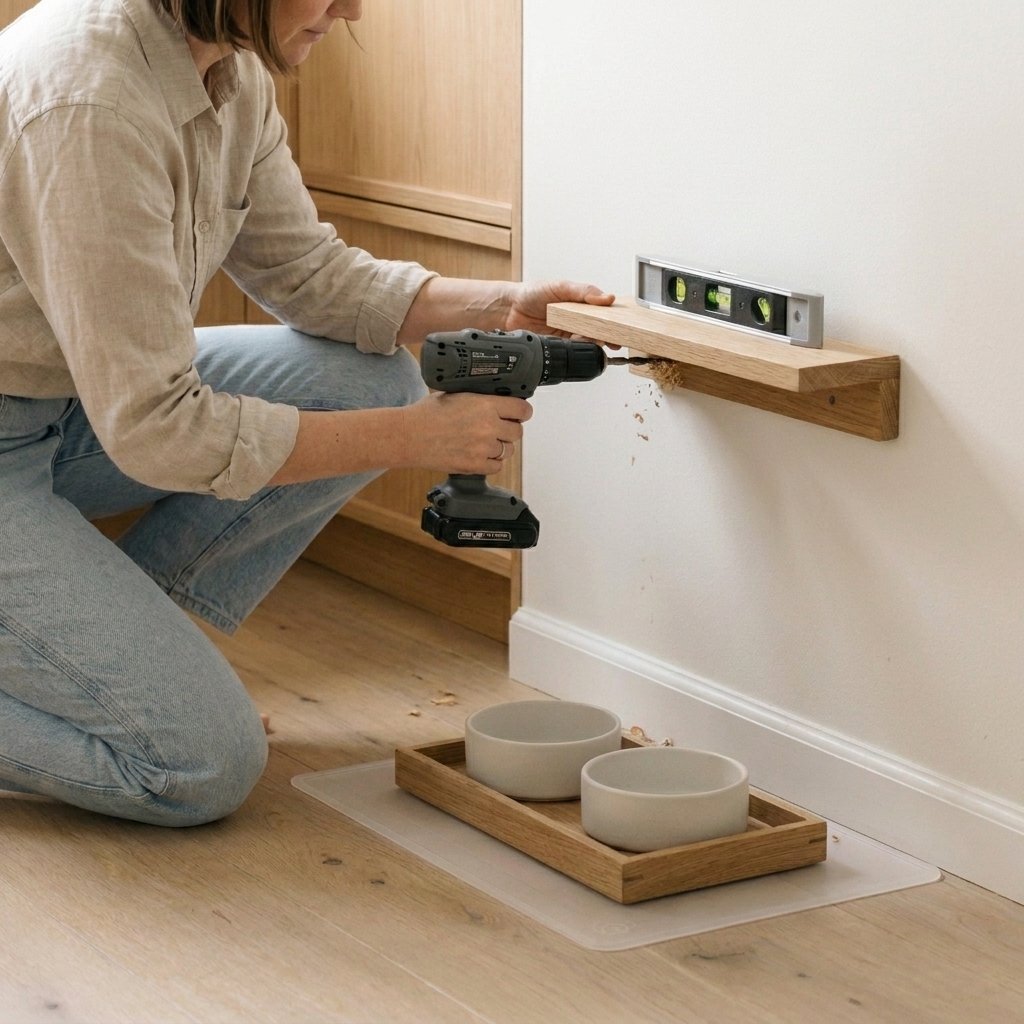
Step 4 – Organize Supplies
Place food containers inside a woven basket or decorative bin nearby.
Use small containers for treats and supplements.
Keeping everything together makes daily routines much easier.
Step 5 – Add Decorative Touches
Complete the space with:
- Small framed print
- Neutral runner rug
- Ceramic vase
- Wooden accents
These finishing touches help the feeding station blend naturally with the rest of your home.
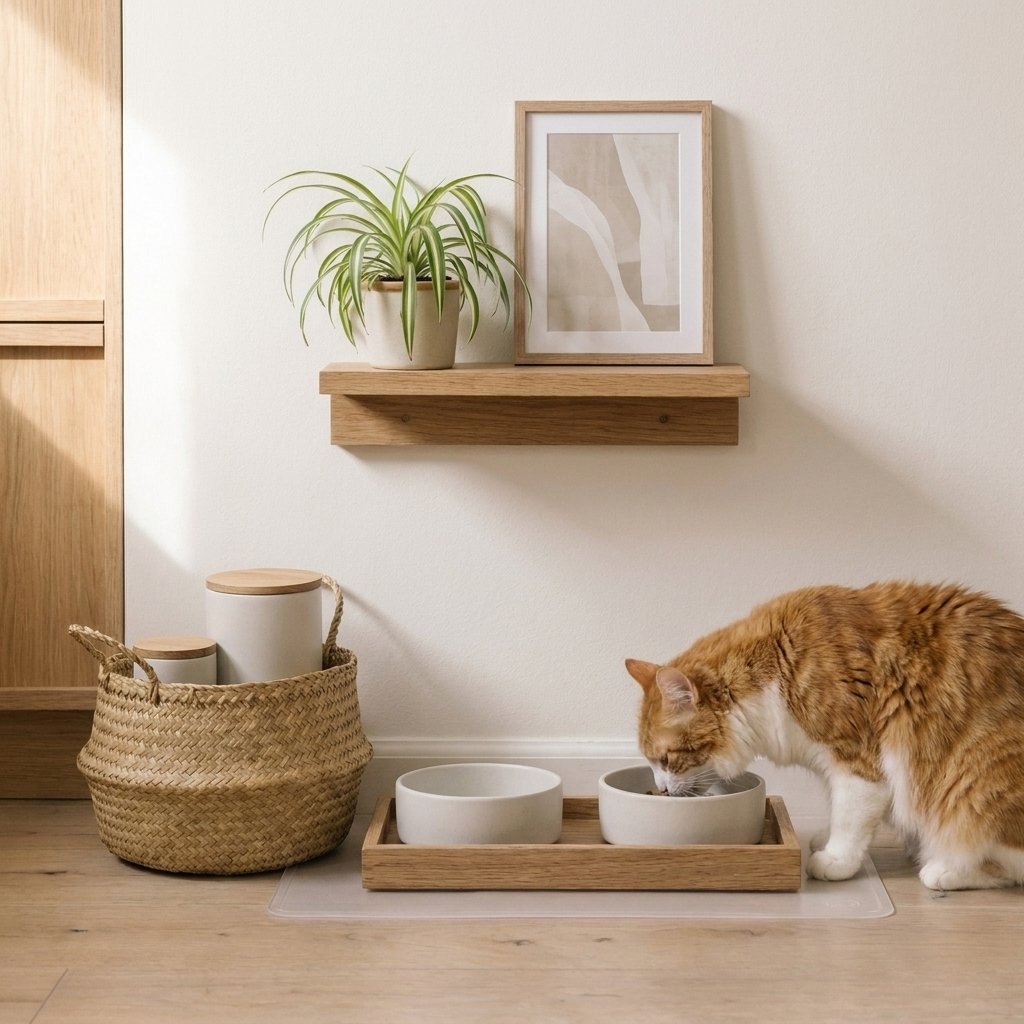
Designer Tip: Choose ceramic bowls in neutral colors that coordinate with your kitchen décor for a seamless designer look.
Safety Note: Wash food and water bowls daily. Replace scratched plastic bowls with ceramic or stainless steel options to help maintain good hygiene.
DIY Cat Corner Idea # 8 Floating Cat Bridge Adventure Wall
For energetic indoor cats, few projects are as rewarding as a floating bridge connecting multiple wall-mounted platforms. This design encourages climbing, balancing, and exploration while keeping valuable floor space completely open.
Why You’ll Love It?
This elevated walkway transforms an ordinary wall into an engaging activity course while creating a dramatic design feature that guests will admire.
Difficulty: Advanced | Time: One Weekend
Perfect For:
- Highly active cats
- Multi-cat homes
- Loft apartments
- Modern interiors
Materials
- Floating cat shelves
- Wooden bridge planks
- Thick sisal rope or sturdy fabric straps
- Heavy-duty eye bolts
- Wall anchors
- Power drill
- Level
- Measuring tape
- Sandpaper
- Wood finish
Investing in premium floating shelves, heavy-duty wall anchors, quality hardwood planks, durable rope, and dependable power tools helps ensure the bridge remains stable and attractive for years of daily climbing.
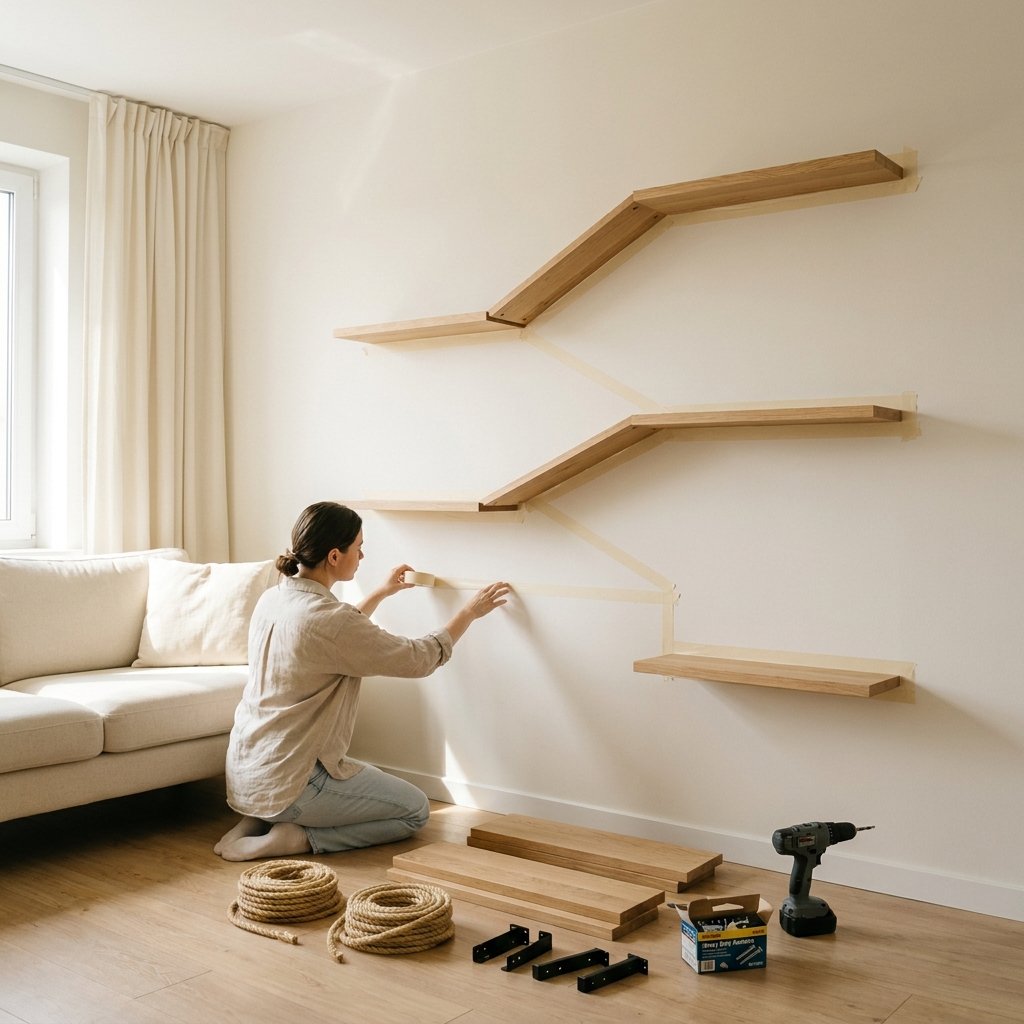
Step 1 – Plan the Adventure Route
Sketch the complete climbing path before installing anything.
Connect existing shelves, hammocks, or window perches whenever possible.
Leave adequate spacing between every feature.
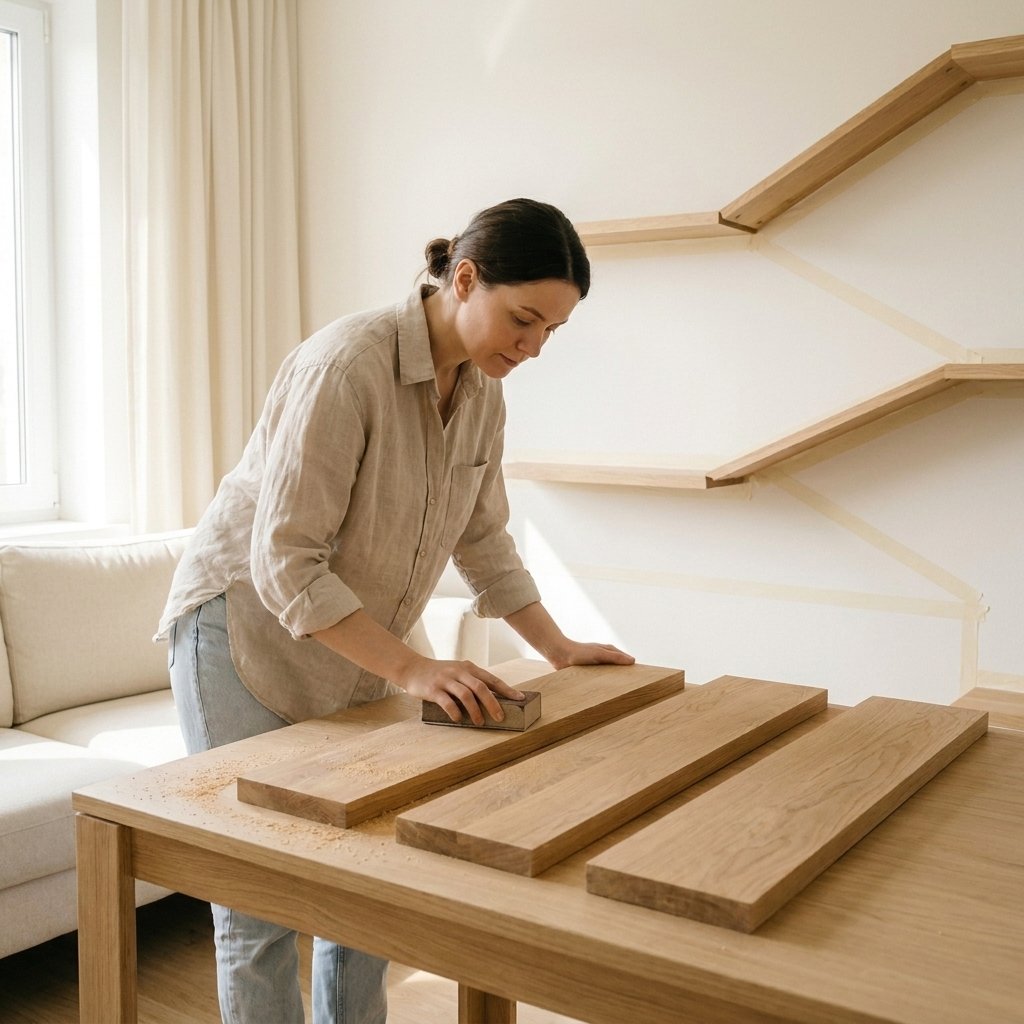
Step 2 – Prepare Every Wooden Piece
Sand all bridge planks until smooth.
Apply wood finish if desired.
Allow everything to dry completely before installation.
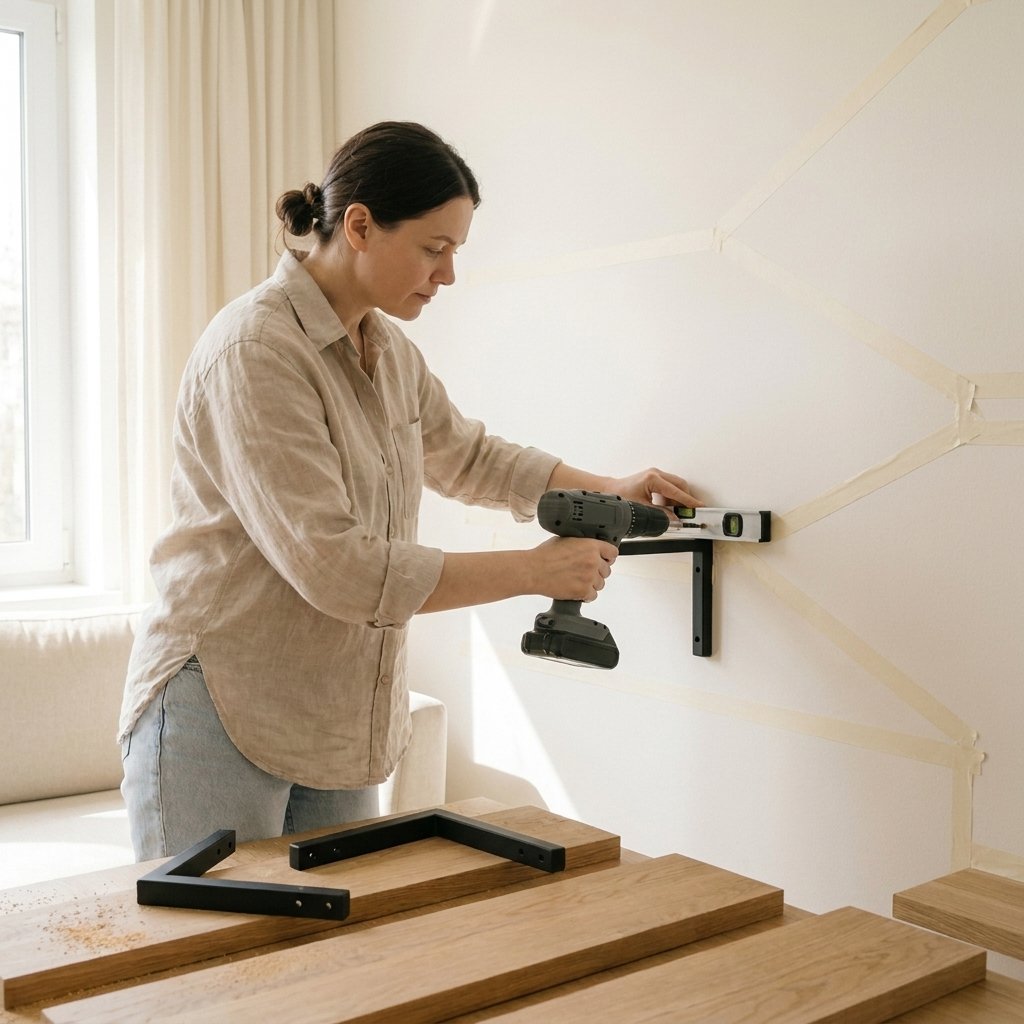
Step 3 – Install the Wall Supports
Locate wall studs whenever possible.
Install heavy-duty brackets and eye bolts according to your bridge design.
Double-check that everything is level before tightening.
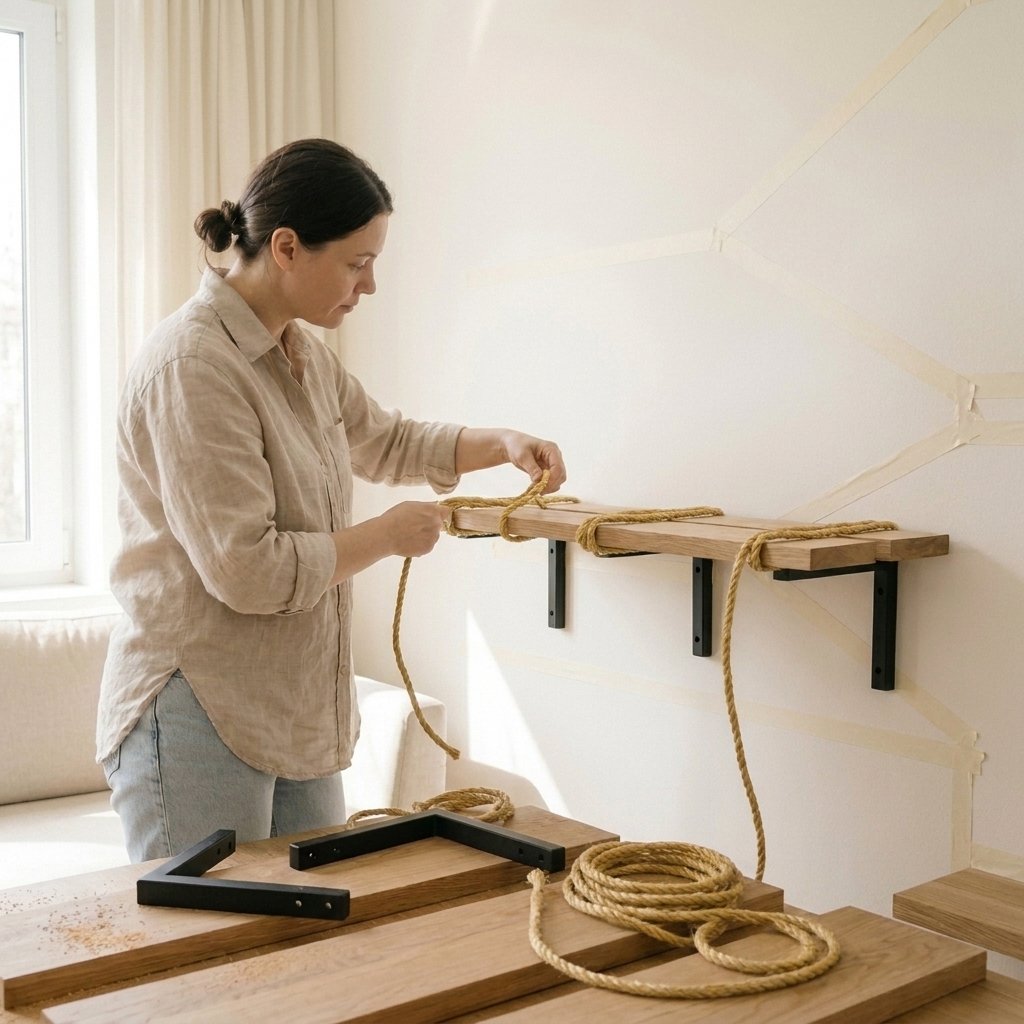
Step 4 – Assemble the Bridge
Attach each wooden plank using thick rope or durable straps.
Leave small, even gaps that allow gentle movement while remaining comfortable for your cat to cross.
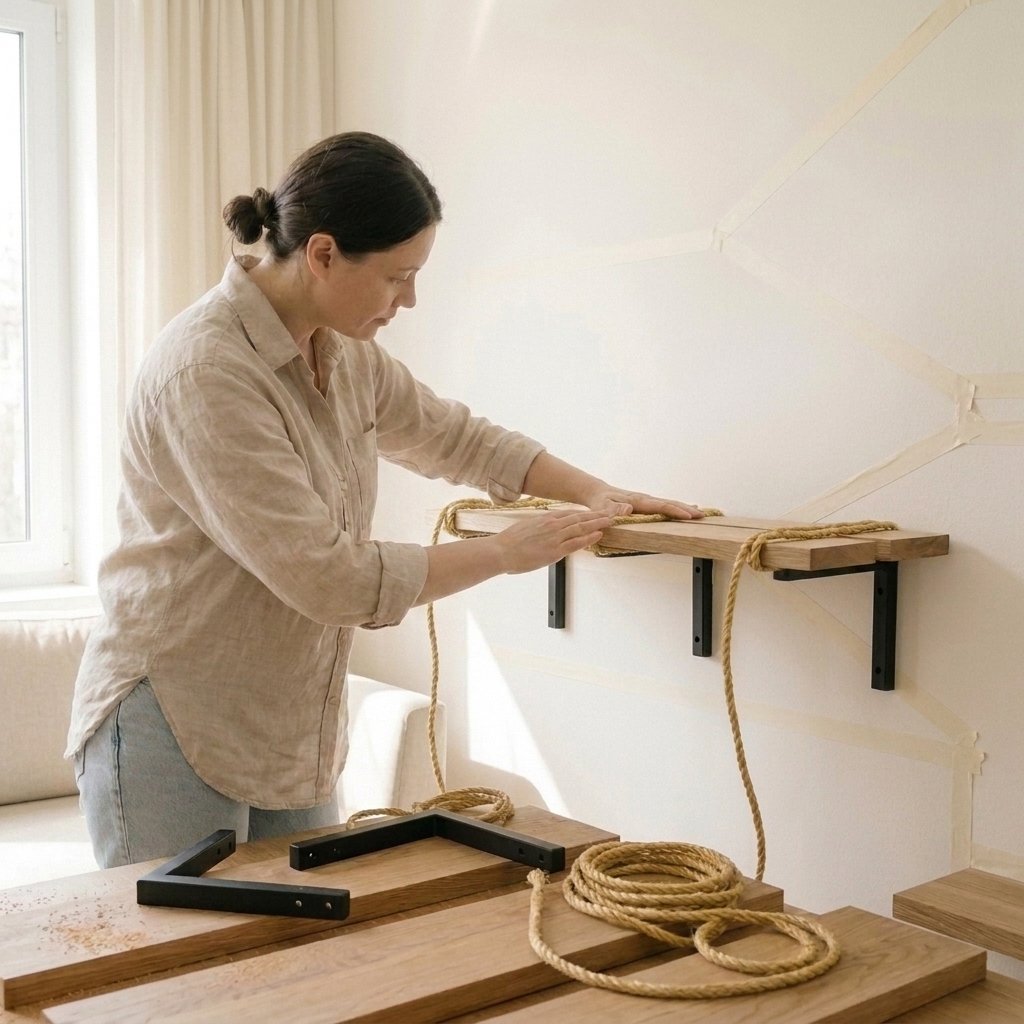
Step 5 – Test Stability
Before introducing your cat:
- Check every fastener.
- Apply pressure across the bridge.
- Ensure there is no excessive movement.
Only after thorough testing should your cat begin exploring.
Step 6 – Complete the Adventure Wall
Add nearby features such as:
- Wall-mounted scratching pad
- Small lounging shelf
- Hanging toy
- Cozy resting platform
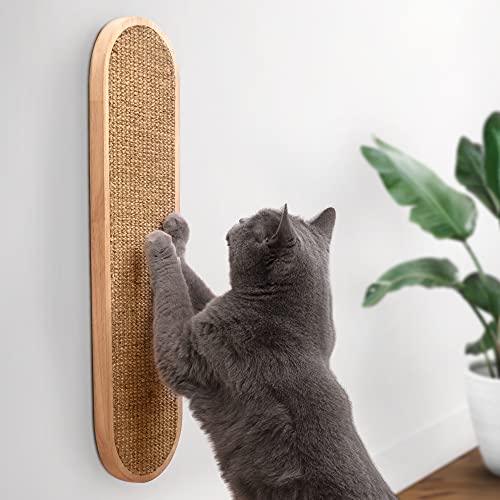


These additions encourage your cat to move naturally between activities throughout the day.
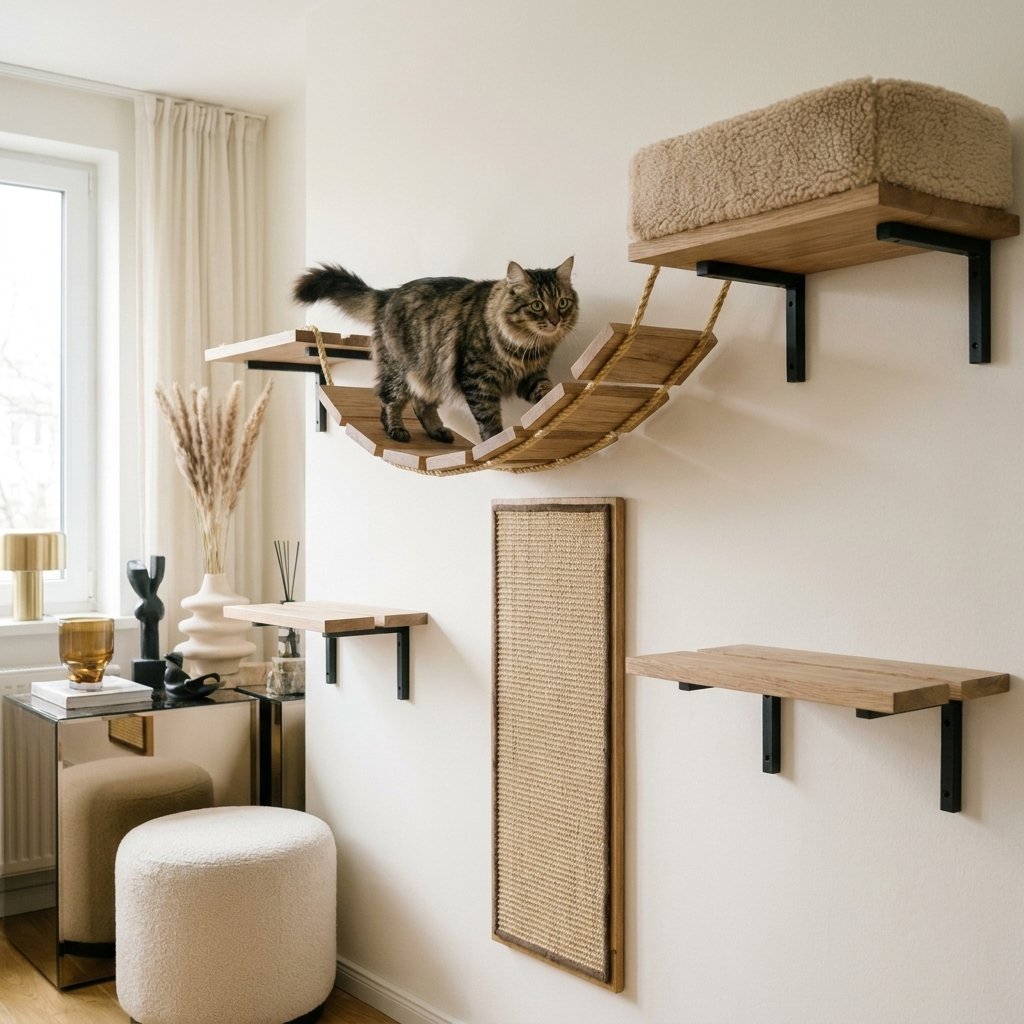
Designer Tip: Using the same wood species and finish throughout the wall creates a cohesive built-in appearance that feels custom designed for the apartment.
Safety Note: Inspect every mounting point regularly, especially in high-use areas. Replace worn ropes or straps immediately if you notice signs of fraying or stretching.
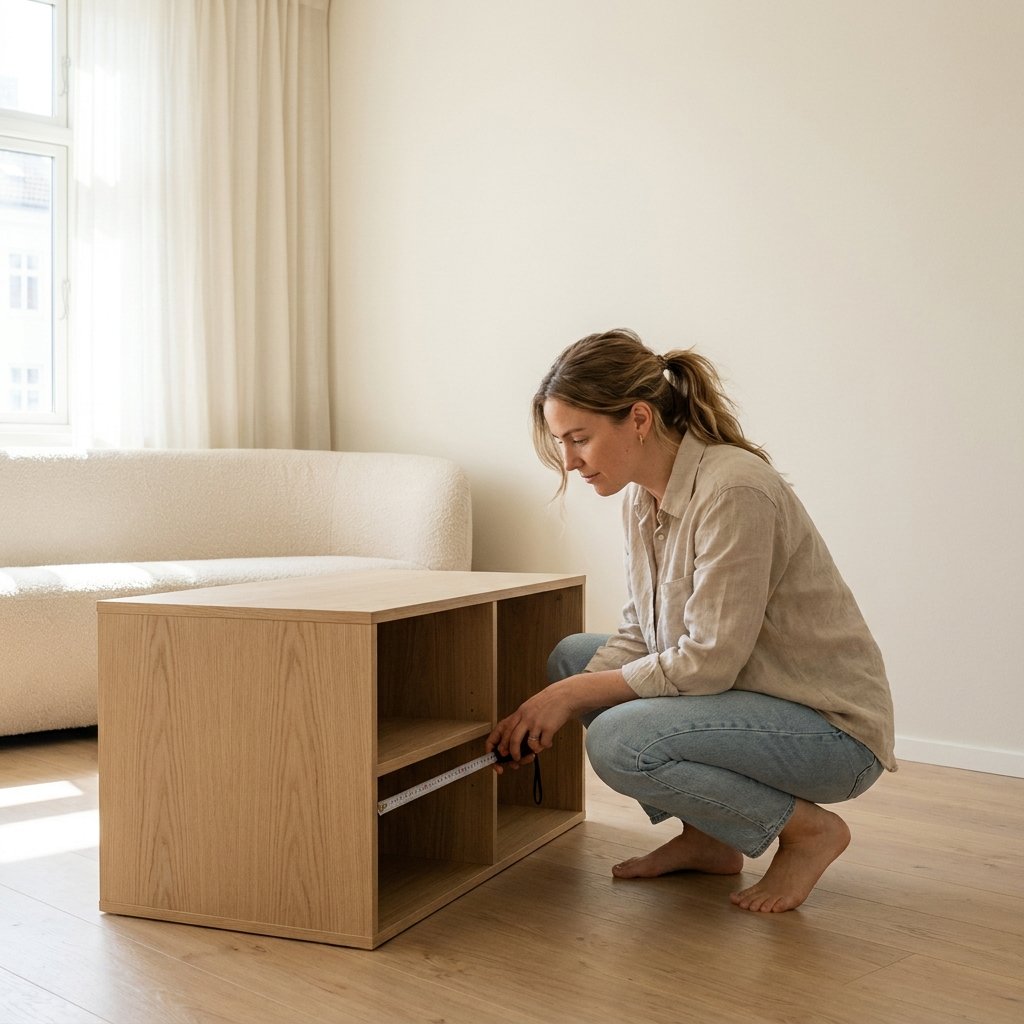
DIY Cat Corner Idea # 9 Minimalist Hidden Cat Cabinet Retreat
Not every cat enjoys climbing all day. Some prefer a quiet, enclosed hideaway where they can nap undisturbed. This project transforms an ordinary cabinet, cube shelf, or side table into a stylish cat retreat that blends seamlessly with modern home décor.
Unlike traditional pet houses, this hidden nook keeps your apartment looking clean while giving your cat a private sanctuary.
Why You’ll Love It?
This project disguises your cat’s sleeping area inside furniture you already use, making it perfect for studio apartments and small living spaces.
Difficulty: Beginner | Time: 2–3 Hours
Perfect For:
- Apartment dwellers
- Nervous or shy cats
- Minimalist interiors
- Multi-purpose furniture
Materials
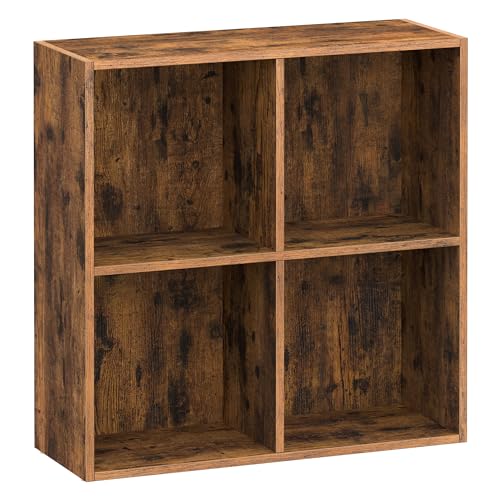
- Cube storage cabinet or side cabinet
- Soft washable cat bed
- Peel-and-stick felt
- Battery-operated LED puck light
- Decorative storage basket
- Small curtain panel (optional)
- Cat-safe fabric spray (optional)
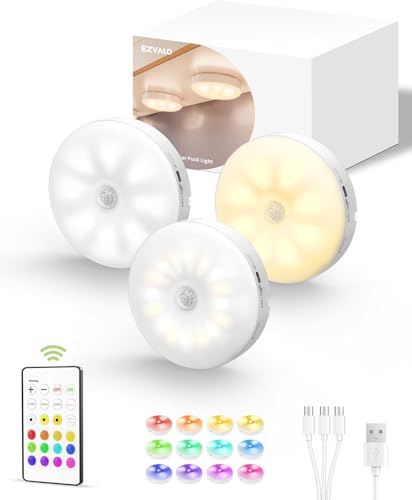
A sturdy cube storage cabinet, plush machine-washable pet bed, rechargeable LED puck lights, decorative woven baskets, and adhesive felt liners are affordable upgrades that make this project feel custom-built while remaining easy to maintain.
Step 1 – Choose the Cabinet
Select a cabinet that’s large enough for your cat to comfortably stand, stretch, turn around, and curl up.
Open-front cube storage units work particularly well because they provide good airflow.
Step 2 – Prepare the Interior
Line the inside with adhesive felt or a removable fabric liner.
This creates a warmer, quieter sleeping space while protecting the furniture.
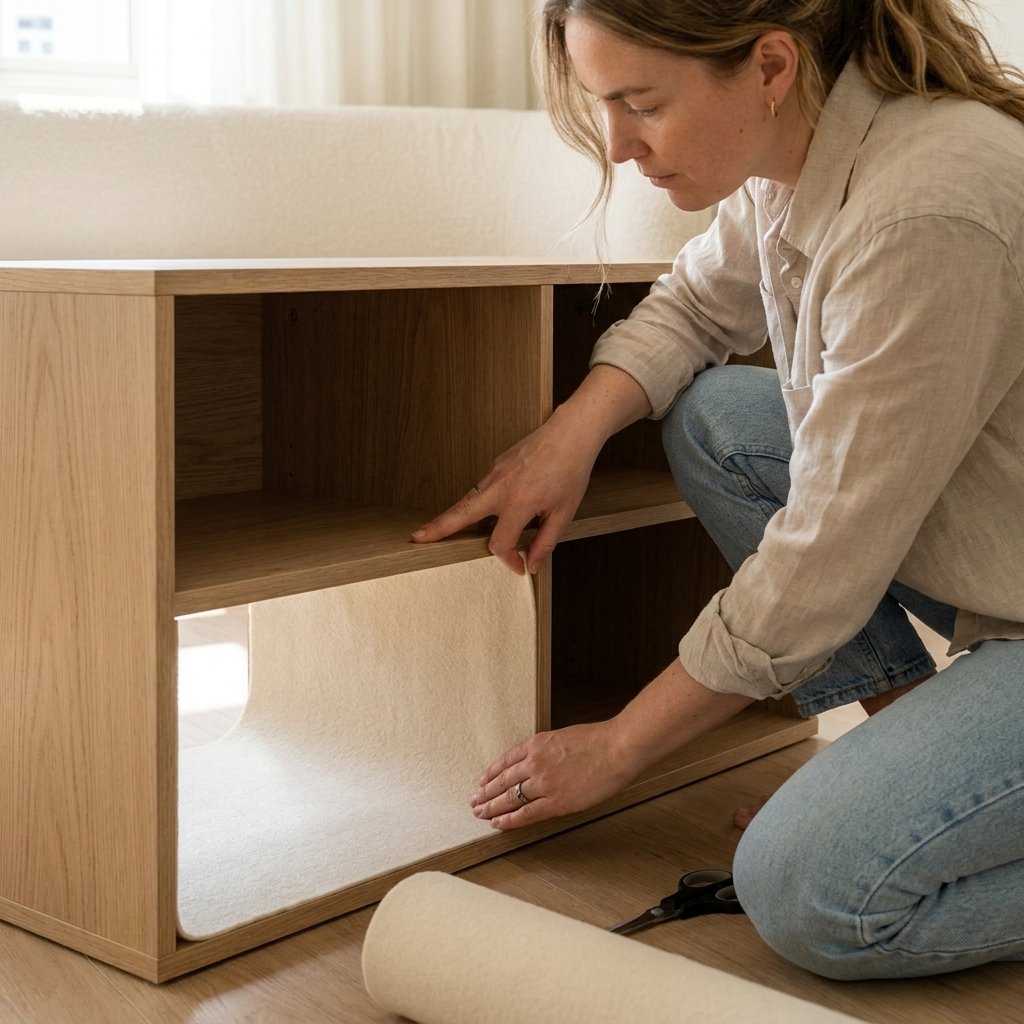

Step 3 – Add Comfortable Bedding
Place a soft round cat bed inside.
Layer it with:
- Small fleece blanket
- Favorite toy
- Catnip pillow (optional)
Comfort encourages your cat to adopt the new space more quickly.
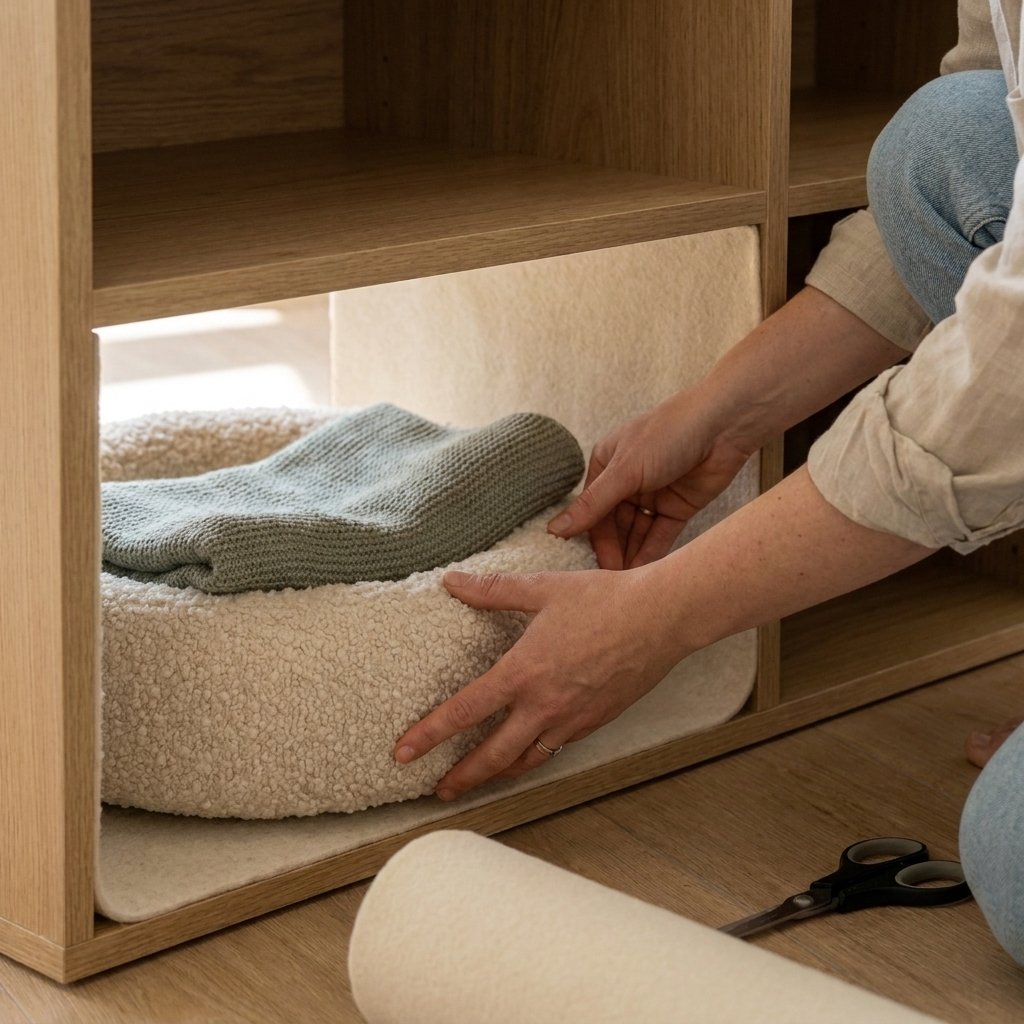

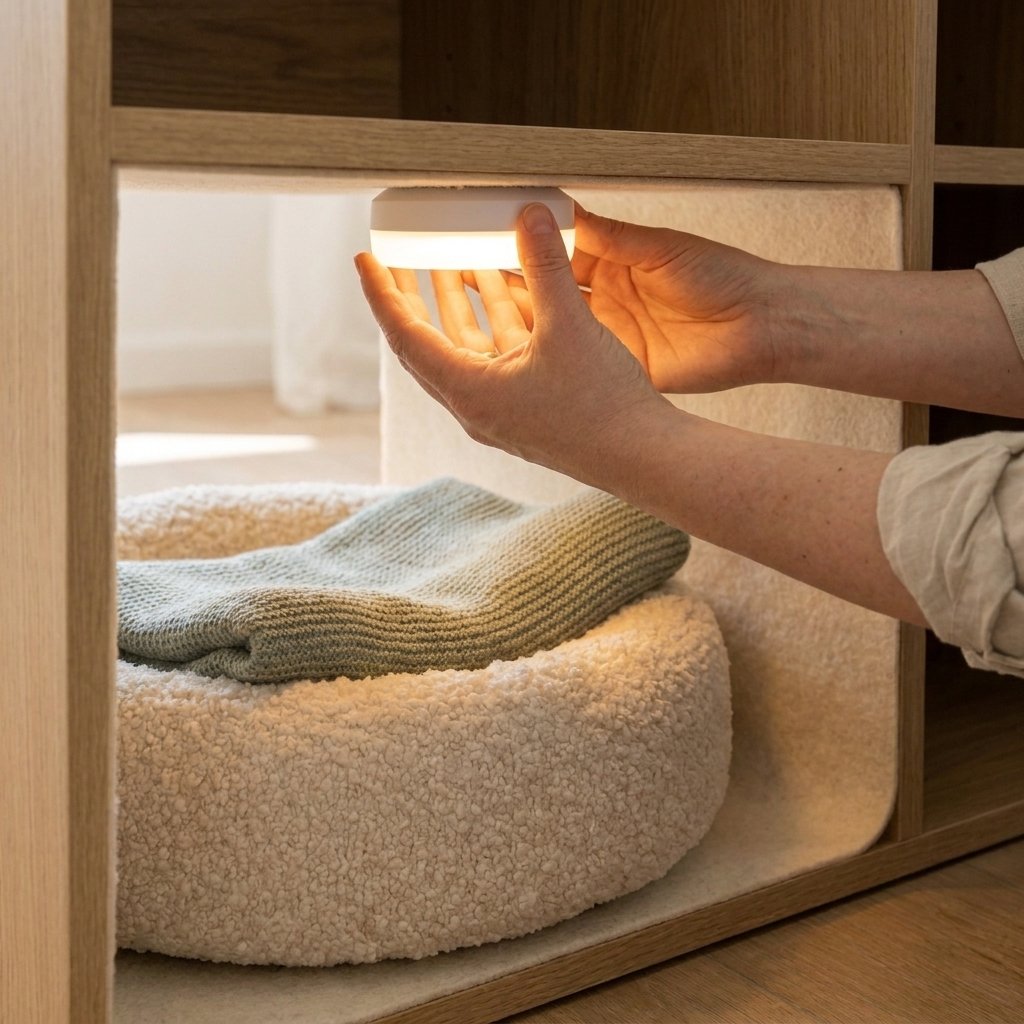
Step 4 – Install Soft Lighting
Attach a rechargeable LED puck light underneath the cabinet’s top panel.
A warm glow makes the hideaway feel cozy during evenings without disturbing your cat.
Step 5 – Style the Exterior
Decorate the top surface with:
- Ceramic vase
- Framed artwork
- Books
- Small cat-safe plant
From the outside, the cabinet looks like an elegant piece of furniture.


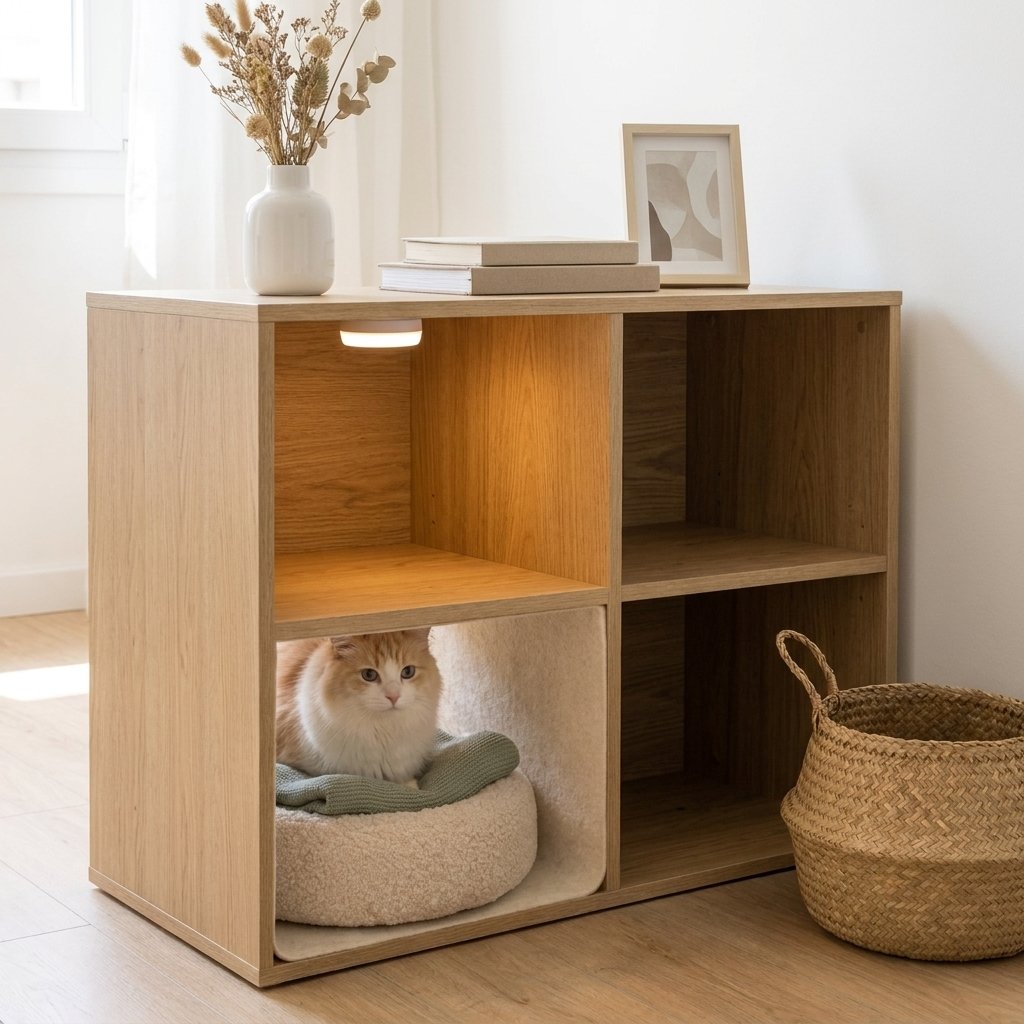
Designer Tip: Selecting furniture in the same wood finish as the rest of the room helps the hideaway blend naturally into your existing décor.
Safety Note: Never block the entrance with decorations or storage baskets. Your cat should always have an unobstructed path in and out of the hideaway.
DIY Cat Corner Idea # 10 Cozy Designer Cat Corner with Lighting & Greenery
If you’ve been inspired by the previous projects, why not combine several ideas into one beautiful corner? This final project creates a complete cat-friendly retreat featuring vertical climbing, comfortable lounging, hidden storage, warm lighting, and decorative greenery—all while maintaining a clean, modern aesthetic.
It serves as the ultimate inspiration for anyone wanting a stylish, functional cat corner in a compact apartment.
Why You’ll Love It?
This project combines comfort, enrichment, storage, and décor into one cohesive space that feels thoughtfully designed rather than pieced together.
Difficulty: Moderate | Time: One Weekend
Perfect For:
- Living rooms
- Home offices
- Studio apartments
- Cat parents who love interior design
Materials
- Floating wall shelves
- Soft cat bed
- Woven baskets
- Decorative storage boxes
- Warm LED strip lighting
- Cat-safe indoor plants
- Sisal scratching mat
- Small washable rug
- Decorative throw pillow
- Wall art
Using premium floating shelves, rechargeable LED strip lights, woven storage baskets, washable pet beds, decorative planters, and durable scratching mats helps create a polished space that looks professionally designed while standing up to everyday use.
Step 1 – Choose the Perfect Corner
Select an area with:
- Natural light
- Nearby wall space
- Low household traffic
- Enough room for climbing and lounging
A peaceful location encourages daily use.
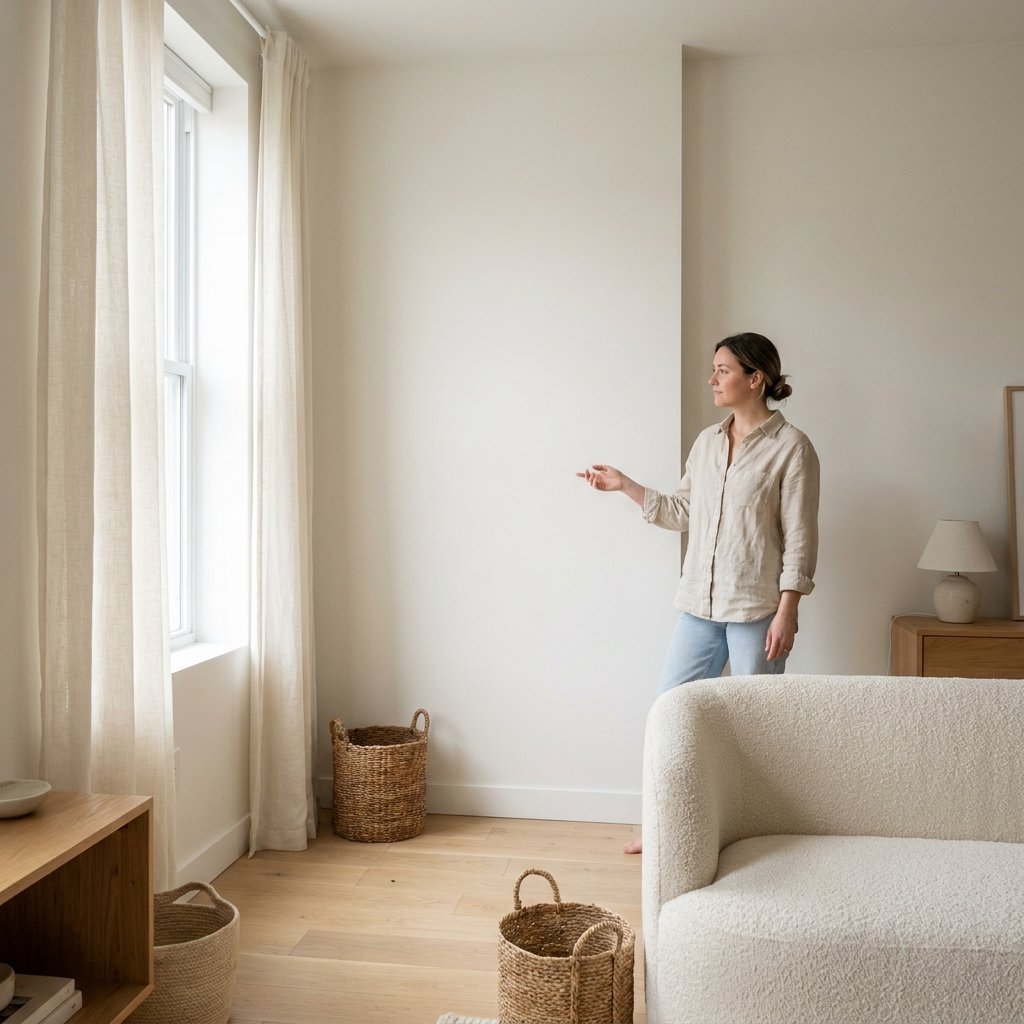
Step 2 – Install the Vertical Features
Mount floating shelves first.
Position them to create a gentle climbing route.
Leave enough room for your cat to comfortably jump between platforms.
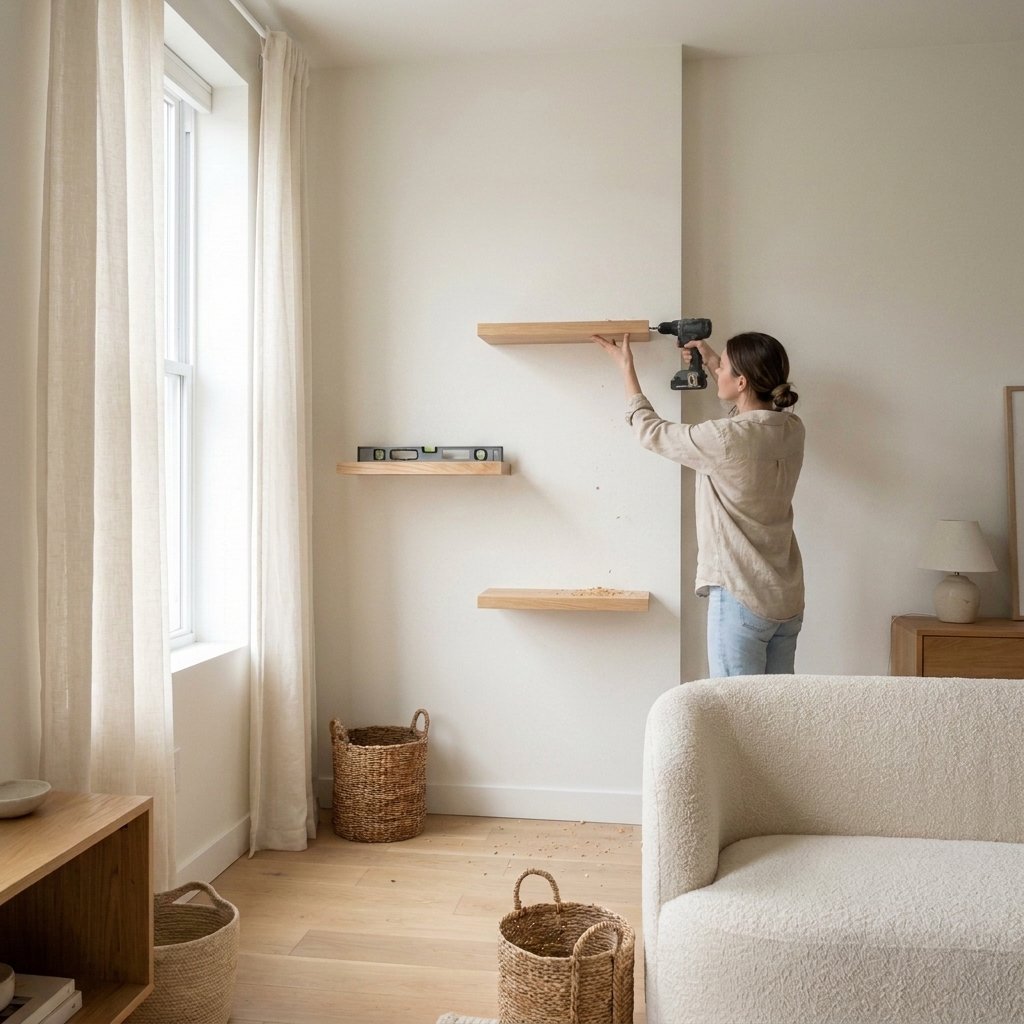

Step 3 – Create the Lounge Area
Place a comfortable cat bed beneath the shelves.
Add:
- Washable blanket
- Small pillow
- Favorite toys
This gives your cat both elevated and ground-level resting options.

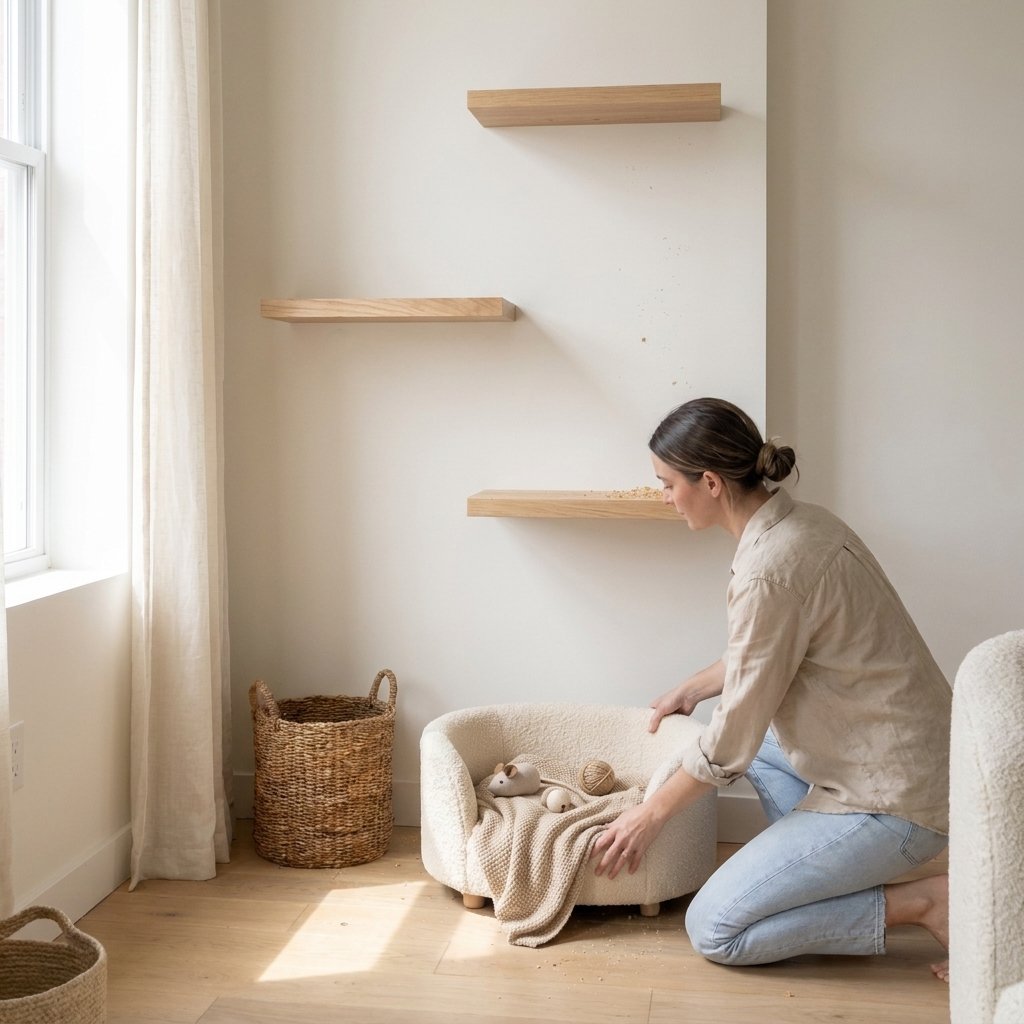
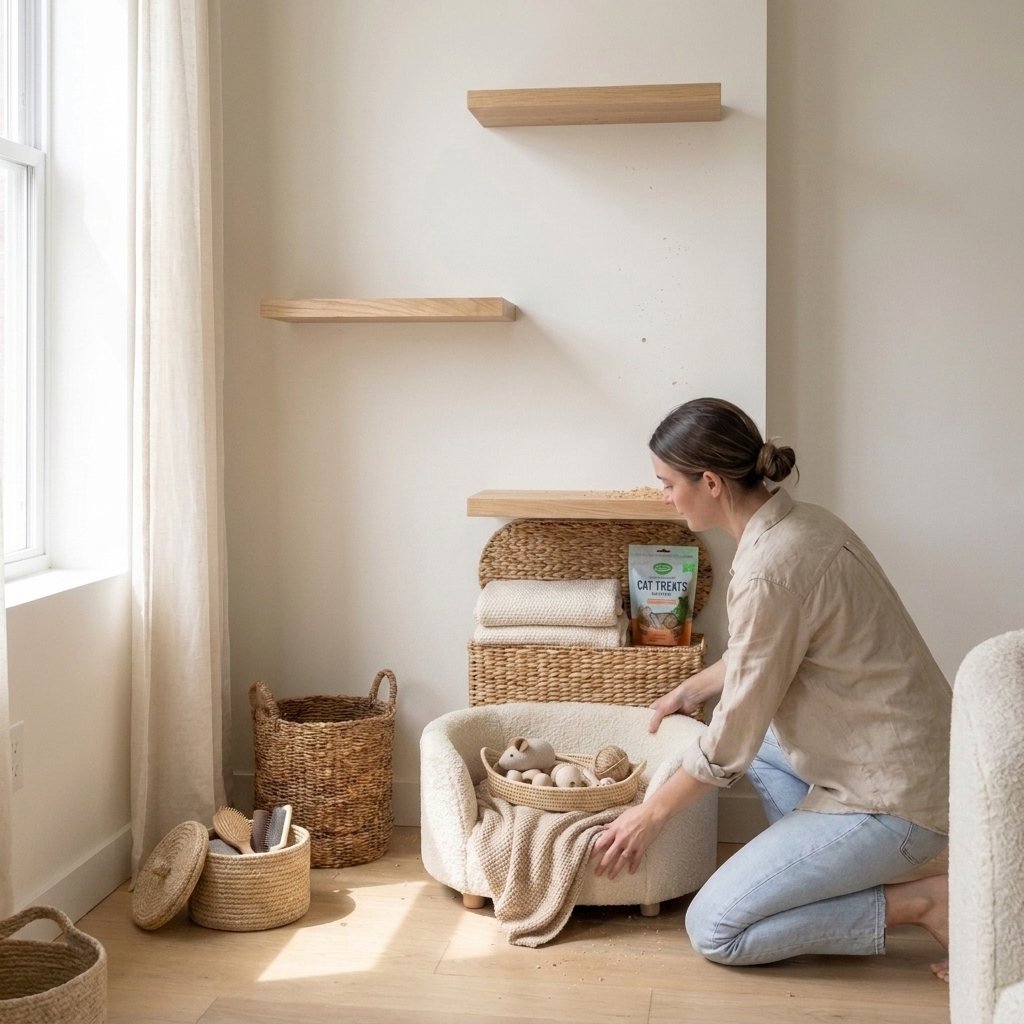
Step 4 – Add Hidden Storage
Organize toys, brushes, and treats inside woven baskets or decorative storage boxes.
Keeping essentials nearby makes cleaning and daily routines much easier.

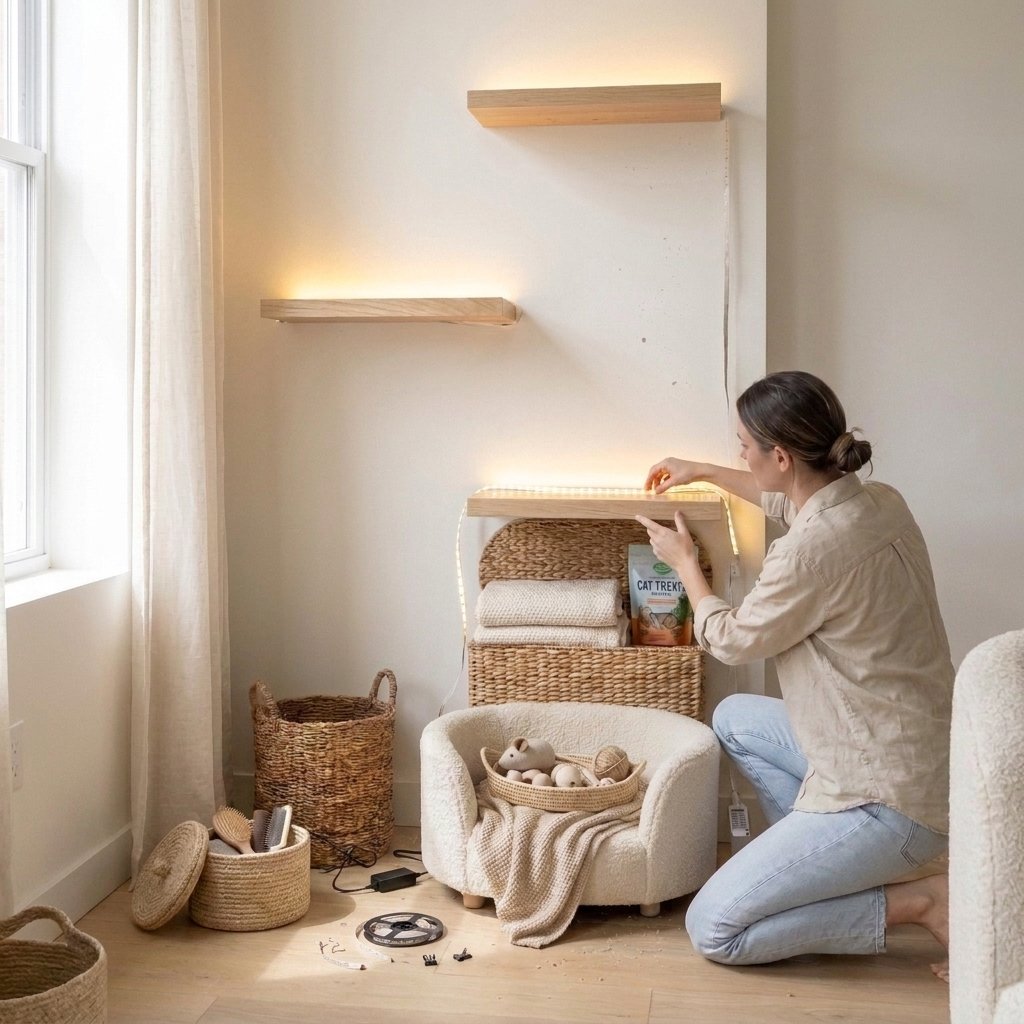
Step 5 – Install Ambient Lighting
Attach warm LED strip lighting behind floating shelves.
Indirect lighting creates a soft evening atmosphere without being harsh.

Step 6 – Add Cat-Safe Greenery
Incorporate non-toxic plants such as:
- Spider Plant
- Boston Fern
- Areca Palm
- Parlor Palm
- Calathea


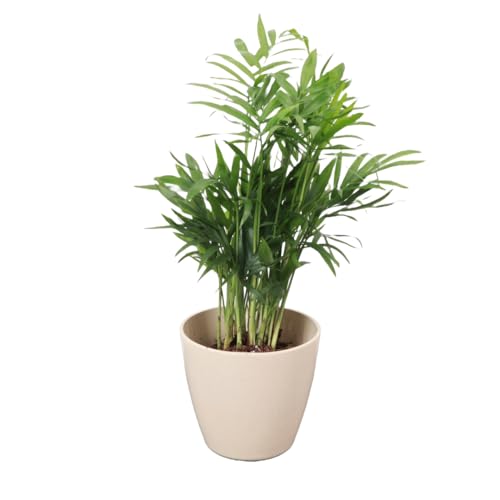

Plants soften the overall design while adding natural texture and visual interest.
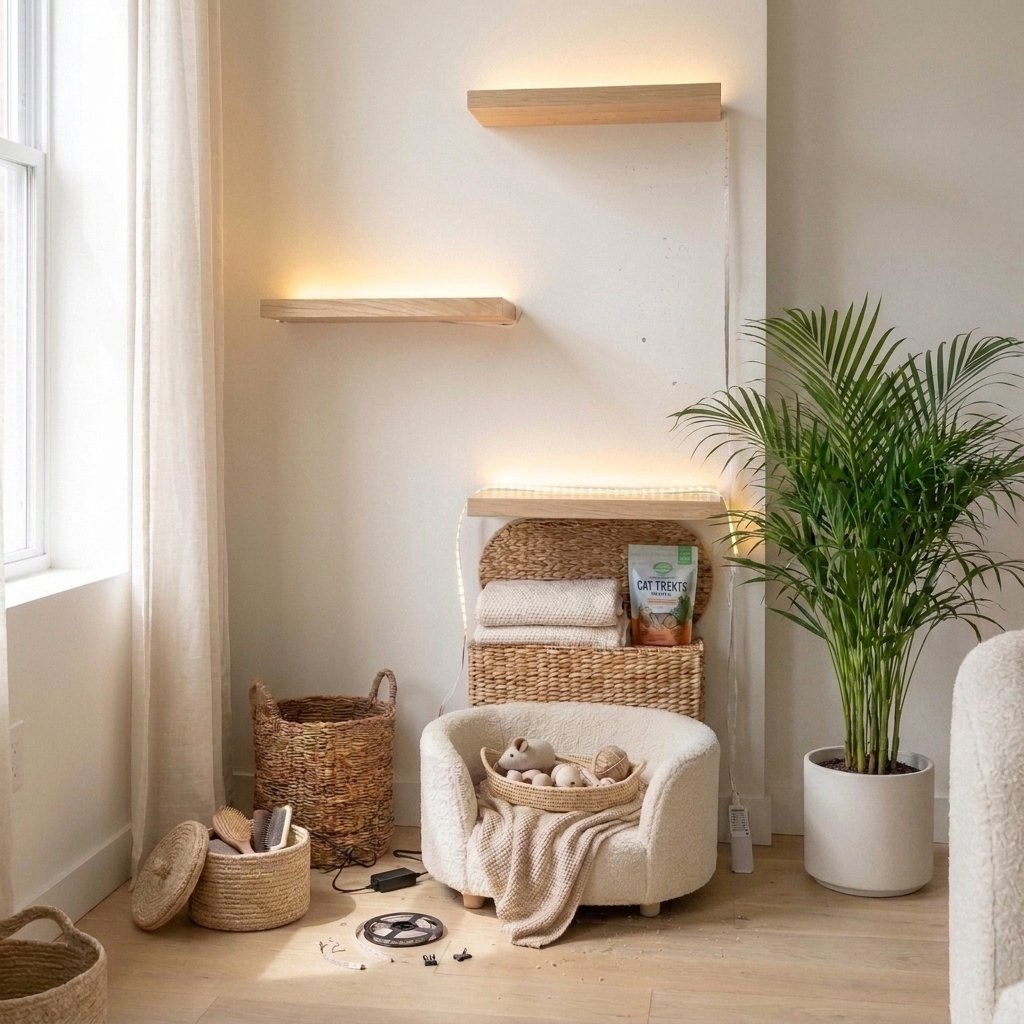
Step 7 – Finish with Decorative Details
Complete the corner using:
- Neutral artwork
- Wooden accents
- Linen textiles
- Soft area rug
The finished result should feel like a thoughtfully designed part of your home rather than a separate pet area.
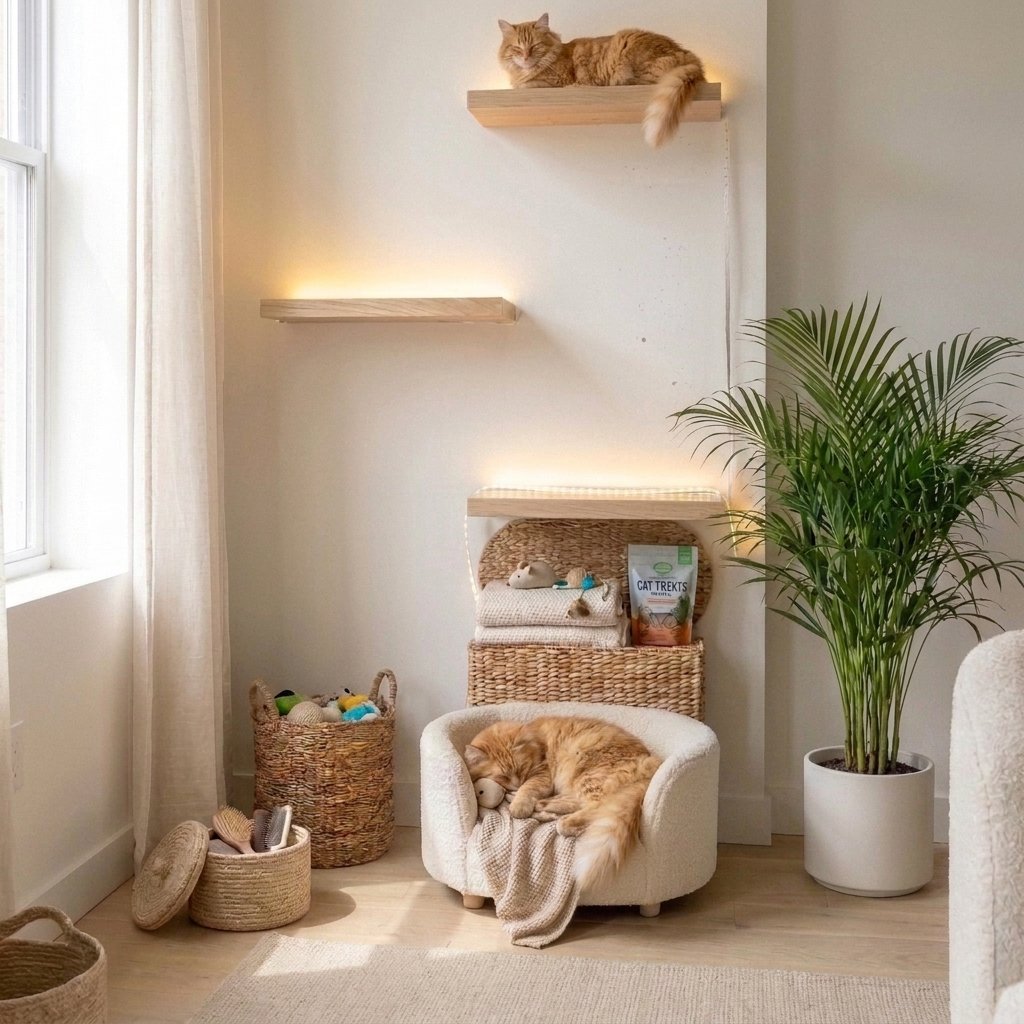
Designer Tip: Repeating the same colors, wood tones, and woven textures used throughout the rest of your apartment creates a harmonious look that feels professionally styled.
Safety Note: Leave enough open floor space around the climbing area so your cat can jump safely without bumping into furniture or décor.
Apartment Cat Corner Maintenance Tips
Once you’ve created your DIY cat corner, a little routine maintenance will help keep it safe, clean, and inviting for years to come.
- Vacuum Weekly – Pet hair can quickly collect on shelves, cushions, scratching surfaces, and rugs. Regular vacuuming helps reduce allergens while keeping fabrics looking fresh.
- Wash Bedding Frequently – Machine-wash blankets, removable covers, and cushions according to the manufacturer’s care instructions to maintain a clean and comfortable resting area.
- Inspect Hardware Monthly – Check floating shelves, hammocks, climbing bridges, and wall-mounted accessories for loose screws or signs of wear. Tighten hardware as needed to ensure every feature remains secure.
- Refresh Scratching Surfaces – Replace worn sisal rope, scratching mats, or cardboard inserts when they become heavily frayed. Fresh scratching surfaces encourage your cat to continue using designated areas instead of household furniture.
- Rotate Toys – Introducing a few different toys every couple of weeks helps keep your cat mentally stimulated without overcrowding the space.
- Keep the Area Clutter-Free – Avoid allowing storage baskets, décor, or household items to block climbing routes or sleeping areas. An organized corner is both safer and more enjoyable for your cat.
Cat Safety Tips for Apartment Living
Creating a beautiful cat corner is important, but safety should always come first.
- Secure all floating shelves directly into wall studs whenever possible or use heavy-duty anchors rated for the intended load.
- Choose only cat-safe indoor plants and keep toxic varieties out of reach.
- Avoid small decorative objects that could become choking hazards.
- Keep electrical cords bundled neatly using cord organizers or cable covers.
- Use washable, non-toxic materials whenever possible.
- Test every climbing feature before allowing your cat to use it.
- Leave clear landing areas around elevated platforms.
- Replace damaged scratching materials promptly.
- Keep candles, essential oil diffusers, and open flames away from cat activity areas.
- Observe how your cat interacts with each new feature and make adjustments if needed.
Final Thoughts
Creating a dedicated cat corner doesn’t require a large home or a professional renovation. With thoughtful planning and a few well-chosen materials, you can transform even the smallest apartment into a comfortable, enriching environment that both you and your cat will appreciate.
Whether you start with a simple window lounge or build an entire climbing wall, each project in this guide is designed to maximize vertical space, reduce clutter, and complement your home’s décor. The best DIY Cat Corner Ideas combine practicality, comfort, and style, giving your feline companion places to climb, scratch, rest, and observe the world while enhancing your living space.
As you gather materials, focus on quality over quantity. Durable floating shelves, sturdy wall anchors, premium sisal rope, washable cushions, woven storage baskets, and pet-safe finishes can improve both the appearance and longevity of your projects. Investing in reliable tools and well-made supplies also makes the building process smoother and helps ensure each feature remains safe for everyday use.
With a little creativity and careful craftsmanship, you’ll have a chic cat corner that’s as enjoyable for your pet as it is beautiful in your home. Happy building!
Frequently Asked Questions
- What is the best location for a DIY cat corner?
A quiet area with natural light, low foot traffic, and enough vertical wall space is ideal. Many cats enjoy corners near windows where they can relax while watching outdoor activity.
- How much space do I need for a cat corner?
Even a space as small as 3 × 3 feet can become a functional cat corner when you make good use of vertical wall space.
- Are wall-mounted cat shelves safe?
Yes, when installed correctly using wall studs or appropriately rated heavy-duty anchors and hardware.
- Which wood is best for DIY cat furniture?
Solid hardwoods such as oak, maple, and birch are durable choices. Always sand surfaces smooth and finish them with pet-safe products.
- What type of rope should I use for scratching posts?
Natural sisal rope is one of the most durable and widely used materials because it provides an appealing texture for scratching.
- Which indoor plants are safe around cats?
Several popular options include Spider Plant, Areca Palm, Boston Fern, Calathea, and Parlor Palm. Always verify plant safety before bringing new varieties into your home.
- Can I build these projects if I’m renting?
Many ideas in this guide are renter-friendly. Freestanding projects, furniture-based hideaways, and removable accessories work well. If you’re mounting shelves, always check your lease agreement and use appropriate installation methods.
- How do I encourage my cat to use a new cat corner?
Place favorite toys, treats, or a familiar blanket in the new space. Allow your cat to explore at its own pace without forcing interaction.
- How high should floating cat shelves be?
Shelf height depends on your cat’s age, agility, and confidence. Most adult cats are comfortable with platforms spaced about 10–14 inches (25–35 cm) apart vertically.
- How do I stop my cat from scratching furniture instead?
Provide attractive alternatives such as sisal scratching posts or scratching mats near the areas your cat already likes to scratch. Reward your cat for using these approved surfaces.
- How often should I inspect DIY cat furniture?
Perform a quick visual check every few weeks and a more thorough inspection of screws, anchors, ropes, and fabric at least once a month.
- What fabrics work best for cat beds and hammocks?
Durable, washable materials like canvas, upholstery fabric, fleece, and tightly woven cotton are practical choices for everyday use.
- Can older cats use climbing shelves?
Yes, but keep platforms closer together and include lower resting spots or ramps to make climbing easier and safer.
- How can I keep a cat corner looking stylish?
Choose furniture and accessories that match your home’s color palette, repeat natural materials like wood and woven textures, and use concealed storage to reduce clutter.
- What’s the biggest mistake to avoid when building DIY cat furniture?
Prioritizing appearance over stability. Every shelf, bridge, perch, and climbing feature should be securely installed and tested before your cat begins using it.