As an Amazon Associate we earn from qualifying purchases. Here’s how it works.
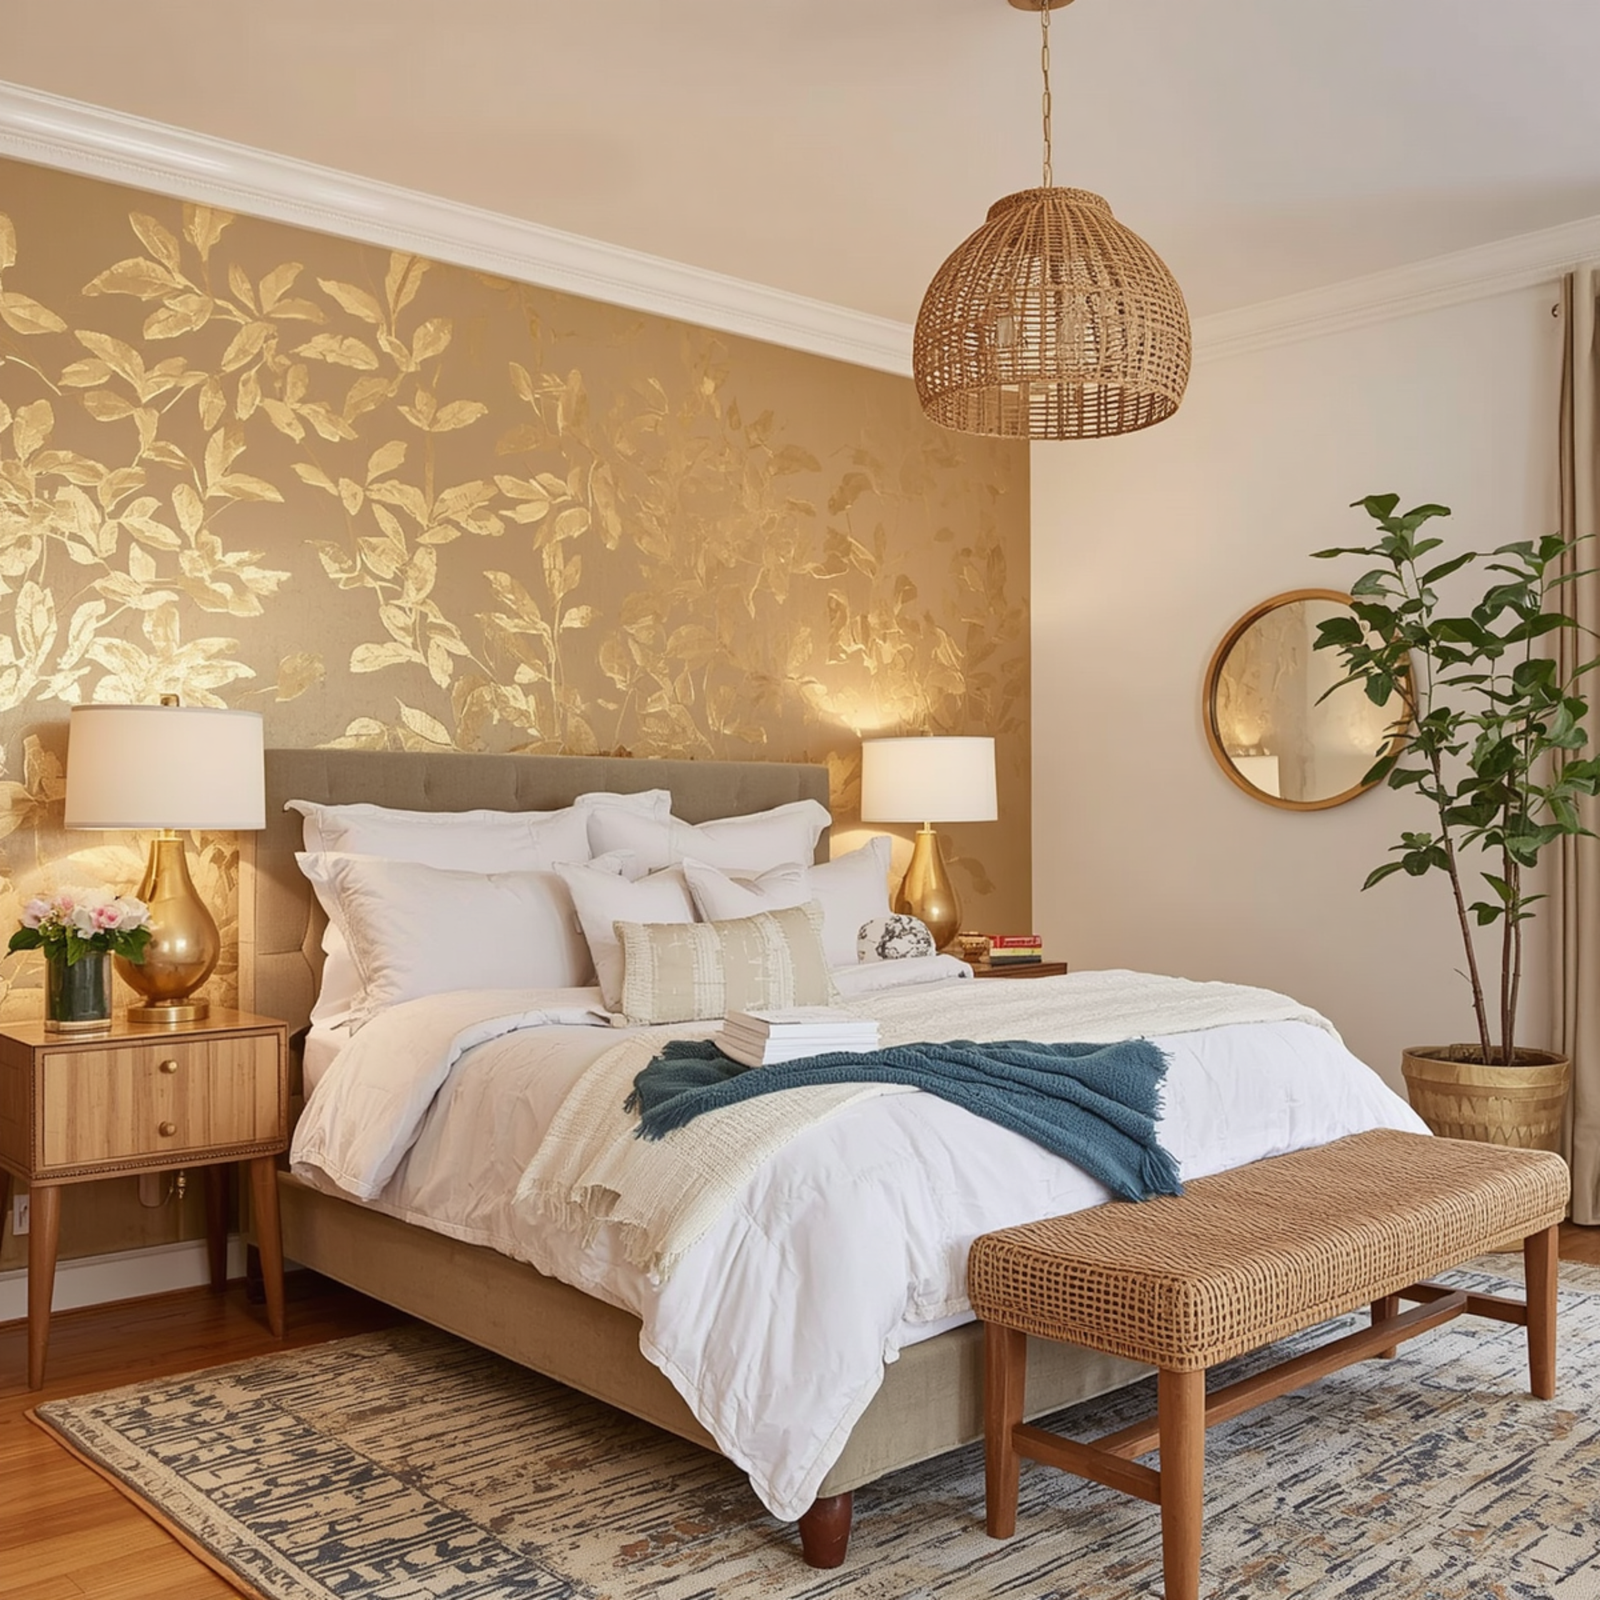
Picture this: you walk into your bedroom and the wall behind your bed literally glows. Rich, warm gold leaf shimmers in the lamplight. It looks like something out of an Architectural Digest spread — except you did it yourself on a Sunday afternoon for less than the cost of a single throw pillow from a boutique.
That’s exactly what this luxury bedroom makeover on a budget tutorial is going to help you pull off.
The gold leaf accent wall is one of the most-pinned bedroom DIY transformations for a reason. It’s dramatic, it’s timeless, and — thanks to modern peel-and-stick gold foil and stencil kits — it’s more beginner-friendly than it ever looks. Whether you’re renting (yes, this is renter-friendly!) or own your home, this technique works on virtually any smooth wall surface.
Let’s do it!
What Is a Gold Leaf Accent Wall? (And Why Is Everyone Doing It?)
A gold leaf accent wall is a feature wall — typically the one directly behind your bed — where gold foil or metallic leaf is applied to create a shimmering, textured effect. Traditionally, gold leafing was a skilled craft done by professional gilders using genuine 24-karat gold sheets, adhesive sizing, and specialized brushes. It was expensive. It was complicated. It was definitely not a weekend DIY.
Modern peel-and-stick gold foil sheets changed all of that.
Today, you can achieve a nearly identical look using imitation gold leaf sheets (also called composition leaf or faux gold leaf), a simple stencil or freestyle technique, and basic craft supplies most people already have at home. The result is genuinely stunning — and if you scroll Pinterest right now, you’ll see thousands of bedrooms proving it.
Why this project is trending:
- It photographs beautifully — golden hour lighting + gold wall = magic
- It’s one of the highest-impact bedroom upgrades with the lowest cost-per-wow ratio
- The peel-and-stick method makes it achievable for complete beginners
- Renter-friendly options exist (no permanent wall damage required)
- It pairs with every bedroom aesthetic — boho, glam, minimalist, maximalist, and everything between
What You’ll Need: Full Materials List
Before we dive into steps, here’s everything you need to gather. We’ve organized this by must-haves and nice-to-haves so you can shop smart.
1. Gold Leaf Sheets (Peel-and-Stick)
The star of the show. Look for imitation gold leaf (composition leaf) sheets — they’re sold in packs and are far more durable and budget-friendly than genuine gold. Peel-and-stick versions have a self-adhesive backing that eliminates the need for separate sizing/adhesive.
Buying Guide: When shopping for Imitation gold leaf sheets, look for a pack of at least 100 sheets for a standard queen/king feature wall (roughly 8′ x 9′ wall).
Copper alloy, 5.5 × 5.5 inches. Will not tarnish once sealed under resin.

2. Wall Stencil Kit
A stencil transforms your gold foil project from “random patchy spots” to “intentional designer pattern.” Popular choices include:
- Moroccan tile stencil (classic, bohemian)
- Art deco geometric stencil (modern glam)
- Leaf/botanical stencil (organic, natural)
- Allover damask stencil (maximalist luxury)
- Or go no-stencil for a freeform organic look (covered in Step 5)

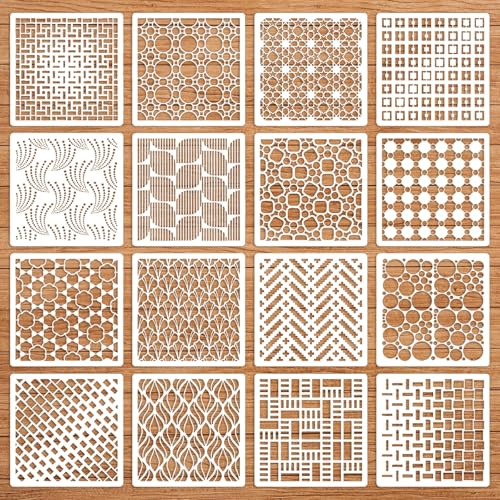


Buying Guide: Choose a large repeating stencil (12″–16″ repeat) for faster coverage. Smaller stencils take much longer on a full accent wall.

3. Gold Leaf Adhesive / Sizing (if using non-peel-and-stick sheets)
If you opt for traditional imitation gold leaf sheets (non-adhesive, usually sold loose or in booklets), you’ll need a water-based gold leaf adhesive (also called sizing or leafing glue). It goes on milky white and dries clear and tacky.

4. Soft Gilding Brush or Stippling Brush
For pressing and smoothing the foil onto the wall without tearing it. A wide, flat, super-soft brush (sometimes called a “mop brush”) works best.

5. Painter’s Tape (Low-Tack)
To mask off edges, protect baseboards, and hold your stencil steady against the wall.
Buying Guide: Use the “delicate surface” version — it’s gentler on walls and won’t lift paint when removed.

6. Clean, Damp Cloths
For wiping away stray adhesive and keeping your hands clean between sheets.
7. Step Stool or Small Ladder
You’ll need to reach the top of the wall comfortably. Balance and comfort matter a lot here — you’ll be doing detailed work.

🌟 Nice-to-Have Upgrades
- Clear matte sealer spray — locks in finished foil so it doesn’t flake over time (highly recommended!)
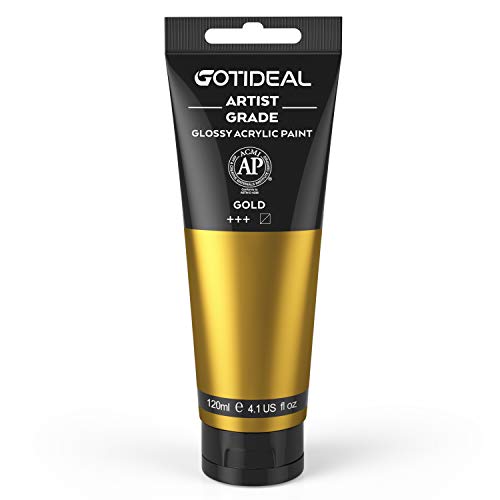
- Metallic gold craft paint — useful for touching up gaps and edges, especially around the stencil border
- Foam roller (small 4″) — for applying adhesive evenly inside the stencil
- Level and pencil — for marking stencil placement guidelines (trust me, you’ll want these)


How to Prep Your Wall (Don’t Skip This — It Makes or Breaks the Result)
The most common reason a gold leaf project looks patchy or peels prematurely is poor wall prep. This is the step most beginners rush through, and the step that professionals never skip.
Step 1 — Clean the Wall
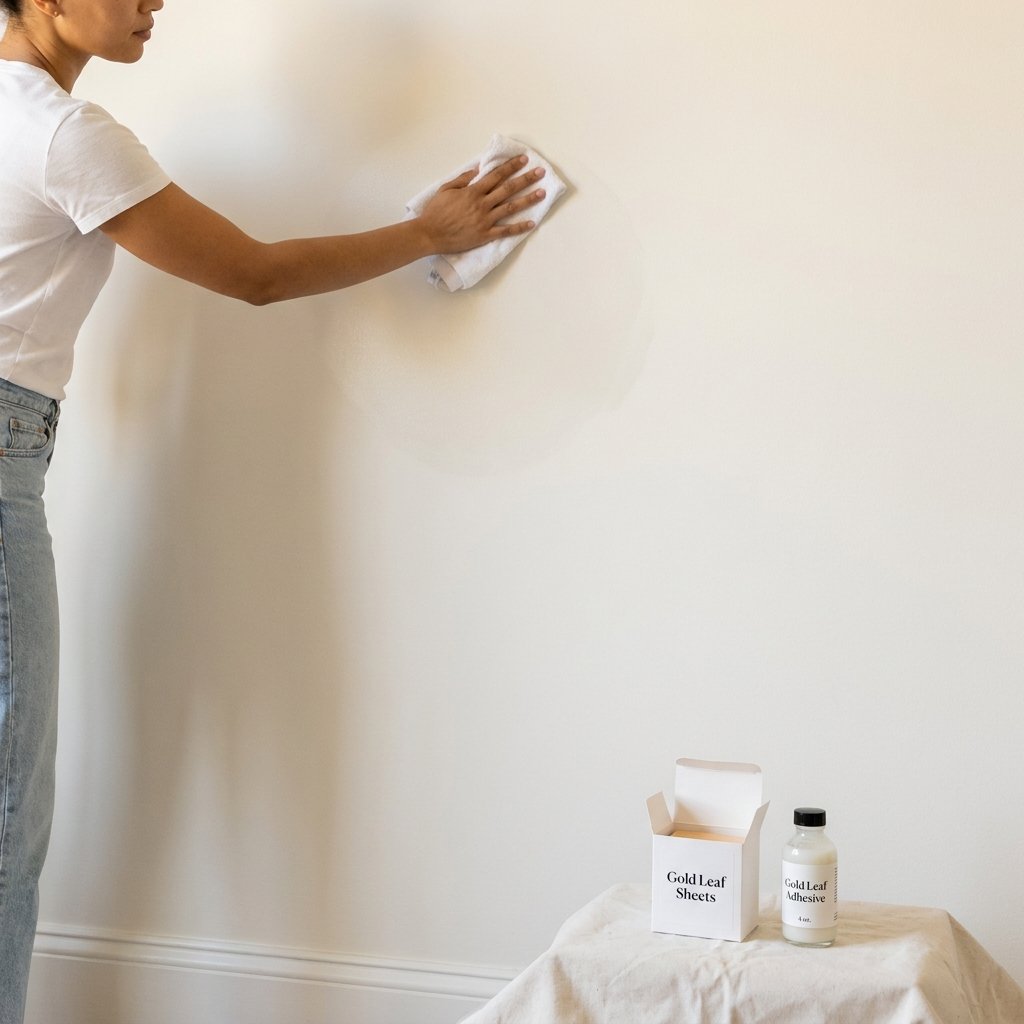
Wipe your entire accent wall with a barely-damp microfiber cloth. You’re removing dust, oils (from hands leaning against the wall), and any loose debris. Let it dry completely — at least 30 minutes.
If the wall has any grease (kitchen-adjacent rooms) or heavy grime, use a small amount of dish soap in the water, then wipe again with clean water to remove any soap residue.
Why it matters: Gold leaf adhesive bonds to the wall surface, not to a layer of dust and oils. Skipping this step causes the foil to lift within days.
Step 2 — Check (and Fix) Your Wall Surface
Gold foil is unforgiving of surface imperfections — it’s thin and shimmery, which means it will highlight every bump, crack, and texture.

- Smooth/eggshell walls: You’re good to go.
- Heavily textured walls (orange peel, knockdown): The foil will still adhere, but the look will be more “rustic” than “refined.” If you want a clean result, lightly sand the texture down in your target area first, then wipe away dust.
- Cracks or holes: Fill with lightweight spackle, let dry, sand smooth.
- Fresh paint: Wait at least 72 hours before starting — fresh paint is still off-gassing and can interfere with adhesive bonding.
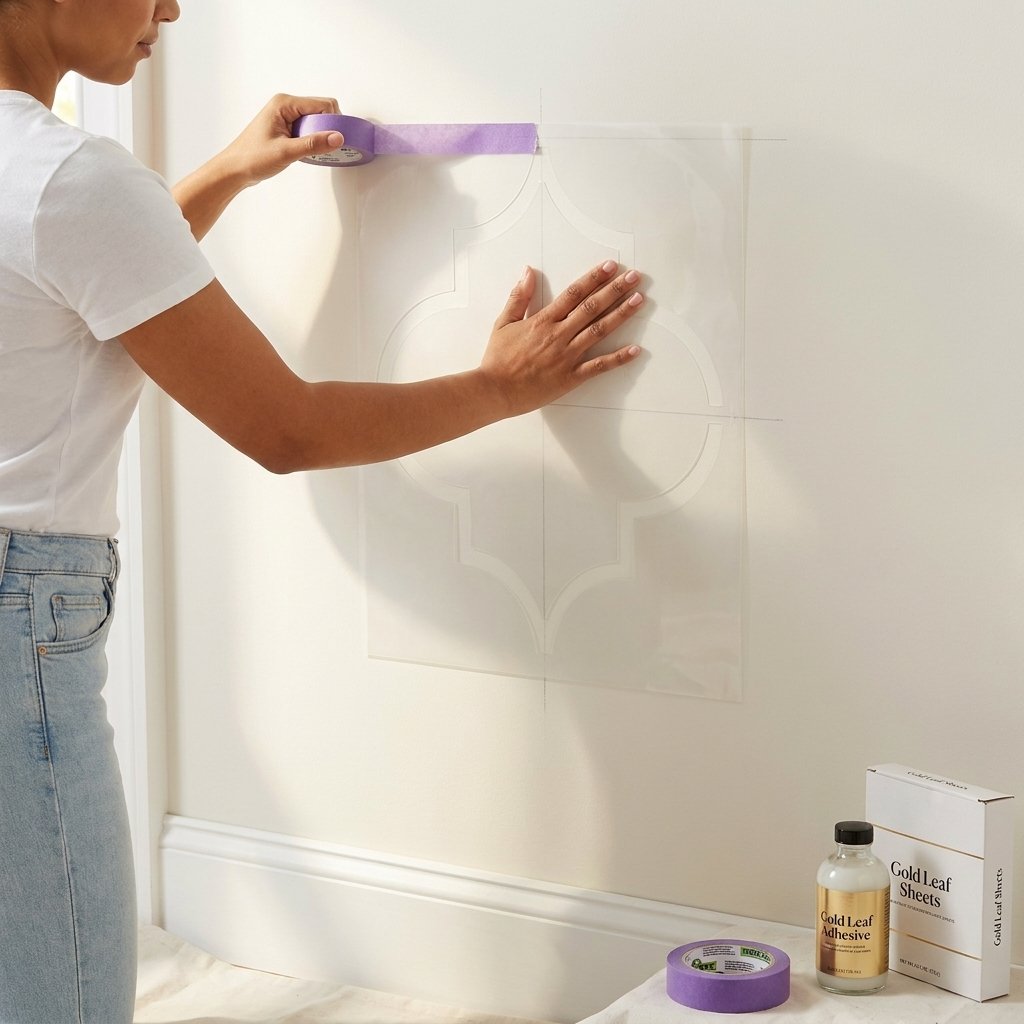
Step 3 — Plan Your Pattern Layout
This step separates a beautiful result from a chaotic one.

Using your level and pencil, lightly mark the wall with a grid that matches your stencil’s repeat size. These marks will guide stencil placement so your pattern stays perfectly aligned from top to bottom. (Nothing worse than finishing a wall and realizing the pattern is skewed at eye level.)
Centering tip: Find the center point of your wall (horizontal midpoint) and start your stencil pattern from there, working outward in both directions. This ensures the pattern is symmetrical around the center — especially important if your bed will be centered on this wall.
The Gold Leaf Accent Wall — Step-by-Step Application
Now for the main event. Take your time here — speed is less important than precision, and once you find your rhythm, the rest goes fast.
Step 4 — Position and Secure Your Stencil
Align your stencil with your pencil guidelines. Secure it flat against the wall using painter’s tape on all four sides (and in the middle for larger stencils). Run your hand over the entire stencil to make sure there are no lifted edges — gaps between the stencil and wall let adhesive bleed under, blurring your pattern.
Pro tip: Apply a tiny bit of low-tack repositionable spray adhesive to the back of your stencil before taping. This creates a gasket-like seal that prevents bleeding completely. Reapply every few uses.
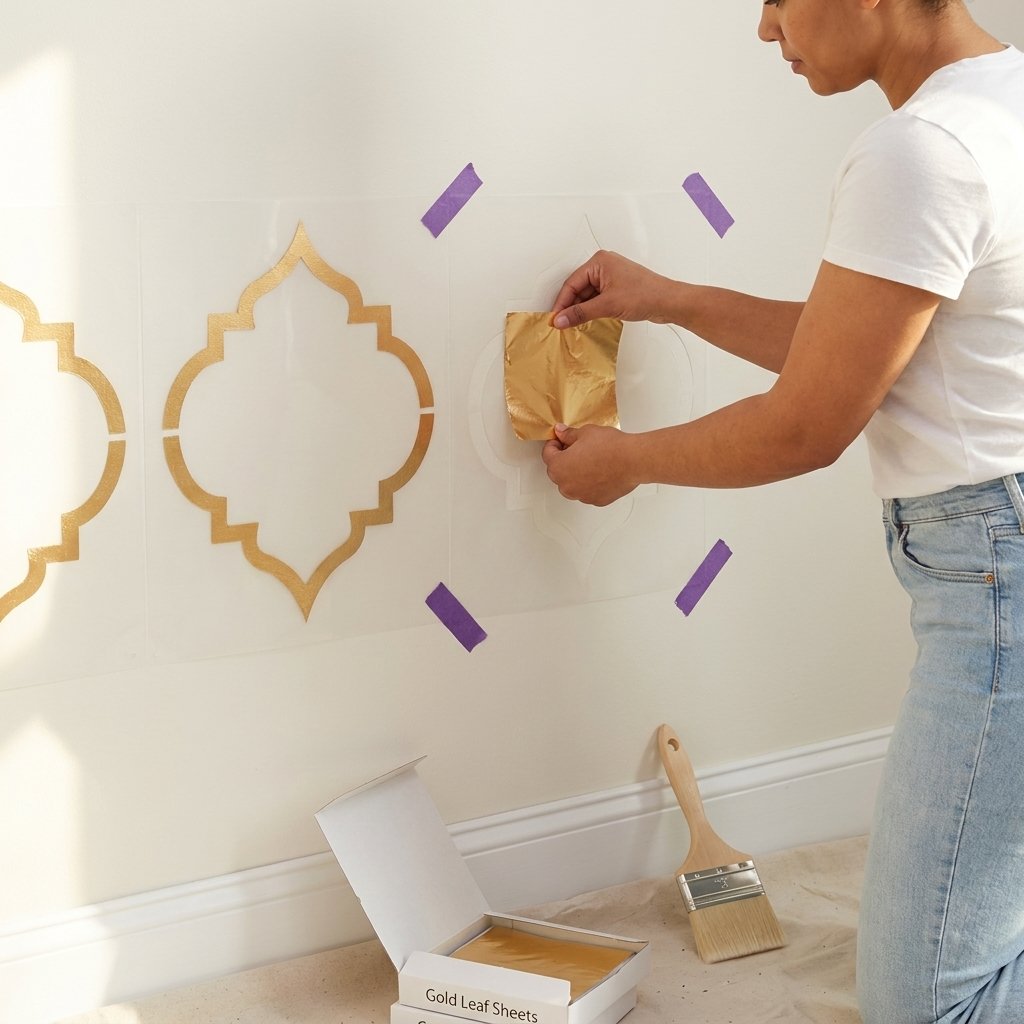
Step 5A — Applying with Stencil + Peel-and-Stick Gold Foil Sheets
This method gives you the cleanest, most defined geometric look.
How to do it:
- With your stencil secured, peel one gold foil sheet from its backing.
- Place the foil over an open section of the stencil.
- Press it down gently with your fingertips — no hard rubbing yet.
- Use your soft gilding brush to press and stipple the foil firmly into the adhesive, working from the center outward to the edges of each stencil opening.
- Carefully peel back the foil. The gold will transfer to the adhesive-coated wall through the stencil openings.
- Repeat across the stencil, slightly overlapping sheets if needed for full coverage.
- Gently peel back the stencil.
✨ What you’ll see: A perfectly sharp geometric gold pattern, with the original wall color showing in the non-stenciled areas.
The contrast between the wall color and the gold is what makes this look architectural rather than just “gold paint.” If your wall is a deep charcoal, navy, or sage green, the effect is particularly dramatic.
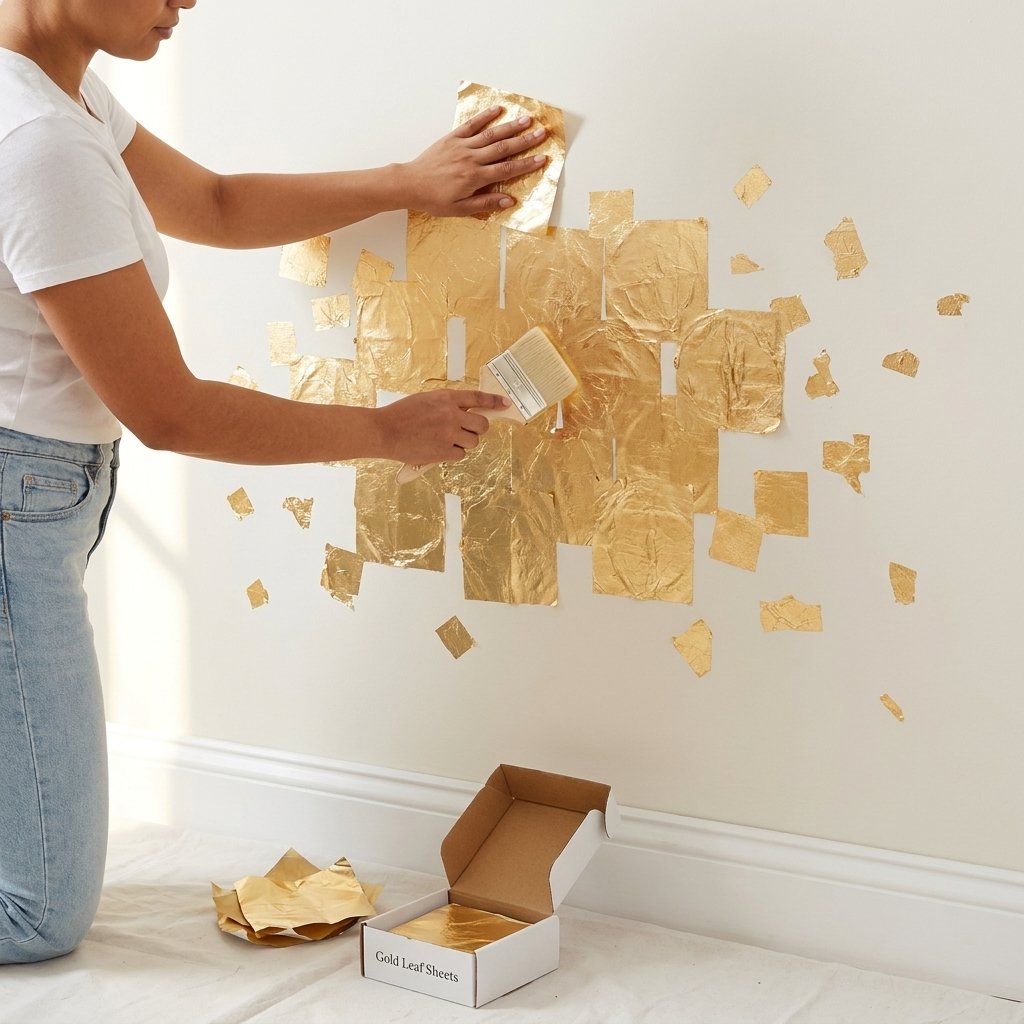
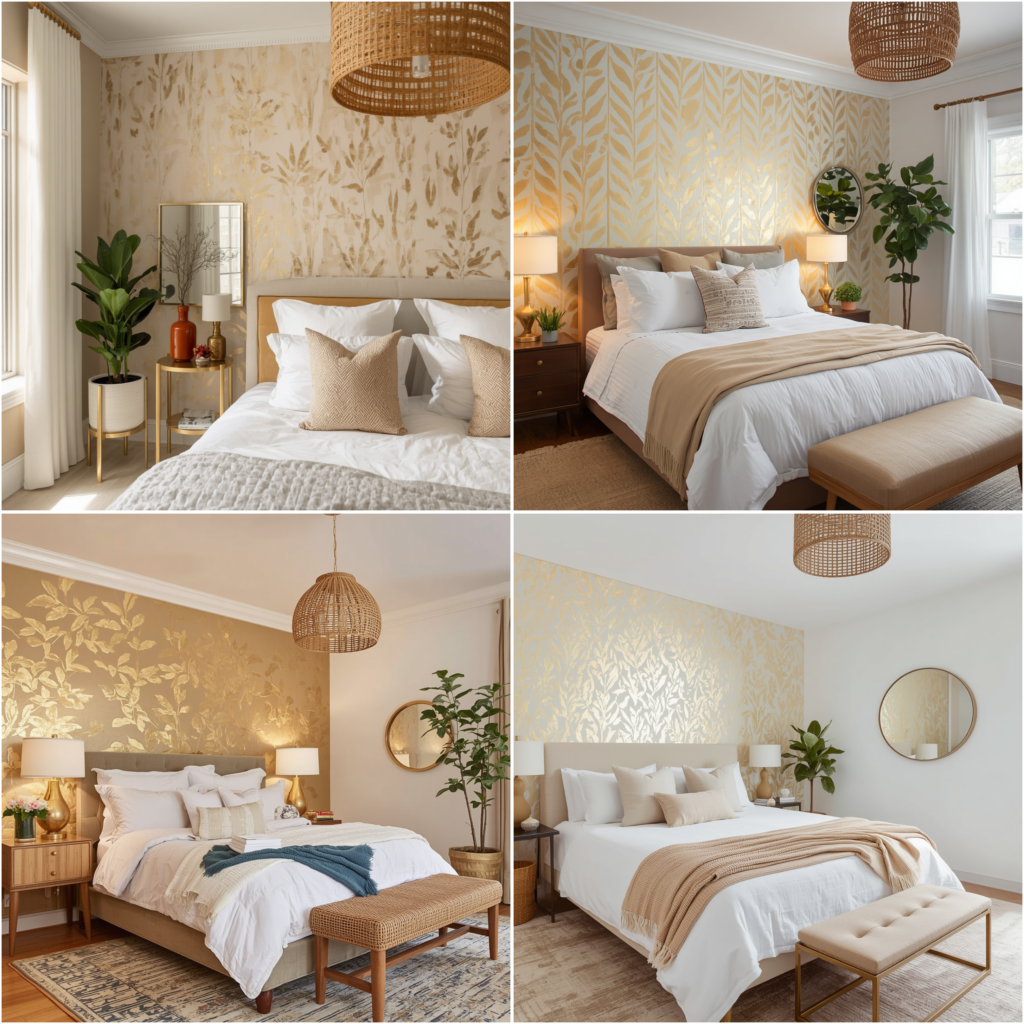
Step 5B — Alternative: Freeform / Organic Gold Leaf Technique (No Stencil)
If you want a more abstract, organic look — think scattered gold leaf patches or a gradient effect that’s heavier near the center and fades toward the edges — skip the stencil entirely.
How to do it:
- Working in roughly 2′ x 2′ sections, apply your gold leaf adhesive (or use peel-and-stick sheets) in irregular, organic patches — not a perfect grid.
- Vary the size and angle of each patch: some large, some small, some overlapping, some with a gap.
- Where sheets overlap, the extra layer creates a beautifully rich, textured depth.
- Step back every few minutes to assess coverage and adjust as you go.
This freeform approach takes longer to plan but often results in the most Instagram-worthy outcomes because it has that “did an artist come in and do this?” quality.
Step 6 — Fill Gaps and Touch Up Edges
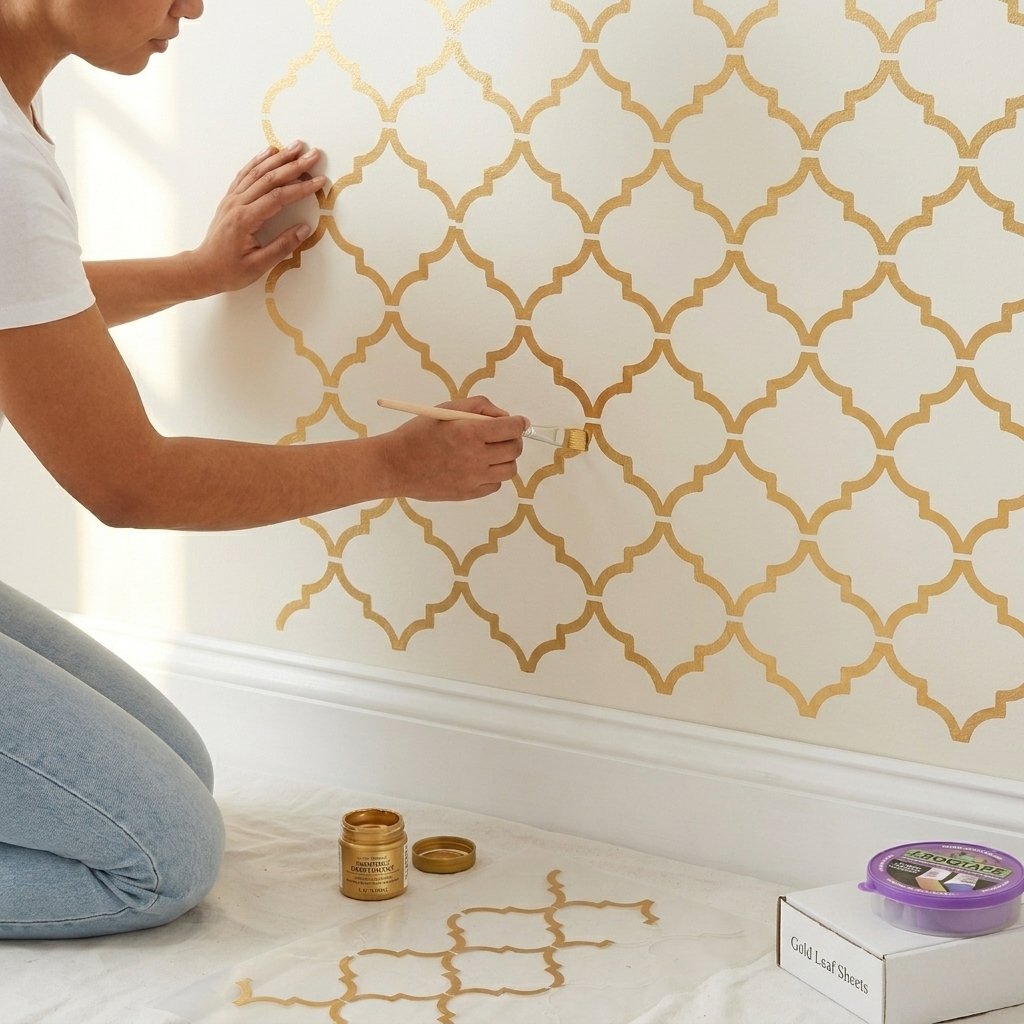
No matter how careful you are, there will be tiny gaps, lifted edges, or thin spots in the foil — especially around corners and where stencil edges meet. This is completely normal.
Use your metallic gold craft paint and a small flat artist brush to carefully fill in any visible gaps. This is especially important around the border of your stencil pattern where precision matters most.
You can also use a second layer of foil over thin spots — let the adhesive set for 5 minutes (it gets tackier, not less tacky, as it sits), then apply a second foil sheet on top.
Step 7 — Remove Pencil Guidelines
Once your foil is fully applied and you’re happy with the coverage, gently erase your pencil guide marks from the wall using a soft white eraser. Work carefully near the foil edges — too much pressure can dislodge freshly applied sheets.
Step 8 — Seal the Whole Wall
This step is not optional if you want your wall to last.
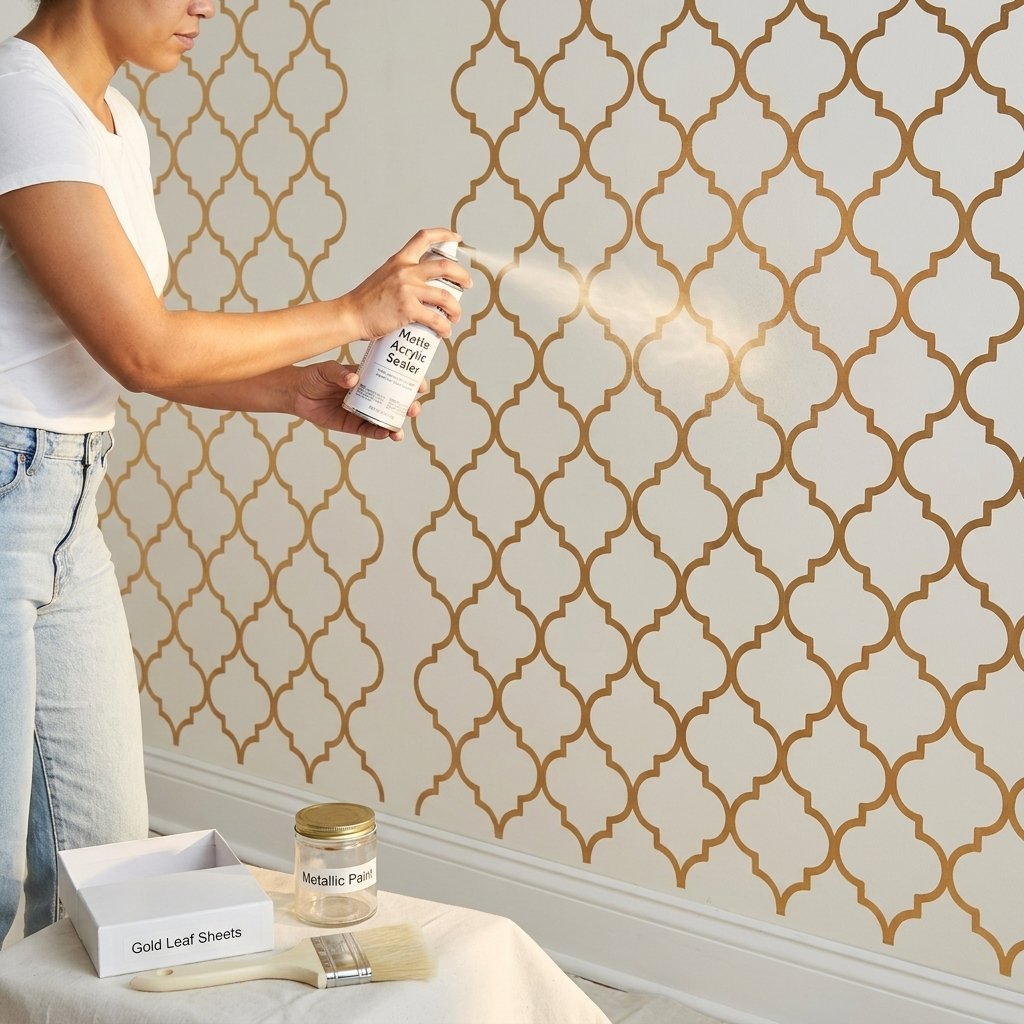
Gold leaf foil — especially imitation/composition leaf — can flake and tarnish over time without protection. A clear matte sealer locks everything in place and gives the foil a beautiful, soft-matte finish that actually enhances the look (it reduces “cheap glitter” shine and adds depth).
👉 Use Mod Podge Clear Acrylic Sealer in Matte → — hold the can 8–10 inches from the wall, work in horizontal sweeping passes, and apply 2–3 light coats rather than one heavy coat. Let each coat dry 15 minutes before the next.
Avoid: Glossy or glitter sealers (they’ll look tacky). Stick with matte or satin.
How Much Does a Gold Leaf Accent Wall Cost for a luxury bedroom makeover on a budget?
Here’s the honest breakdown so you can budget before you shop:
| Item | Estimated Cost |
|---|---|
| Peel-and-stick gold leaf sheets (200 pack) | $18–$25 |
| Stencil kit | $12–$20 |
| Gold leaf adhesive (if needed) | $8–$12 |
| Soft gilding brush | $8–$14 |
| Painter’s tape (low-tack) | $6–$8 |
| Clear matte sealer spray | $8–$12 |
| Gold metallic touch-up paint | $5–$8 |
| Total Estimated Cost | $45–$99 |
Compare that to hiring a professional decorative painter for the same look: $400–$1,200+ depending on your location and wall size.
Approximate time: 3–5 hours for a standard 8′ x 10′ feature wall, including drying time.
Related Post: DIY Woven Rattan Wall Art: Create Your Own Afrohemian Masterpiece
Common Mistakes to Avoid
Even with the best supplies, a few avoidable errors trip up most first-timers. Here’s what to watch for:
1. Using the wrong type of gold foil Not all gold leaf is the same. Genuine 24-karat gold leaf is gorgeous but costs $3–$10 per sheet and is almost impossibly thin to work with on a large wall. Composition/imitation gold leaf gives you 95% of the look at 5% of the price. For walls, peel-and-stick composition leaf is your best friend.
2. Skipping the stencil alignment step You won’t notice a slightly skewed pattern when you’re up close doing it. You’ll absolutely notice it when you step back and look at the whole wall. Take the extra 15 minutes to snap chalk lines or pencil guides — it’s worth it.
3. Applying adhesive too thick More adhesive ≠ better adhesion. A thin, even layer is what you want. Thick adhesive takes longer to reach the right tackiness level and can seep through the stencil edges, blurring your pattern.
4. Rushing the adhesive dry time Water-based gold leaf adhesive should be applied, then left to become tacky (clear, slightly sticky) before you apply foil. This usually takes 15–30 minutes depending on humidity. Applying foil to wet adhesive = poor transfer and wasted sheets.
5. Not sealing at the end Skipping the sealer means your wall will slowly flake and tarnish. Take the extra 20 minutes. Future you will thank present you.
Gold Leaf Accent Wall Variations to Try
Once you’ve mastered the basic technique, these variations take it even further:
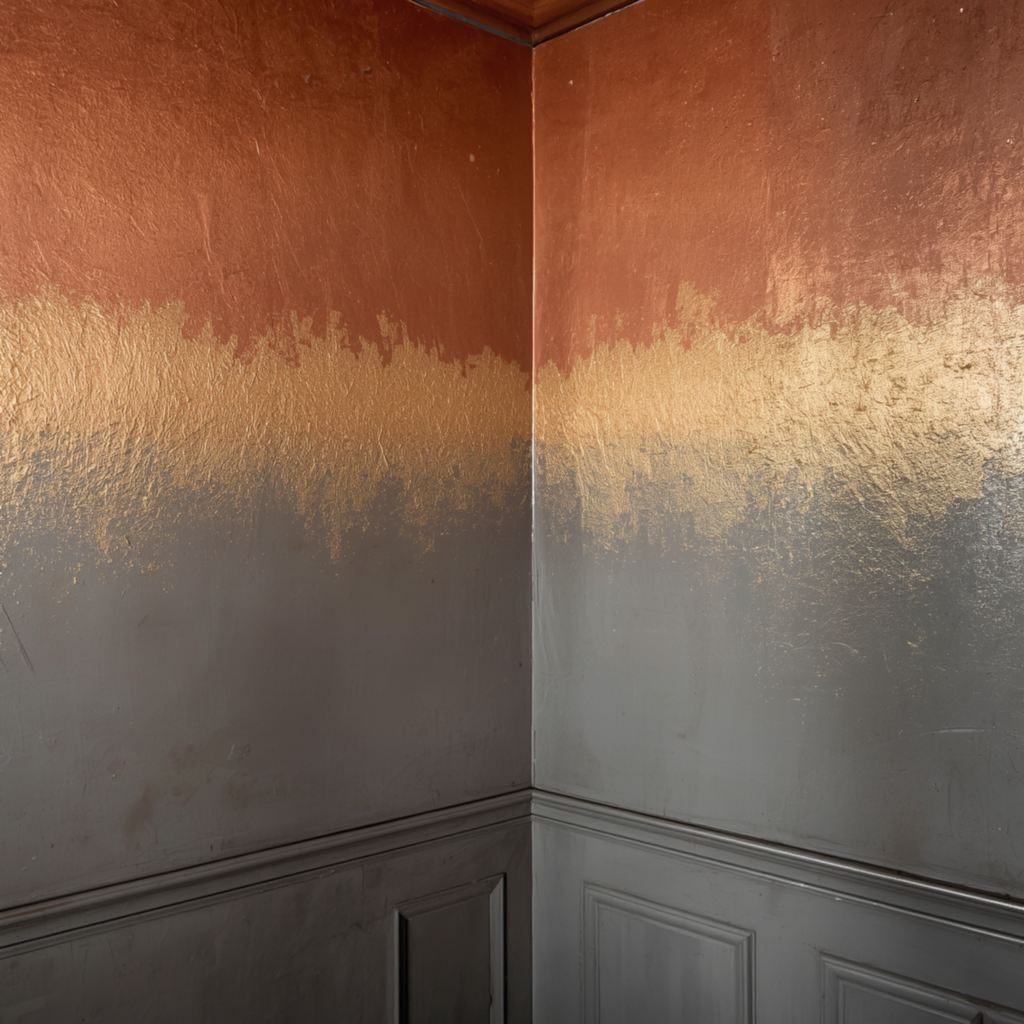
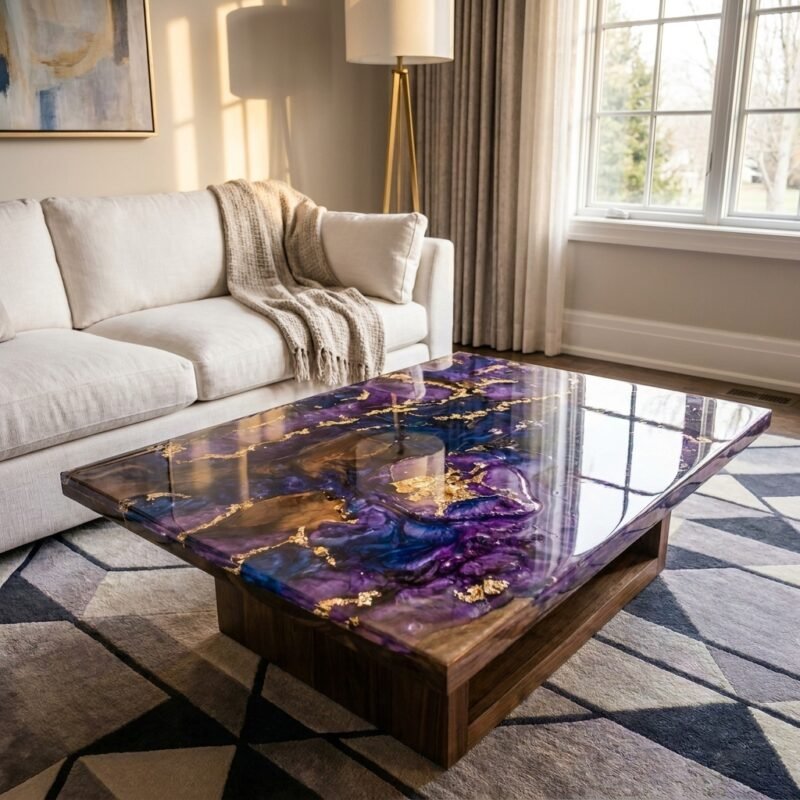
The Two-Tone Wall
Apply gold leaf in the bottom half of the wall, and copper leaf in the top half, with a soft blend in the middle. The warm metal gradient reads as incredibly sophisticated.
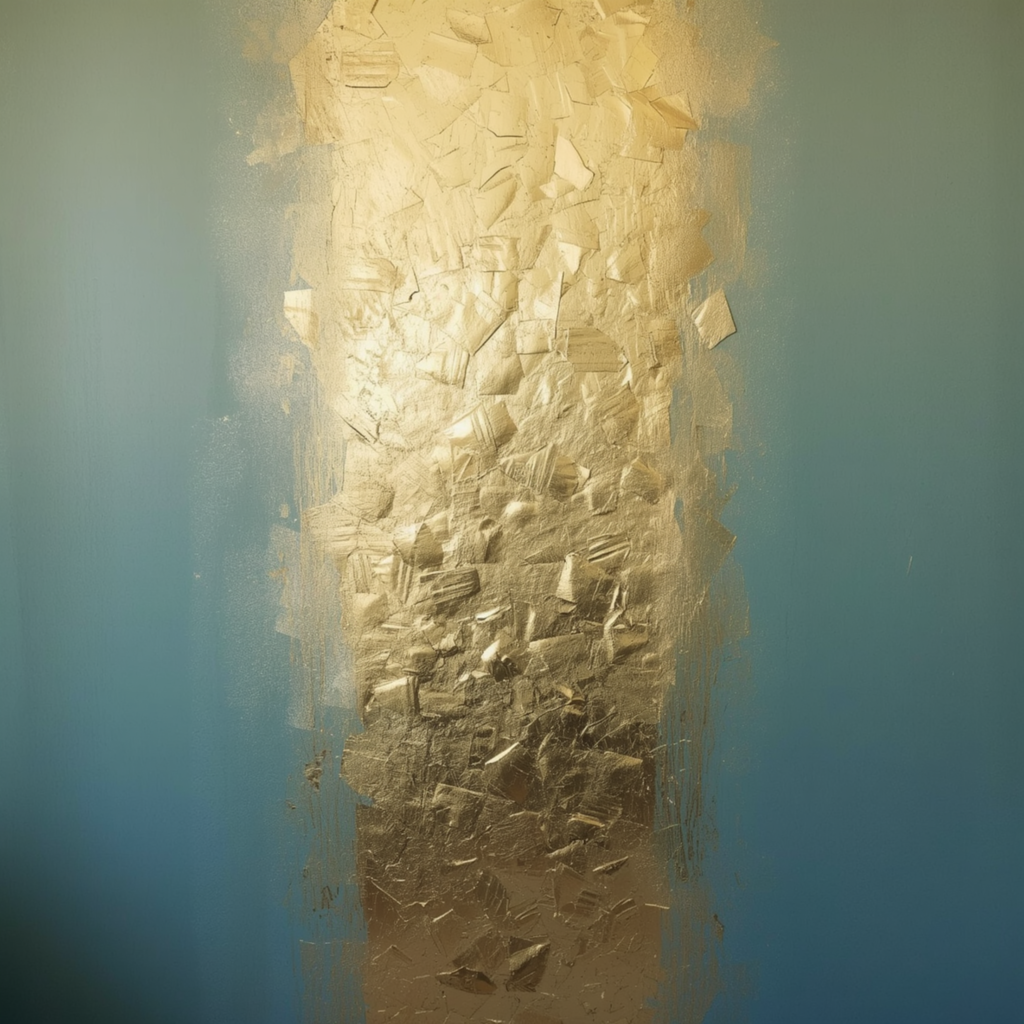
The Ombre Fade
Start with dense, overlapping gold foil at the center panel and gradually thin it out toward the edges so the gold seems to “fade” into the wall color. Dreamy, ethereal, absolutely pinnable.
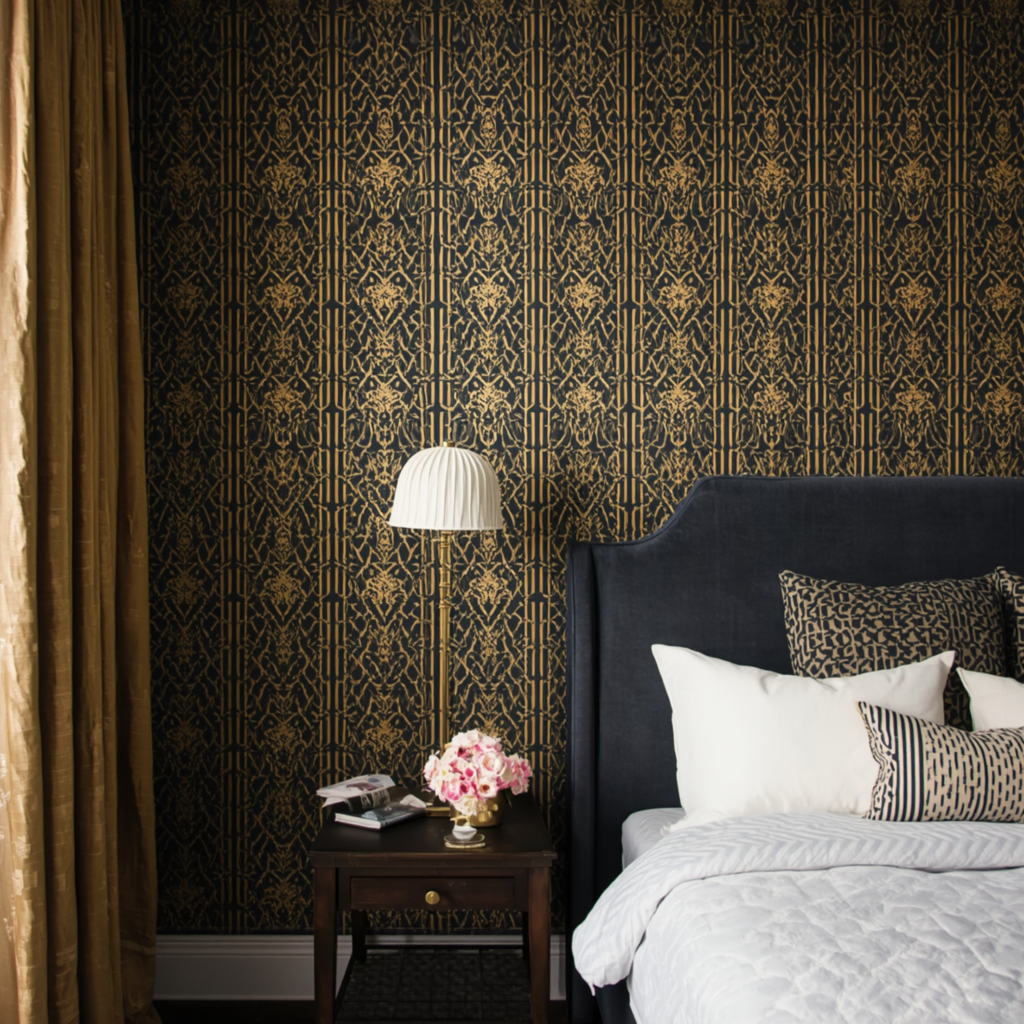
Black + Gold (The Boldest Move)
Paint your accent wall in deep matte black first, let it dry completely, then apply gold stencil work on top. The contrast is jaw-dropping. This works best with geometric stencils — art deco, chevron, or Moroccan tile.
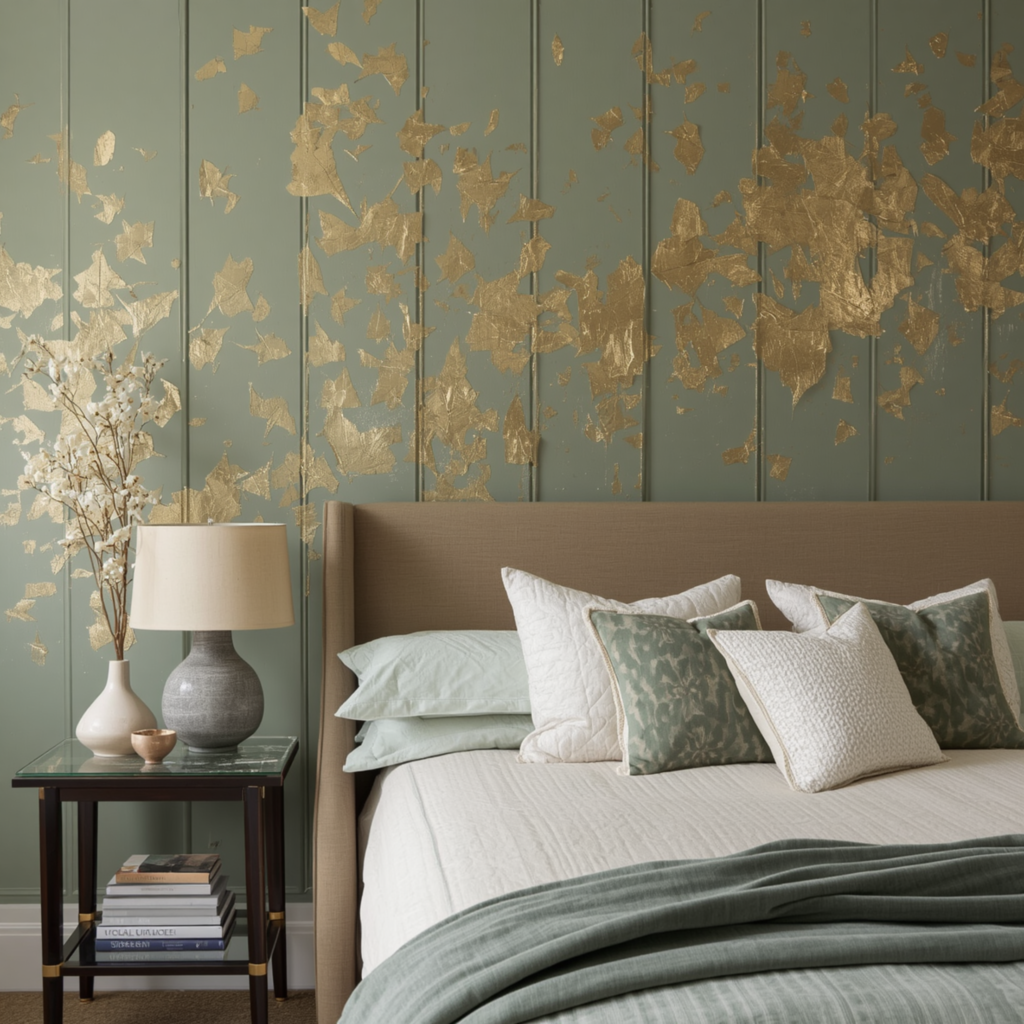
Soft Sage + Gold
Sage green + gold is one of the most-searched bedroom color combinations right now. Paint the wall sage green, then apply gold leaf in a scattered freeform pattern. The result is organic, earthy, and utterly luxurious.
Styling Your Gold Leaf Accent Wall
The wall is done — now let’s make sure the rest of the room does it justice.
Bedding: White, ivory, or champagne linen bedding lets the gold wall take center stage. Avoid busy patterns or dark bedding — they fight with the wall instead of complementing it.
Lighting: This is crucial. Gold leaf responds dramatically to light direction. Place a warm-toned pendant light or rattan chandelier overhead, and add warm LED bedside lamps on each side. Cold blue-toned light makes gold look harsh; warm light makes it glow.
Furniture: Natural wood tones (walnut, oak, rattan) balance the opulence of gold beautifully. If your furniture is white or painted, add warm wood accents through a side table, a tray, or a small bench at the foot of the bed.
Plants: A tall sculptural plant (like a fiddle leaf fig, snake plant, or olive tree) in a gold or terracotta pot in the corner of the room grounds the space and prevents it from feeling over-decorated.
Mirrors: A round or arched mirror mounted adjacent to (not on) your gold wall doubles the glow and makes the room feel larger.
Pin It, Save It, Do It
This is the kind of project that seems intimidating until you do it — and then you wonder why you didn’t do it sooner. Once that first corner of your gold leaf pattern starts shimmering, you’ll understand exactly why this technique has taken over Pinterest.
The best part? You’re not spending $800 on a headboard or $300 on a statement piece of art. You’re spending a Sunday afternoon and under a hundred dollars and walking away with a bedroom that looks like it belongs in a boutique hotel.
Save this post to your “Bedroom Makeover” board. And when you do it — please share your finished wall! Tag me or drop a comment below with your before and after. We genuinely love seeing these transformations.
Frequently Asked Questions
- Is this removable? I’m renting my apartment.
Yes — peel-and-stick gold foil applies to the painted wall surface, not into it. It can be removed carefully using a plastic scraper and a little patience. That said, adhesive residue can vary depending on your wall’s paint finish — flat and matte paints are more vulnerable than eggshell or satin finishes. Always test one sheet in a hidden corner first and leave it for 48 hours before committing to the full wall. If you want zero wall contact, apply your gold leaf to a large piece of stretched canvas or linen fabric, let it dry fully, and hang it as an oversized art panel — the effect is nearly identical and completely reversible.
- How long does a gold leaf accent wall last?
Unsealed, composition gold leaf will begin to flake, dull, and show tarnish spots within one to three years — especially in humid climates or rooms with fluctuating temperatures. Properly sealed with two to three coats of matte acrylic sealer, the same wall can look pristine for five to ten years or longer with no maintenance beyond an occasional gentle wipe with a dry cloth. Sealing is the single most important step for longevity — don’t skip it.
- What wall colors work best as a base for gold leaf?
Warm off-white and soft ivory are the most universally flattering — they let the gold shimmer without competing with it, and they photograph beautifully. Deep matte navy, charcoal, and forest green create the most dramatic contrast and look incredibly editorial. Warm terracotta or dusty clay tones sit harmoniously next to gold and read as rich and bohemian. Soft sage green is currently one of the most-searched combinations — the organic earthiness of sage against warm gold is stunning. Colors to avoid: bright saturated primaries like cobalt blue, fire engine red, or lemon yellow — these compete with the metallic and make the overall effect feel chaotic rather than luxurious.
- Can I do this on a textured wall (orange peel, knockdown, skip-trowel)?
You can, but the result will look different from a smooth wall. On a textured surface, the gold foil only adheres to the raised peaks of the texture, leaving the recessed valleys as the base wall color. This creates a more rustic, aged, or antiqued appearance — which some people love and intentionally seek out. If you want the refined, graphic look shown in most inspiration photos, lightly sand the texture down in your target area first, wipe away all dust, and apply a thin coat of primer before starting. For a quick rental-friendly workaround, mount a large smooth MDF panel or foam board on the textured wall and apply your gold leaf to that instead.
- What is the difference between gold leaf and metallic gold paint?
Gold leaf — even imitation composition leaf — consists of actual metallic flakes physically pressed onto the surface. This means they catch and reflect light from multiple angles as you move around the room, creating a shifting, three-dimensional shimmer that feels genuinely luxurious. Metallic paint is pigment-based: the sheen comes from tiny aluminum or mica particles suspended in acrylic, which reflect light more uniformly and flatly. Side by side on a wall, gold leaf almost always reads as richer, deeper, and more authentic. Paint is easier to apply over large areas, but for a feature wall where you want impact, gold leaf is worth the extra steps.
- My gold foil keeps tearing when I try to apply it. What am I doing wrong?
Composition gold leaf is extremely thin and tears easily, especially in dry conditions or when handled too forcefully. A few things that help: make sure the adhesive has reached the correct tackiness level before pressing the foil — it should feel like the sticky side of a Post-it note, not wet and not completely dry. Handle each sheet by its backing paper as long as possible and only peel it away at the last second. Press with the pads of your fingers rather than fingertip edges, using a light dabbing motion rather than dragging. If your room is very dry, run a small humidifier for 30 minutes before you start — it makes the foil significantly more cooperative. The gilding brush is also your best friend here: it transfers and smooths the foil with far less tearing than fingers alone.
- Can I use real 24-karat gold leaf instead of composition leaf?
You can, and genuine gold leaf will never tarnish — unlike composition leaf, which is a copper-zinc alloy that can oxidize over time without sealing. However, real gold leaf costs considerably more (typically $3–$10 per sheet versus a few cents per sheet for composition), it is even thinner and more fragile, and it requires a different application technique using oil-based sizing and specialized gilding tools. For a bedroom accent wall DIY project, the visual difference between well-applied sealed composition leaf and genuine gold leaf is minimal to most eyes. Save real gold leaf for smaller decorative projects where the extra care and cost make sense.
- How do I keep the stencil pattern perfectly aligned across the entire wall?
This is the step most beginners underestimate. The key is to snap a horizontal chalk line or draw a pencil line with a level at the midpoint of the wall before placing a single stencil. Then mark the vertical center from that line. Always start your first stencil placement at the exact center of the wall and work outward in both directions simultaneously. Most large stencils have registration marks — small notches or crosshairs at the edges — that align with the previous stencil position. If yours doesn’t, lightly mark your own registration dots in pencil as you go. Step back every three to four placements and assess from across the room: misalignment that’s invisible up close becomes very obvious from a distance.
- Do I need to prime or repaint the wall before starting?
Not necessarily. If your wall is already painted in good condition with no major peeling and no glossy finish, you can apply gold leaf directly to the existing paint. Eggshell and satin finishes work best — smooth enough for clean transfer and durable enough to hold adhesive. If your wall has a high-gloss finish, lightly scuff it with 220-grit sandpaper and wipe away all dust first — the adhesive needs a slightly porous surface to grip. If the wall is freshly painted, wait a full 72 hours before beginning (not just until it feels dry to the touch), since fresh paint continues off-gassing for several days and can prevent proper adhesion.
- Can I do a partial gold leaf wall instead of covering the entire surface?
Absolutely — and a partial treatment can look even more intentional than full coverage. Popular partial approaches include a horizontal band of gold stencil work running at headboard height (roughly 36″–48″ from the floor) across the full wall width; a large centered arch or diamond shape filled with gold foil with the rest left as the paint color; or a dense center section that fades to nothing toward the outer edges using the ombre technique. Partial treatments also cost less, take less time, and are more forgiving for first-timers — they’re a great starting point before committing to a full wall.
- The gold looks patchy and uneven after it dried. Can I fix it?
Yes, and this is a very fixable problem. Patchiness usually means the adhesive was applied unevenly, the foil wasn’t pressed firmly enough, or the adhesive had dried too completely before the foil was pressed. To fix it, wait until the first layer is fully dry (at least an hour), then apply a second round of adhesive to the thin or patchy areas, let it reach tackiness, and apply new foil sheets on top. Multiple thin layers actually look better than a single heavy layer — they build depth and richness. Once you’re satisfied with coverage, seal the wall and the result will read as beautifully complex rather than patchy.
- Will the gold leaf adhesive smell? Is it safe to use in a bedroom?
Water-based gold leaf adhesive has a mild, faint odor during application that dissipates within a few hours — it’s non-toxic and safe for living spaces. Keep the room ventilated during application and the smell will be completely gone by the time you finish. The gold leaf sheets themselves are odorless. The sealer spray has a stronger smell and requires better ventilation — apply it with windows open and a fan running, and give the room two to three hours to air out before sleeping in it. Look for a sealer labeled “low-VOC” or “non-toxic” for the most bedroom-friendly option.
- Is this a one-person job or do I need a helper?
The application itself is easily done solo — working alone often produces a more consistent rhythm and result. However, a second person is genuinely helpful during the planning and setup phase: one person holds the stencil flat while the other tapes it, and a second set of eyes checking alignment from across the room saves a lot of corrective work later. If you’re doing it alone, invest in extra painter’s tape and a can of repositionable spray adhesive for the back of the stencil — these two things eliminate most of the challenges of solo stencil work.
- What temperature and humidity conditions are best for applying gold leaf?
Ideal conditions are between 65°F–75°F (18°C–24°C) with moderate humidity (40%–60% RH). In very cold rooms, the adhesive dries slowly and stays wet longer than expected. In very hot or dry conditions, it can dry too quickly, leaving you rushing to press foil before the window closes. Very high humidity can prevent the adhesive from ever reaching the ideal tacky stage. If you’re working in a dry climate or in winter with the heating running, run a humidifier in the room for 30 minutes beforehand. In a humid climate or summer, air conditioning or a dehumidifier helps the adhesive reach tackiness faster and more evenly.
