As an Amazon Associate we earn from qualifying purchases. Here’s how it works.
Walk into any well-organized professional kitchen and notice the first thing that strikes you — it’s not the equipment. It’s the system. Every tool has a place. Every surface has a purpose. Nothing requires hunting for, and nothing is ever in the wrong spot during service.
Your backyard grill deserves the same thinking.
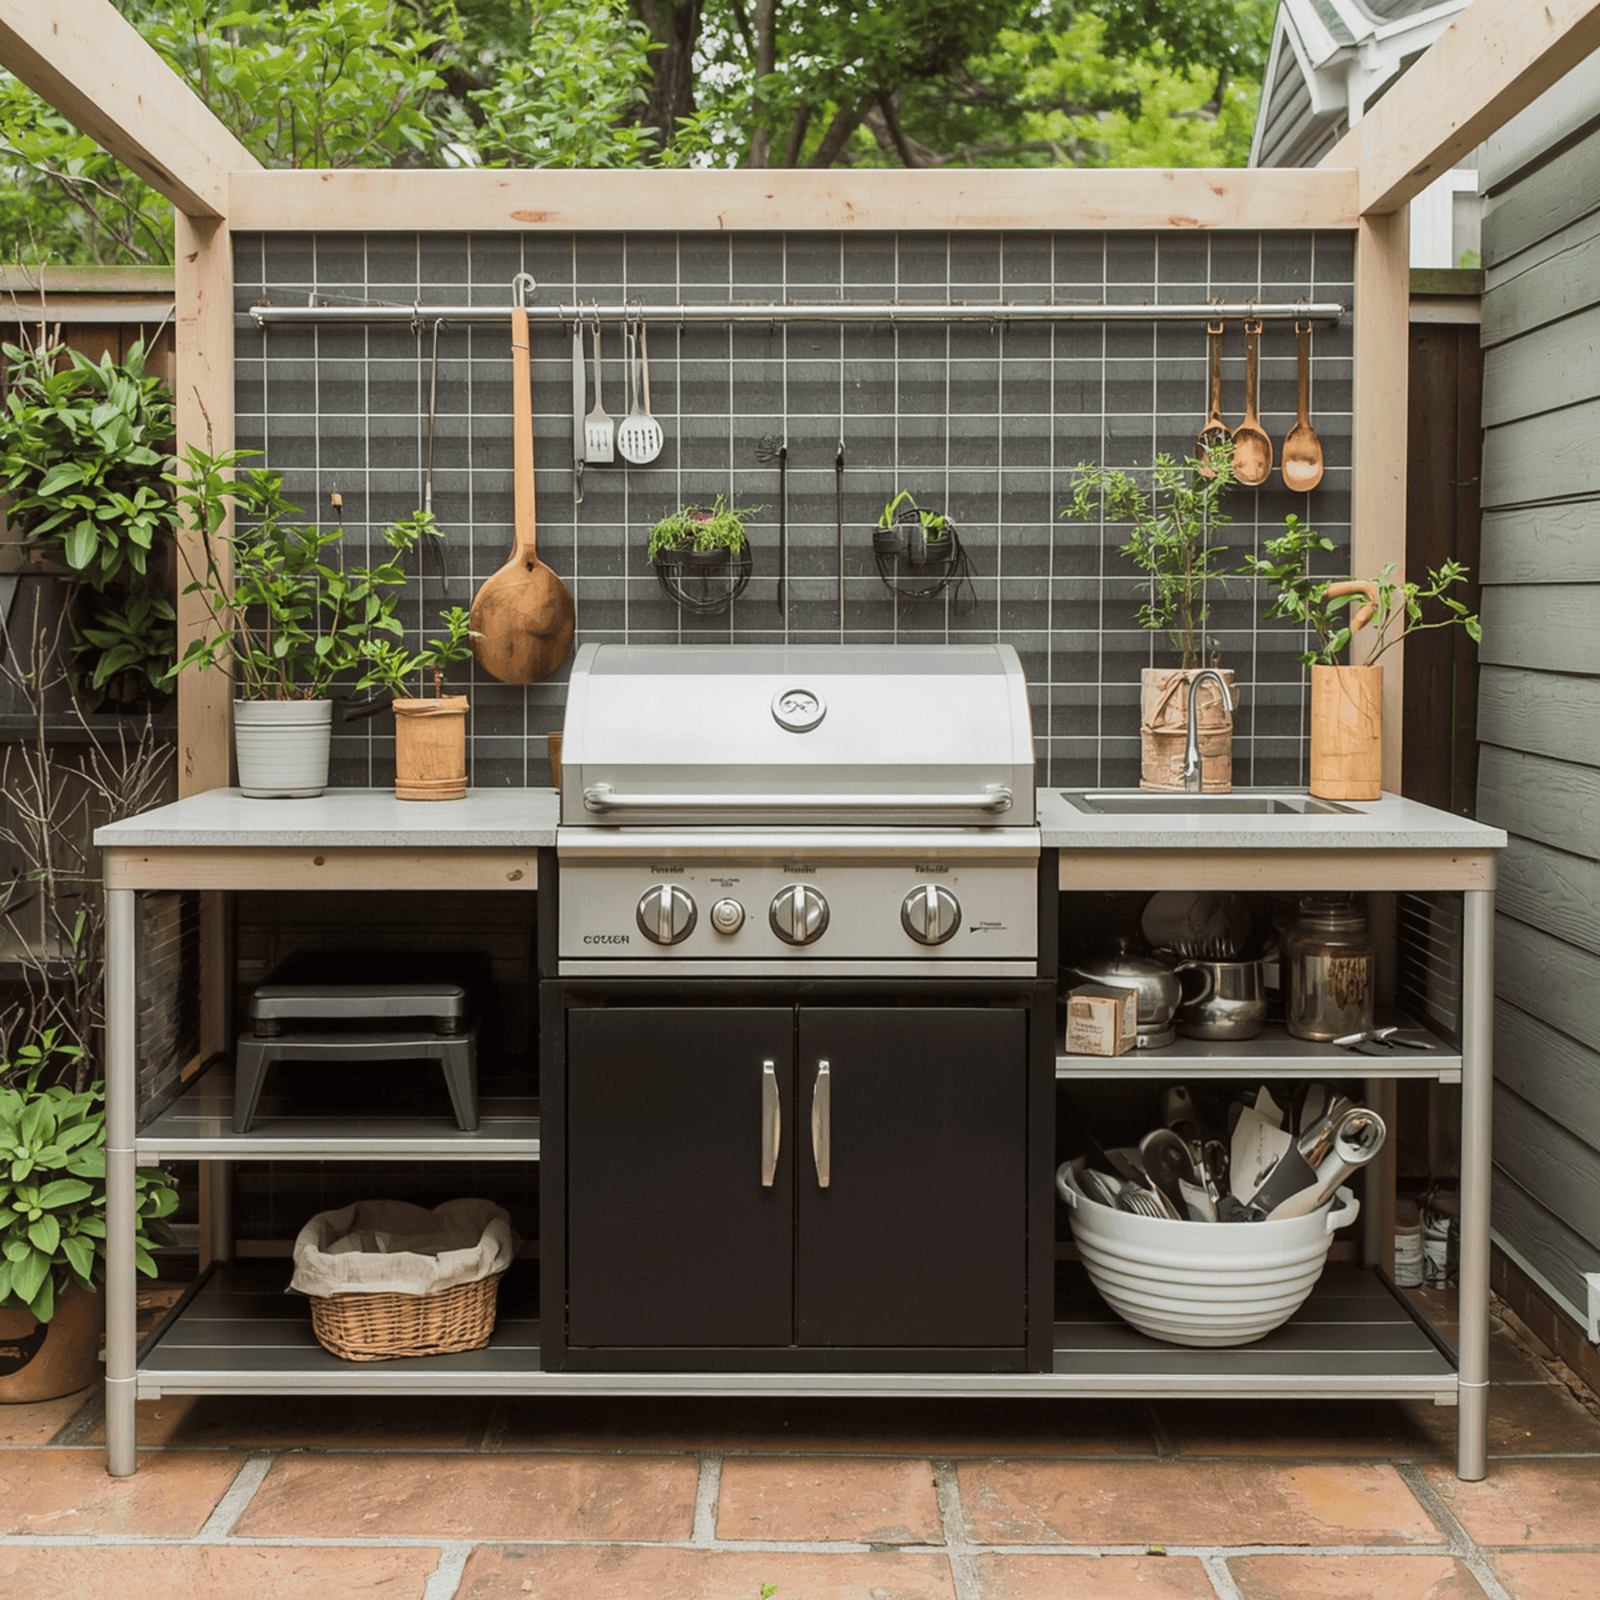
A great DIY BBQ grill station setup isn’t about spending a lot of money or building a permanent outdoor kitchen. It’s about creating a purposeful outdoor cooking workspace where everything you need during a cookout lives within arm’s reach — so you’re cooking with intention instead of scrambling between the grill, the kitchen, and the lawn chair where the tongs somehow ended up.
The good news? You can build a genuinely impressive outdoor grill station in a single afternoon, with tools you already own and a handful of smart purchases. This guide walks you through every step — what to do, in what order, and exactly why each piece of the setup matters.
Whether you’re hosting a 4th of July cookout for 30 or just want your backyard cooking area to finally work the way it should, this is the guide to follow.
Why Your Current Grill Setup Probably Isn’t Working?
Before we build, let’s be honest about what most backyard BBQ setups actually look like:
A lone grill sitting in the middle of the patio. Tools in a bucket nearby — or worse, inside the kitchen. A wobbly side table pushed at an angle. The sauce bottle sitting directly on the deck. Paper towels a full walk away. The wireless thermometer inside because there’s nowhere to set it outside.
Every one of those friction points adds up across a 4–6 hour cookout. You leave the grill to find the tongs. You leave again to get a platter. You leave again for paper towels. That’s not hosting — that’s running errands while food cooks without you.
A proper outdoor BBQ cooking station eliminates all of that. One organized zone. Every tool in its spot. Every surface doing a specific job. The cook stays at the grill and the food is better for it.
Here’s how to build that station step by step.
What You’ll Need — Full Materials and Gear List?
Gather these before you start. The setup goes much faster when everything is in the backyard and ready to go.
The Grill
- Charcoal kettle grill (22-inch minimum) or freestanding gas grill with built-in side shelves
- Grill casters should lock — check this before you start positioning
Surface and Protection
- Ember-resistant BBQ grill mat / deck protector
- Heavy-duty all-weather grill cover (matched to your grill’s dimensions)
Prep and Work Surfaces
- Stainless steel grill cart / outdoor prep table (with lower shelves)
- Large food-safe cutting boards × 2 (different colors — one for raw, one for cooked)
Tool Organization
- Pegboard organizer panel (2×4 ft minimum) with mounting hardware
- Assorted pegboard hooks and S-hooks
- OR Heavy-duty magnetic tool strip (alternative to pegboard — no frame required)
Tools to Load at the Station
- Long-handled BBQ tongs (16-inch minimum)
- Wide offset spatula
- Grill fork
- Silicone basting brush
- Grill brush with scraper
- Silicone heat-resistant grill gloves
- Wireless dual-probe meat thermometer
- Instant-read thermometer
- Water spray bottle
Extras That Make a Real Difference
- Stainless outdoor paper towel holder
- Nitrile food-safe gloves (box of 100, on the lower cart shelf)
- Heavy-duty aluminum foil and disposable drip pans
- Small trash bag clipped to the cart edge
Step-by-Step: Building Your DIY BBQ Grill Station
Step 1: Scout Your Location and Plan the Station Layout
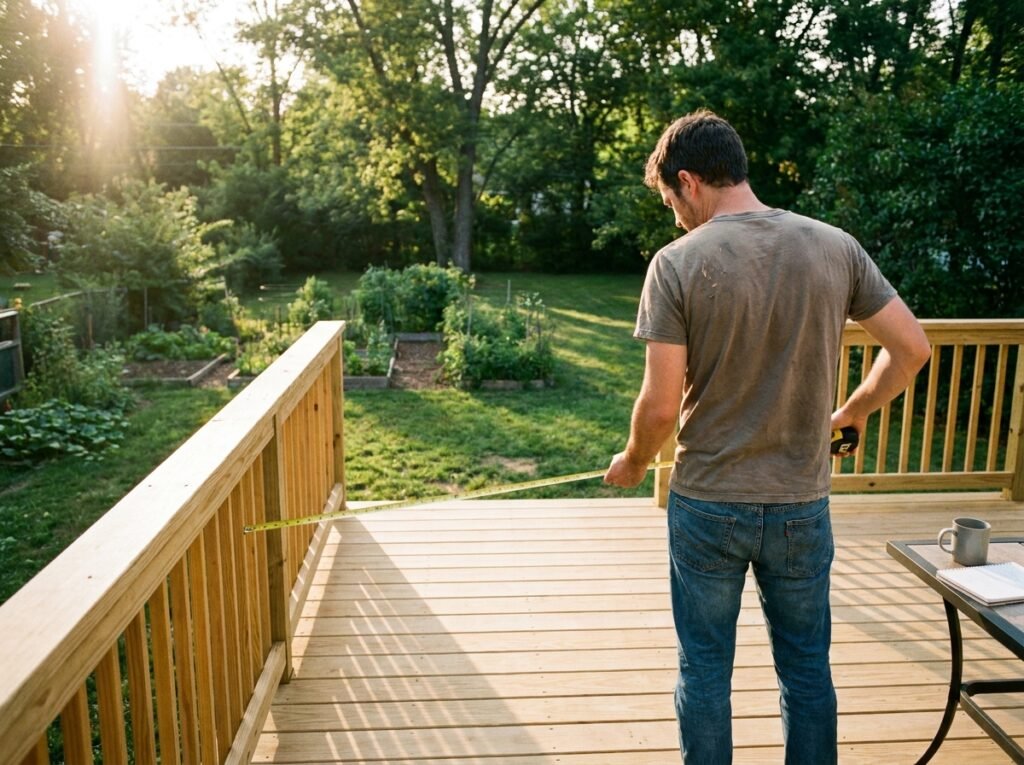
Before anything moves outside, walk your backyard or patio and pick the right spot for your grill station setup. This decision is more important than most people realize — where your grill lives determines how every other part of the station connects around it.
The four rules for grill station placement:
- 10 feet minimum from any structure. This applies to your home’s siding, wooden fencing, deck railings, pergola posts, and any overhanging tree branches or roof eaves. Both charcoal and gas grills need this clearance for fire safety and smoke management. No exceptions.
- Upwind from your guests. Notice where the afternoon breeze typically comes from on your property. Position the grill so prevailing wind moves smoke away from your dining and entertaining area — not through it. Your guests should smell the food from across the yard, not sit inside a smoke cloud.
- Working-side access from two directions. Your BBQ prep station will live immediately beside the grill — most likely to the right (or to your dominant hand side). Make sure that side of the grill has at least 3–4 feet of clear, open space. Don’t push the station against a fence or wall where the working side is blocked.
- Level ground. An uneven grill cooks unevenly — grease pools to one side, flare-ups happen where you don’t expect them, and the grill feels unstable. On a deck, check with a level. On grass, compact the area first or lay a flat solid base under the grill feet.
Once your spot is chosen, mark it mentally or with chalk. Everything else in your outdoor cooking station setup radiates outward from this anchor point.
Step 2: Lay the Grill Mat — Protect Your Deck Before the Grill Moves
This 60-second step is the most skipped in any backyard grill station build, and the one people regret skipping the most.
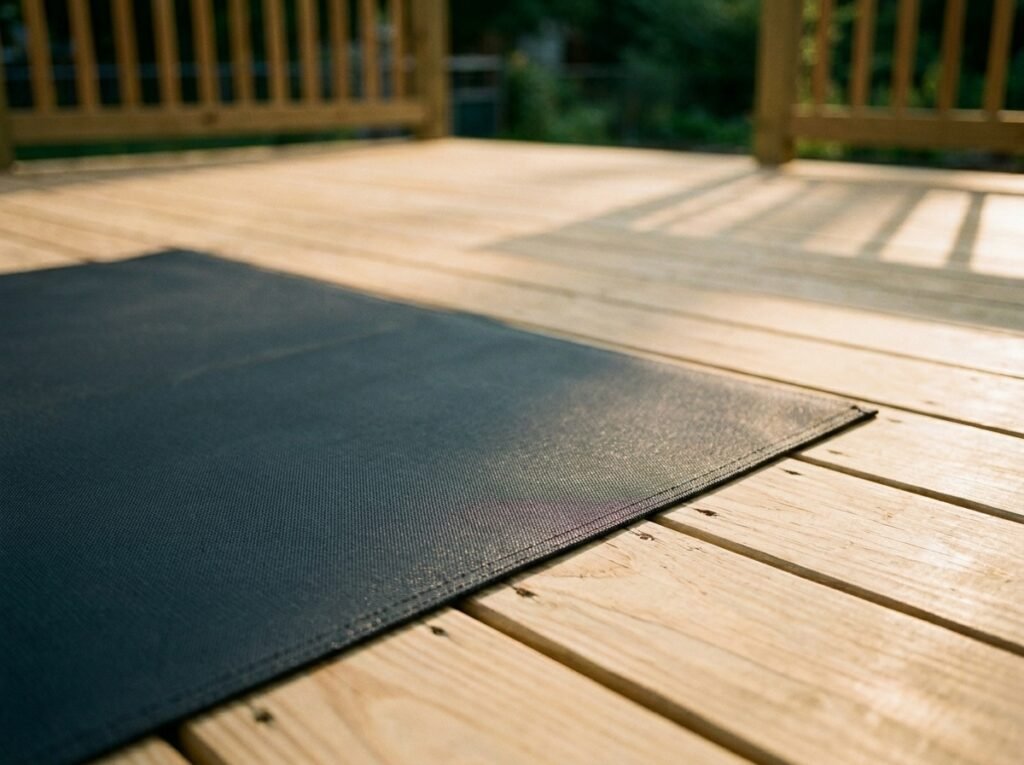
A BBQ grill mat — also called a deck protector or ember mat — is a heat-resistant, waterproof mat that sits under your grill on any deck or patio surface. It catches every grease drip, ash flake, and coal ember that would otherwise permanently stain or scorch your decking.
And here’s the critical detail: lay this mat before you move the grill into position, not after. Sliding a grill already in place onto a mat is awkward, scratches the deck in the process, and usually ends with the mat positioned badly anyway.
Lay the mat first. Position the grill on top of it. Done.
What size mat do you need? Measure your grill’s footprint (length × width at the base, including legs) and add 6 inches of overhang on all four sides. This overhang catches side drips and loose ash that miss the grill’s footprint. Most standard 22-inch kettle grills need a 36×36-inch mat minimum. A 3-burner gas grill typically needs a 48×30-inch mat.
🛒 Look for a mat that is specifically rated as ember-resistant (not just heat-resistant — there’s a meaningful difference), UV-resistant so it doesn’t degrade sitting outside through a summer season, and non-slip on the bottom surface so the grill doesn’t shift.

Position and Anchor Your Grill
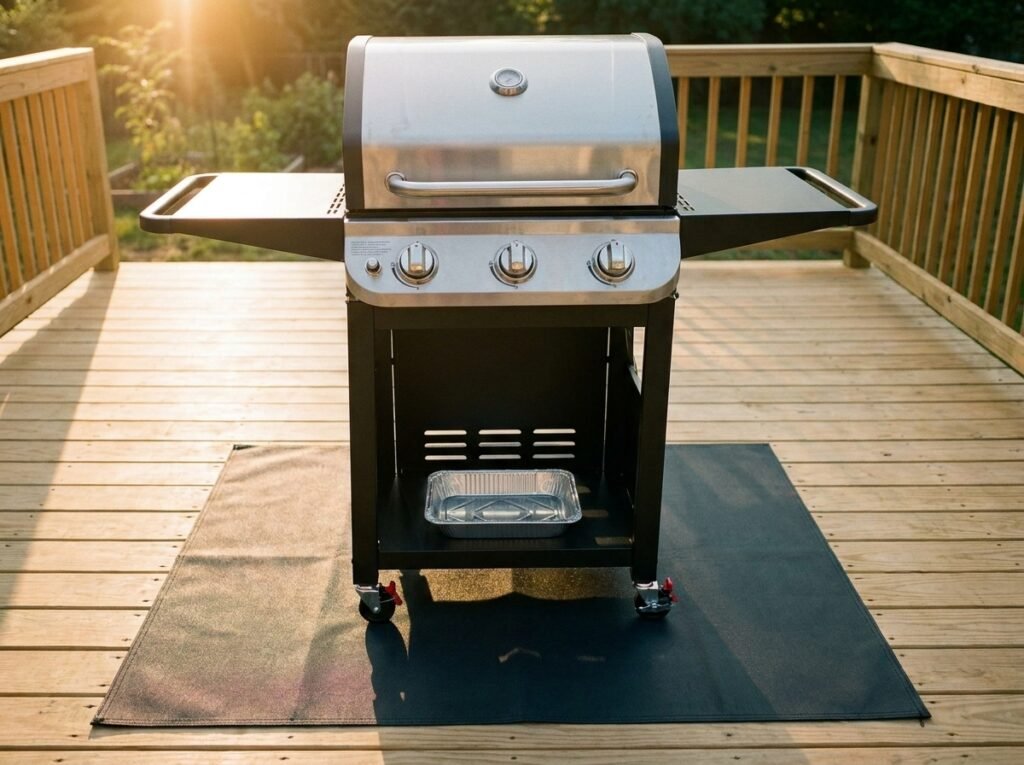
Now the grill moves into place — on top of the mat, in the spot you scouted in Step 1.
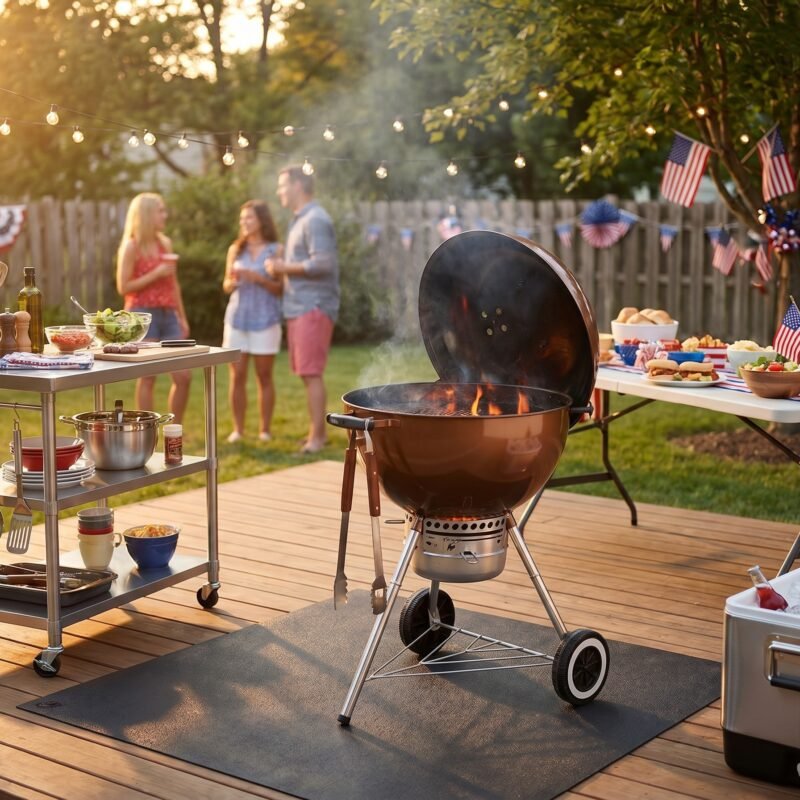
If your grill has casters (wheels), roll it into position and immediately lock every caster that has a lock mechanism. A grill that can roll on a slightly uneven deck surface is a genuine hazard during cooking. Check that it sits level once it’s in position — if any leg feels unstable, adjust before lighting.
On the grill itself: Before your first cook, set a disposable aluminum drip pan inside the grill beneath the grate. For charcoal grills, this sits in the ash catcher zone below the charcoal grate. For gas grills, it goes on the flavorizer bars or heat shields. The drip pan catches grease before it hits the bottom of the grill — reducing flare-ups dramatically and making post-cookout cleanup take 5 minutes instead of 30.
Which grill works best for a DIY station?
A gas grill with built-in fold-out side shelves is the easiest anchor for a backyard grill station because the side shelves give you immediate stable work surface on both sides of the grill without needing to position your cart quite as close. The Weber Spirit E-310 3-Burner Gas Grill is our top recommendation in this category — three independently controlled burners for multi-zone cooking, two large fold-out side shelves, and a build quality that holds up for years of regular outdoor use.

For charcoal lovers, a 22-inch kettle grill anchors the station beautifully — pair it with the side cart in Step 4 and you have everything a gas grill’s side shelves provide, with superior smoke flavor as the trade-off.
Step 4: Add Your Side Prep Cart — The Station’s Operational Core
Your grill is in place. Now you need a dedicated prep surface immediately beside it — and this is the step that transforms a lonely grill into a real outdoor BBQ cooking station.
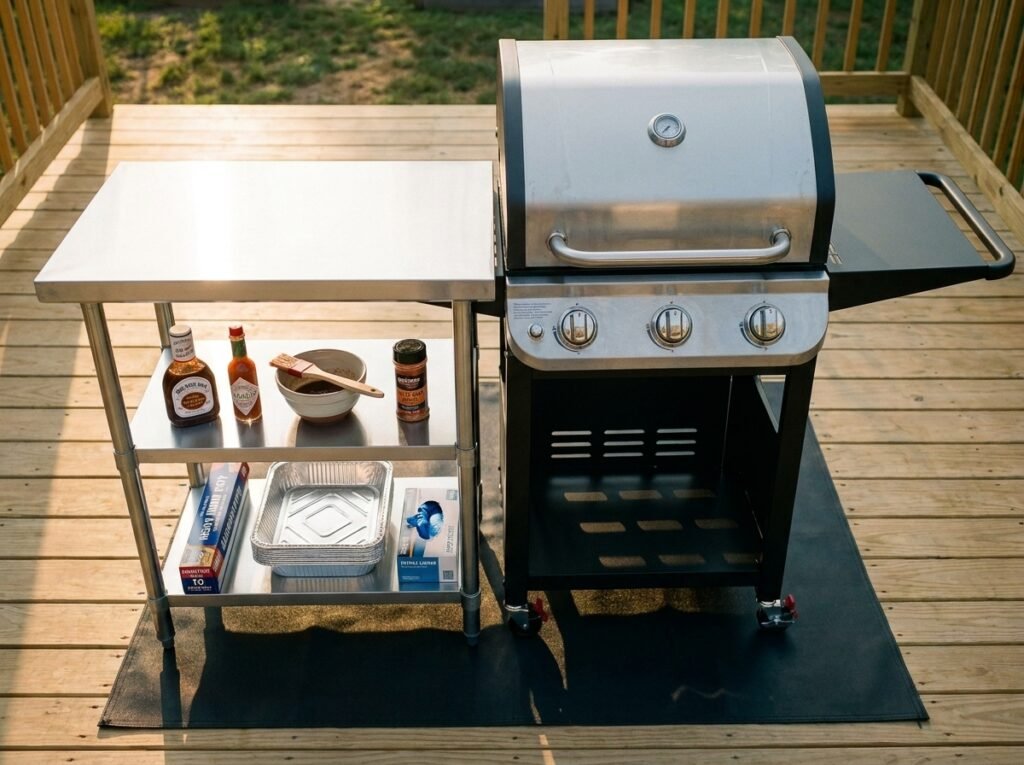
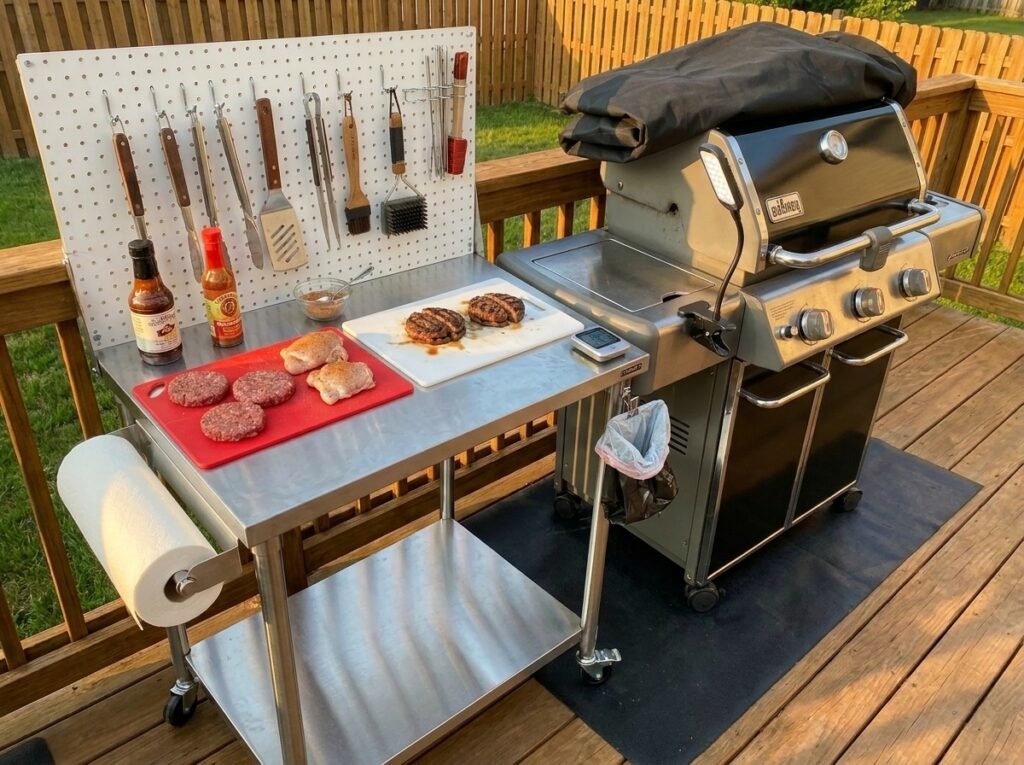
Position a stainless steel grill cart or outdoor prep table flush against the right side of your grill (or the left, depending on your dominant hand and the layout of your space). The surface height of the cart should match — or come within 1–2 inches of — the height of the grill’s side shelf. This lets you slide food from the grill grate directly to the prep surface without lifting or reaching.
Why stainless steel specifically?
Stainless is the right material for an outdoor prep surface. It’s fully weather-resistant, completely food-safe, non-porous (no bacteria absorption), and wipes completely clean with a damp cloth even after a greasy cooking session. Wood tables warp and absorb grease. Plastic tables crack in UV exposure. Stainless stays clean and solid through years of outdoor cookouts.
🛒 The DWVO Three-Shelf Stainless Steel Grill Cart is the piece of equipment we recommend most consistently for a DIY backyard grill station. Full stainless top surface, two lower storage shelves for your sauces and supplies, locking casters so the cart holds its position, and a height that aligns with most standard grill shelves straight out of the box. It functions as a seamless extension of the grill’s workspace.

Once the cart is in position, load the three shelves:
- Top surface: Keep completely clear except for active work. This is your prep and plating zone.
- Middle shelf: Your sauce and condiment station. BBQ sauce, hot sauce, marinade bowl, rub container, basting brush.
- Bottom shelf: Backup supplies. A roll of heavy-duty foil, a stack of drip pans, a box of nitrile gloves, and a small trash bag clipped to the shelf edge.
Step 5: Build Your Tool Organization System
With your grill positioned and your prep cart loaded, it’s time to give your tools a permanent home. This is the step that separates a professional outdoor cooking station from a pile of equipment that happens to be outside.
The goal is simple: every tool you use during a cookout should be visible, accessible, and retrievable in one reach — without searching, without picking through a bucket, without looking away from the grill.
- Option A — The Pegboard System (Best for Semi-Permanent Setups)
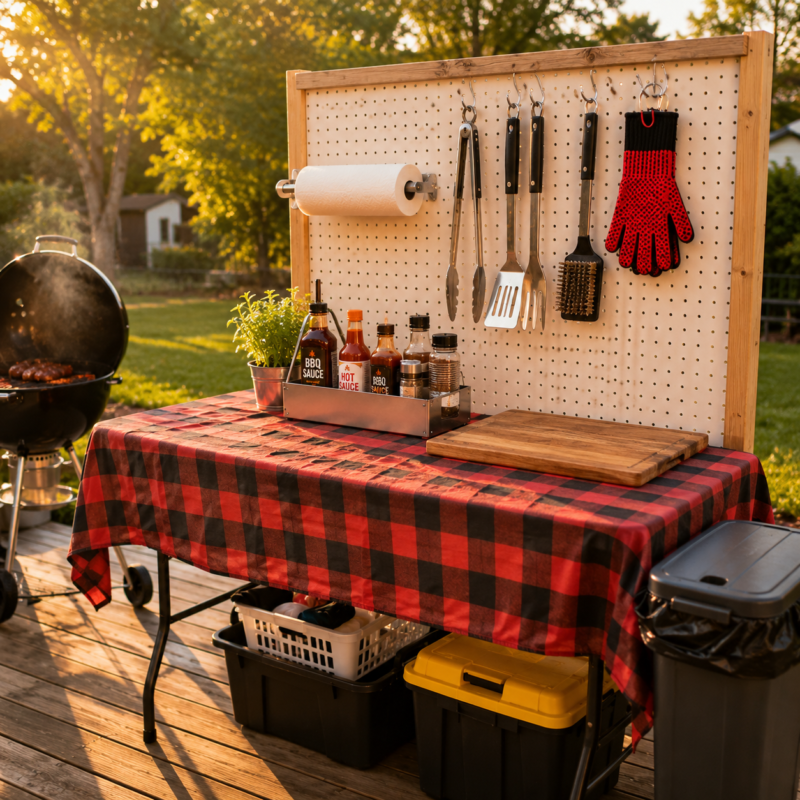
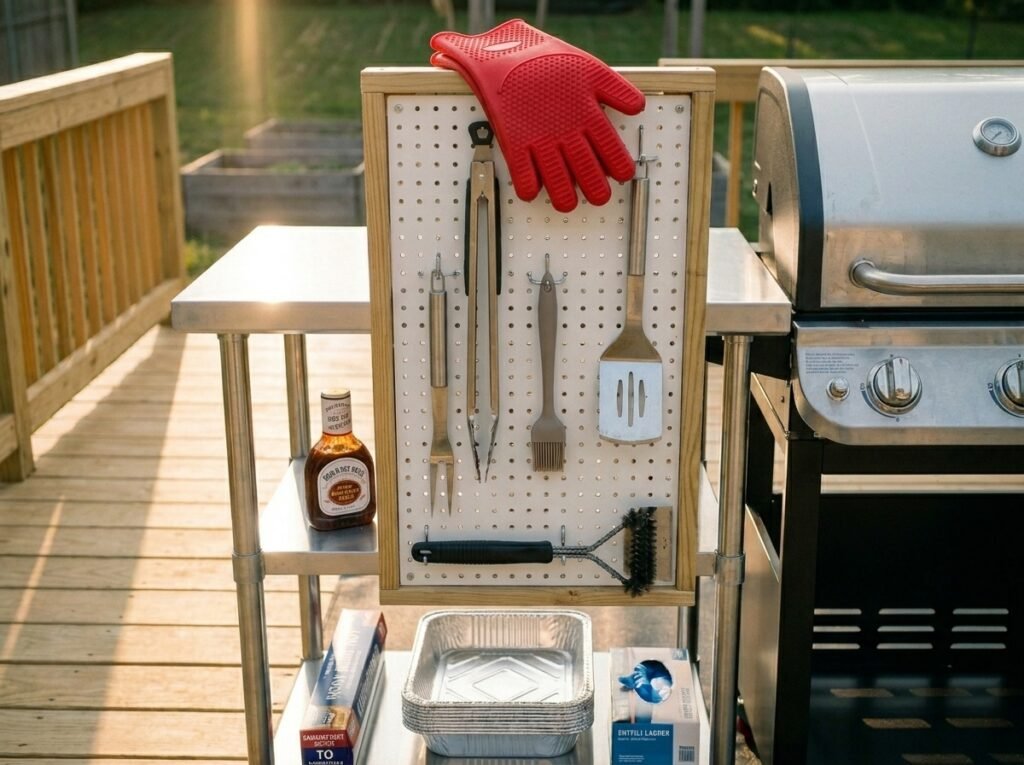
A pegboard panel mounted to a simple freestanding wooden frame gives you a full vertical tool wall directly behind or beside your grill station. Every tool hangs on its own hook, visible from 10 feet away, accessible in under a second.
Build the frame with two 2×4 studs and a crossbar — a 20-minute project with a drill and four screws. Mount a 2×4 foot pegboard panel to the frame. Stand it behind your prep cart. Done.
🛒 The VEVOR Pegboard Organizer Kit is our top pick — it includes the pegboard panel, a complete starter set of hooks in multiple sizes, and mounting hardware, so you’re not sourcing these pieces separately. It’s rated for outdoor use and the panel is treated to resist warping from moisture exposure.

- Option B — The Magnetic Strip (Best for Portability and Speed)
If you want a simpler setup with zero frame-building, a heavy-duty magnetic tool strip mounted to the side panel of your stainless cart holds all your metal tools — tongs, spatula, fork, brush handles — magnetically on the surface. Mounts with two screws and takes about 4 minutes to install.
This isn’t quite as visible or as expandable as a pegboard, but for a first-season setup or a renter-friendly build, it’s a completely workable tool organization system.
What goes on the tool wall:
- Long-handled tongs → most-used tool, most accessible position (eye level, center)
- Wide offset spatula → immediately beside the tongs
- Grill fork → third hook from the left
- Silicone basting brush → lower hook (used less frequently)
- Grill brush + scraper → bottom row (used at start and end, not mid-cook)
- Silicone grill gloves → top hook, most visible — these get grabbed in a hurry
Step 6: Load Your Tools and Stock the Station
With the organization system in place, it’s time to load every tool into its designated spot and stock the station for a full cookout. This step is about more than just hanging the tools — it’s about confirming that the outdoor cooking station is genuinely self-contained and ready to run a 4–6 hour cookout without a single trip back into the kitchen.
Here’s the complete station stock list — everything that lives permanently outside, never inside:
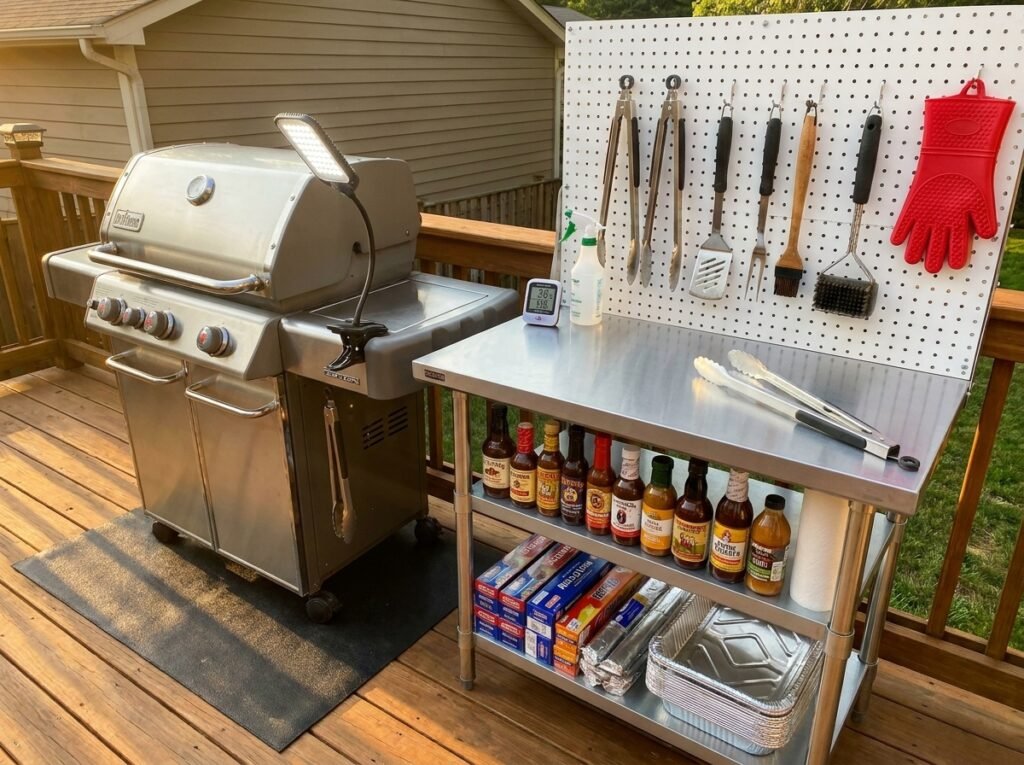
On the pegboard or magnetic strip: Every tool listed in Step 5, plus: a waterproof headlamp or flashlight for evening cooking (small, hooked to the pegboard corner), and a clip-on grill light mounted to the grill handle itself.
On the cart’s middle shelf: BBQ sauce, hot sauce, marinade bowl, dry rub container, basting brush standing in a small jar. These items are restocked before every cookout but live on the cart, not in the kitchen.
On the cart’s lower shelf: Heavy-duty aluminum foil, stack of disposable drip pans, box of 100 nitrile gloves, small trash bag clipped to the shelf edge, backup paper towels.
At the front edge of the cart top: Wireless meat thermometer display unit, spray bottle filled with water, and long-handled tongs (duplicated from the pegboard — one pair stays on the cart top for quick reaches during active cooking).
One tool deserves a specific callout here:
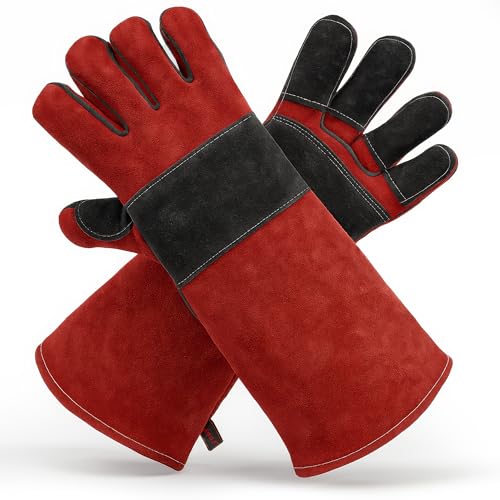
The silicone grill gloves. Most grill stations have standard oven mitts somewhere nearby. Replace them. Silicone grill gloves rated to 450°F or higher give you full forearm protection when reaching over a live grill and — critically — enough grip dexterity to actually hold a heavy cast iron pan, reposition a hot grill grate, or carry a full rack of ribs to the serving table securely. Standard oven mitts fail at all of these.
We keep the Grill Armor Heat & Fire Resistant Gloves at the top hook on the pegboard at every cookout. Rated to 932°F, 16-inch length that protects the forearm when reaching across a live grill, and textured surface that grips through grease. Once you cook with proper grill gloves, you won’t go back to oven mitts.
Step 7: Set Up Your Prep Surface — The Two-Board System
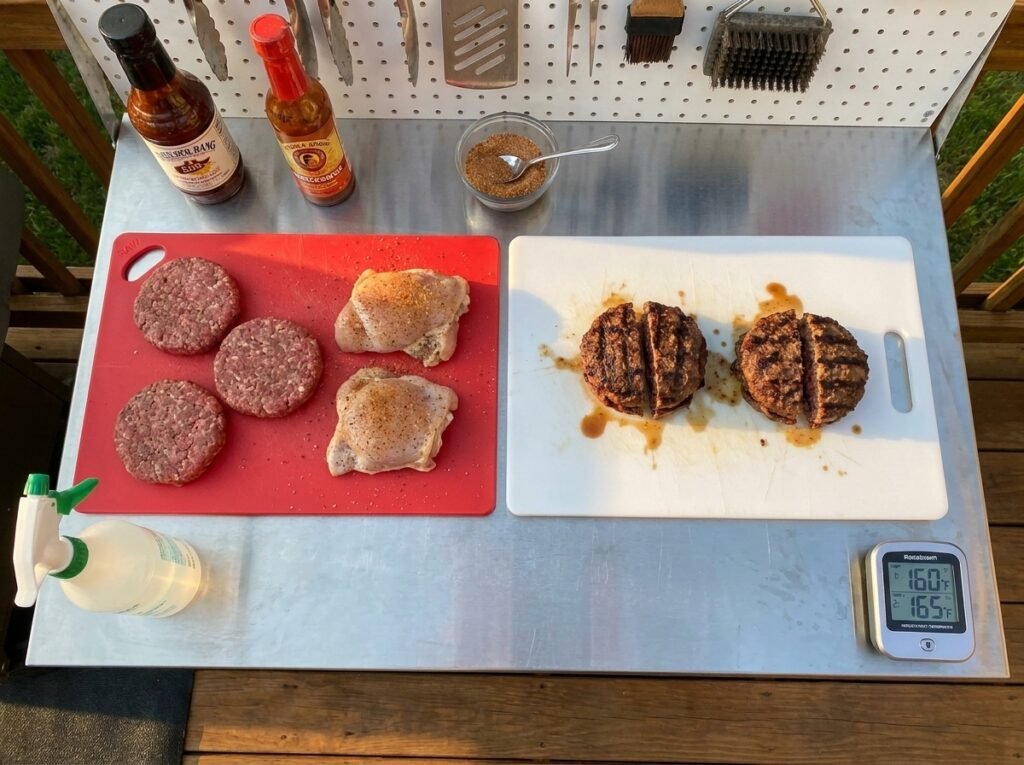
The top of your prep cart is the most active surface in your entire DIY BBQ grill station. How you organize it during the cookout determines whether raw and cooked food stay properly separated — a food safety essential, not a suggestion.
The two-board system is the solution, and it takes 30 seconds to implement.
Board 1 — The Raw Board A large red or clearly labeled cutting board positioned on the left side of the cart top, used exclusively for raw proteins: placing raw burger patties before they go on the grill, trimming raw chicken, resting marinated steak. This board does not touch cooked food — ever.
Board 2 — The Ready Board A white or different-colored board positioned on the right side of the cart top, used for everything coming off the grill: resting cooked steaks and brisket, slicing finished chicken, assembling burgers. This board never touches raw protein.
The color difference between the boards is the visual cue that makes the system work without thinking about it in the heat of cooking. When you’re managing 20 burgers, a rack of ribs, and three chicken thighs simultaneously, you should not have to stop and remember which board is which.
The rest of the top surface:
- Back edge: Your sauce station — BBQ sauce, hot sauce, and a rub container within reach but not in the way of the cutting boards
- Front left corner: The spray bottle — always within one reach of the grill handle
- Front right corner: The wireless thermometer display unit
Step 8: Mount the Paper Towel Holder and Add Final Touches
This final setup step takes less than five minutes and prevents one of the most consistently annoying friction points at any outdoor BBQ station — reaching for a paper towel and finding none within reach.
During an active cookout you will use paper towels constantly. Pat proteins dry before they hit the grill (this is the single biggest factor in getting a proper sear on a burger or steak). Wipe tools between raw and cooked uses. Blot grease off the prep surface between protein batches. Clean your hands every time you switch between raw and ready. Wipe the grill brush after cleaning the grate.
Every one of those uses requires a paper towel to be within arm’s reach. When the paper towels are inside the kitchen, you walk for them — every single time.
Mount a stainless outdoor paper towel holder to the side panel of your prep cart (two screws, 3 minutes) or to the pegboard frame at elbow height. Load it with a full roll. Keep a backup roll on the cart’s lower shelf.
The final touches that complete the station:
- Clip-on LED grill light mounted to the grill handle. You won’t need it at 2 PM. You absolutely will need it at 8:30 PM when you’re finishing the last batch of chicken and the sun is below the fence line. Mount it before the party, not when you need it.
- Trash bag clipped to the cart edge. A small kitchen trash bag clipped to the right side of the lower cart shelf is your on-station waste system. Bones, marinade bags, used drip pans, empty glove fingers — everything goes in here so your prep surface stays clean throughout the cook.
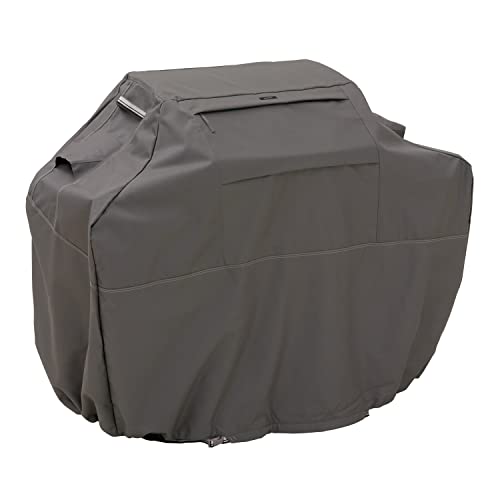
- Grill cover nearby and accessible. When the cookout ends and the grill cools down, your grill cover goes back on immediately. A quality all-weather grill cover is what keeps everything you built in this guide looking and functioning like new from one cookout to the next.
If you haven’t already invested in a proper grill cover, the Classic Accessories Ravenna Heavy-Duty Grill Cover is our recommendation — heavy-gauge solution-dyed polyester, built-in vents that prevent moisture and mildew buildup under the cover, and a padded handle for easy one-handed removal. It’s available in sizes for every standard grill format from kettle grills to 4-burner gas units.
Pro Tips for Getting the Most Out of Your Grill Station
- Keep it stocked between cookouts. The biggest threat to a well-organized outdoor BBQ cooking station is the habit of bringing tools inside after every cookout and then not bringing them back out. Designate the grill station as the permanent home for all your BBQ tools. They live outside. They come in only for washing and go straight back out.
- Add a chalkboard label to each pegboard hook. A small chalkboard sticker below each hook with the tool name means any helper at the grill knows exactly where each tool goes when they pick it up — no “where does this go?” mid-cookout.
- Station height matters more than you think. Ideally, your prep cart’s surface sits at the same height as your grill’s side shelves — or within 1 inch. If your cart is significantly lower, you’ll be hunching to prep. If it’s higher, you’ll be reaching up awkwardly. Check this alignment before you commit to the cart’s permanent position.
- Protect your pegboard between cookouts. Even outdoor-rated pegboard benefits from a simple protective treatment — a coat of exterior-grade clear sealant applied once per season keeps the board from absorbing moisture at the edges and gradually warping. It takes 15 minutes and extends the board’s life significantly.
- Run a 5-minute end-of-cookout reset. After every cookout: tools wiped and back on their hooks, cutting boards washed and replaced, sauce bottles restocked, cart top wiped clean, spray bottle refilled, drip pans replaced, grill cooled and covered. Five minutes. Every time. This is the habit that keeps a great outdoor grill station great for years rather than gradually becoming a mess that you eventually stop using.
Related Post: The Ultimate 4th of July BBQ Setup Guide — Everything You Need to Host the Perfect Backyard Cookout
Final Thoughts
There’s a version of every backyard cookout where the host is relaxed, the grill is running smoothly, every tool is exactly where it’s supposed to be, and the food is genuinely great because nothing got missed or rushed. That version isn’t an accident. It’s the result of a DIY BBQ grill station setup that was built with intention.
Follow this guide one step at a time, get everything in place before your next cookout, and notice the difference when you’re actually standing at the grill. Less scrambling. Less stress. Better food. And — for the first time in a while — a cookout you actually enjoyed hosting.
🔥 Fire it up. You’re ready.
Frequently Asked Questions
- How long does it take to set up a DIY BBQ grill station from scratch?
If all your materials are purchased and on hand, building a complete DIY BBQ grill station — from unboxing the cart to hanging the last tool on the pegboard — takes approximately 2–4 hours for a first-time setup. The grill itself (if new) will take 30–60 minutes to assemble. The pegboard frame takes about 20 minutes to build from two 2×4 studs. Loading and organizing the cart and tools takes another 30–45 minutes. The payoff is permanent — every subsequent cookout runs significantly smoother because of the hour you put into the setup.
- Do I need a side cart if my grill already has fold-out side shelves?
Built-in grill side shelves are helpful but not a substitute for a dedicated prep cart. Most built-in side shelves are small (18–22 inches wide), not at a comfortable working height for extended prep, and hold only a few items before they’re full. A stainless grill side cart gives you a full-width food-safe prep surface, two additional storage shelves for sauces and supplies, and lockable casters so the whole unit can be repositioned. If your grill has side shelves, keep them for quick staging (platter of raw protein going on, sauce bowl within reach) and use the cart for all active prep work.
- What is the best surface material for an outdoor BBQ prep station?
Stainless steel is the best material for an outdoor BBQ cooking station prep surface. It’s completely weather-resistant, food-safe, non-porous, and wipes clean even after a heavily greasy cooking session. Wood surfaces — while attractive — absorb grease, can harbor bacteria in scratches and grain, and warp with repeated exposure to rain and sun. Composite and plastic surfaces degrade in UV exposure over one to two seasons. A stainless top surface is the right long-term investment for a permanent outdoor grill station.
- Where should I position my BBQ grill station in my backyard?
The best position for a backyard grill station follows four rules: at least 10 feet from any structure (your home, fencing, railings, or overhanging branches); upwind from your dining and entertaining area so smoke travels away from guests; with open access on the working side (at least 3–4 feet of clearance where the prep cart will live); and on level ground. Among these four, the clearance rule is the most critical from a safety standpoint and the one most commonly ignored — many hosts push the grill within a few feet of a fence or railing and only realize the problem when the fence starts discoloring from heat exposure.
- Can I build a grill station on a rental property without permanent installation?
Yes — a completely portable, non-permanent DIY BBQ grill station is achievable without drilling into walls, pouring concrete, or any installation that would concern a landlord. A grill on casters, a stainless cart on casters, and a pegboard system on a freestanding wooden frame (no wall mounting required) can all be set up without any permanent modification to the property and can be packed up and moved when you leave. This is exactly how the station described in this guide is built — every component is self-standing or surface-mounted with removable hardware.
- How do I protect my outdoor BBQ grill station from rain and weather?
Three layers of protection keep a backyard BBQ cooking station in good condition year-round. First, a quality all-weather grill cover fitted to your specific grill model keeps the grill itself protected from moisture, UV, and debris between uses. Second, your stainless prep cart doesn’t need covering — stainless handles outdoor exposure well — but wiping it down and ensuring it drains properly after rain prevents water pooling on the shelves. Third, a once-per-season exterior sealant coat on any wooden elements (your pegboard frame, any wooden accessories) keeps moisture from penetrating and causing rot or warping. With these three steps in place, a well-built outdoor grill station stays in great condition through multiple seasons of regular use.
- What is the most important tool to have at a BBQ grill station?
Among all the tools at a DIY outdoor BBQ station, a wireless dual-probe meat thermometer is the most impactful single upgrade for cooking results. It lets you monitor two different proteins simultaneously from across the yard — no guessing, no cutting into meat to check doneness, no serving undercooked chicken or overcooked brisket. Every other tool at the station improves your process. A wireless thermometer improves your outcome — and the outcome is what guests remember.
- How do I keep the grill station organized when multiple people are helping?
The most effective system for maintaining organization when multiple helpers are working around the outdoor cooking station is the labeled pegboard approach from Step 5. When every hook has a label below it and every tool has a clear designated position, helpers naturally return tools to the right spot because the system is self-explanatory. Without labels, even well-intentioned helpers set tools down on the nearest flat surface — which is usually the prep surface you need clear. A quick 5-minute briefing before the cookout (“tools go back on the pegboard, raw board is red, don’t lift the food cooler lid”) covers everything else.