As an Amazon Associate we earn from qualifying purchases. Here’s how it works.
Picture this: It’s the morning of July 4th. Your guests arrive at noon. The grill is cold. Your tools are scattered across the garage. You forgot the serving tongs. The cooler is half-full of warm soda. And someone just asked where the condiments are.
Sound familiar? That’s not how your Independence Day cookout is going to go this year.
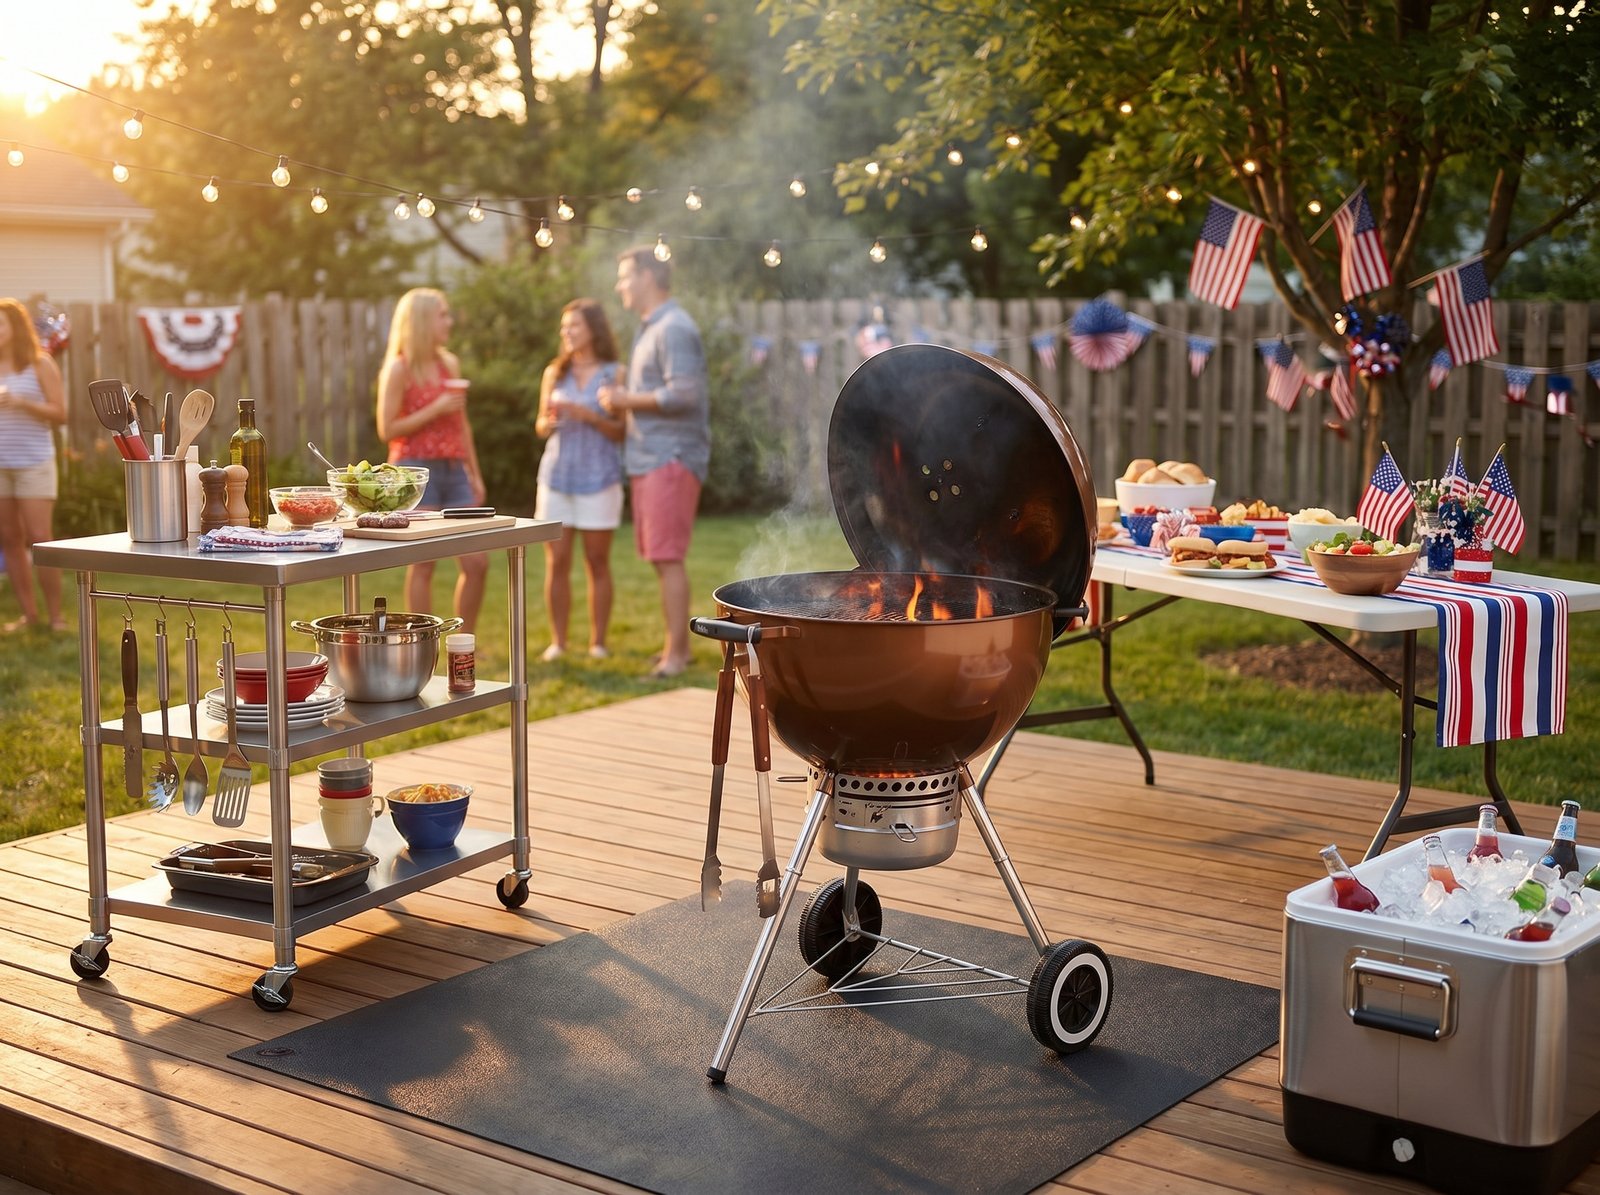
This 4th of July BBQ setup guide covers everything — your grill station, tool organization, prep area, food safety station, drink cooler, and evening lighting — laid out as a practical, step-by-step setup you can follow the morning of the party. Whether you’re hosting 10 close friends or a full neighborhood Independence Day cookout, this guide gives you the exact setup blueprint to handle it with confidence.
By the time your first guests walk through the backyard gate, your outdoor BBQ party will look and run like it was planned by a professional.
⏱️ Hosting 20 or more people? The setup principles in this guide scale easily. For crowd-specific quantities, cook timelines, and high-volume equipment picks, see our companion guide: How to Grill for a Crowd of 50?
Before You Start: The Golden Rule of BBQ Hosting
The single biggest mistake backyard cookout hosts make isn’t picking the wrong cut of meat or under-seasoning the rub. It’s treating setup as an afterthought.
Every great backyard BBQ party runs on a system — specific zones for specific activities, every tool in a designated spot, food moving through a logical flow from grill to plate. When your setup is solid, you’re not scrambling. You’re hosting.
Here’s how to build that system from the ground up.
Planning Your Grill Station Layout
Your grill station is the operational core of your entire 4th of July BBQ setup. Every other zone — prep, serving, drinks — flows around it. Get this right first, and everything else falls into place.
Where to Position Your Grill?
Before you move anything outside, decide exactly where your grill lives. This matters more than most hosts realize. Follow these positioning principles:
Minimum 10 feet from any structure. Keep your grill — whether charcoal or propane — at least 10 feet away from your home’s siding, fencing, deck railings, or any overhanging tree branches. This is both a safety requirement and a smoke-management strategy. Guests don’t want to stand in a smoke channel, and you don’t want scorch marks on your house.
Upwind from your guests. Pay attention to the prevailing afternoon breeze on your property. Position the grill so smoke drifts away from your main gathering area, not into it. Your guests will thank you.
Easy access from the kitchen. You’ll be making trips back and forth for trays of raw meat, sauces, extra tools, and paper towels more times than you expect. The shorter that walk, the better your party runs.
On level ground. An uneven grill is an unstable grill. On a deck, always check that the grill sits flat. On grass, compact the area slightly or place a solid flat surface under the legs.
Step 1: Choose Your Grill — The Anchor of Your Setup
Your grill is the centerpiece of your entire outdoor grill party setup, so it’s worth choosing carefully.
For most backyard cookouts, a 22-inch charcoal kettle grill is the gold standard. It’s versatile (direct and indirect heat), delivers superior flavor, produces beautiful char, and handles everything from burgers to a full rack of ribs to a whole chicken. The Weber Original Kettle Premium 22″ remains the best-in-class recommendation at this size — it’s built to last decades, has an ash management system that makes cleanup fast, and the hinged grate design lets you add charcoal without removing the grate.

If you prefer propane for the convenience of instant ignition and easier heat control, the Char-Broil Performance 4-Burner Gas Grill is an excellent choice for 4th of July cookout volume — four burners give you multiple independent heat zones for simultaneously grilling different proteins.

Our recommendation for most hosts: Go charcoal for the flavor, go propane for the convenience. If it’s your first big backyard cookout setup, the kettle grill wins — the learning curve is shallow and the results are significantly better.
Step 2: Lay Your Grill Mat First — Protect Your Deck Before You Cook a Single Thing
This step takes 30 seconds and saves you from a problem that is very difficult to fix later.
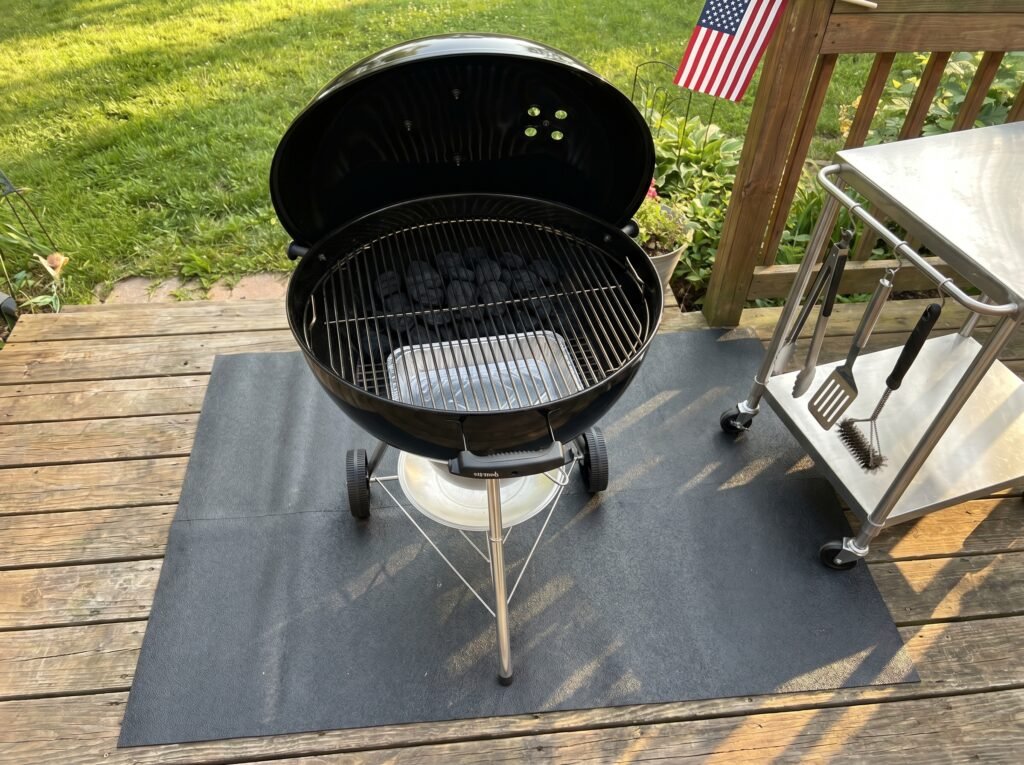
A BBQ grill mat (also called a deck protector or grill pad) is a heat-resistant, non-slip mat that sits underneath your grill on any deck, patio, or wood surface. It catches grease drips, ash fall, and coal flakes that would otherwise permanently stain or scorch your deck boards.
Place this before the grill, not after. Sliding a hot or recently-used grill is both dangerous and unnecessary. Lay your mat first, position your grill on top, and you’re done.
The UBeesize’s Double-Sided Fireproof Grill Pad is our top pick — it’s ember-resistant, waterproof, and large enough (under grill footprint plus a 6-inch perimeter) to catch everything that misses the catch pan. It’s also UV-resistant so it doesn’t degrade sitting outside through a summer season.

Deck owners: This is non-negotiable. A single cookout without a grill mat can leave permanent grease rings and char marks on composite or wood decking that no amount of cleaning removes completely.
Step 3: Set Up Your Drip Management System
Before you light a single coal, set your drip management inside the grill. This is one of those small steps that separates a clean, organized BBQ party setup from a messy one.
Disposable aluminum drip pans placed beneath your grill grate (in the ash catcher area for charcoal, or on the flavorizer bars for propane) catch grease runoff before it hits the bottom of your grill. This does three important things:
- It dramatically reduces flare-ups during cooking
- It makes post-party grill cleanup take 5 minutes instead of 30
- It protects the bottom of your grill from long-term grease buildup damage
Pick up a pack of Weber Aluminum Drip Pans — these pans fit most grills perfectly, and having a few extras on hand means you can swap a full pan mid-cookout without stopping to clean.

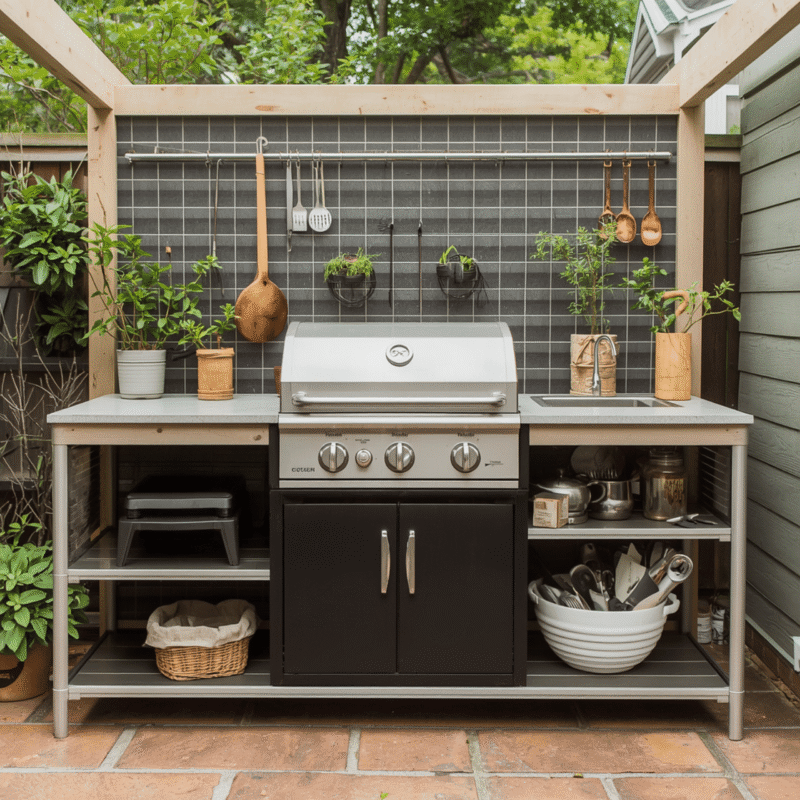
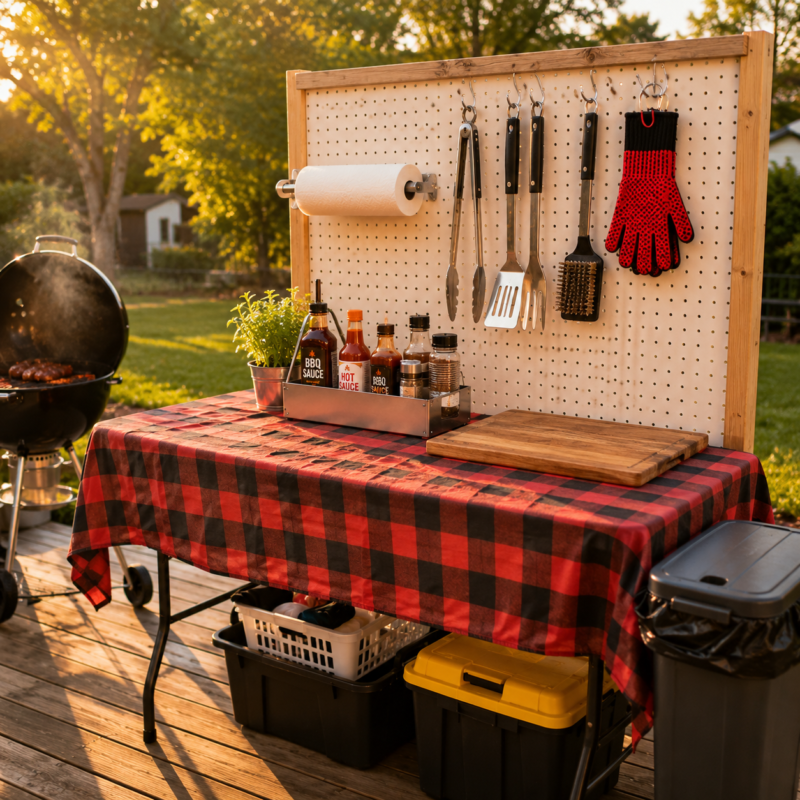
Want to take your grill station to the next level? Our dedicated guide — How to Set Up a DIY BBQ Grill Station? – From Bare Backyard to Cookout-Ready in One Afternoon — walks through building a fully organized outdoor grill station with a pegboard tool rack, prep surface, and professional-level organization. If this is your first backyard BBQ party setup, start with the steps above. When you’re ready to upgrade, that guide is your next read.
The 10 Tools Every Pit Master Needs Within Arm’s Reach
Here’s a fact every experienced backyard BBQ host knows: the moment you step away from the grill to hunt for a tool, something burns.
Everything you need for active grilling should be within arm’s reach of the grill — organized, accessible, and ready. No walking. No searching. No “has anyone seen the thermometer?”
Here are the 10 tools that should never be more than one step away from your grill on the 4th of July.
The Core 7 — Your Non-Negotiable Grill-Side Tool Set
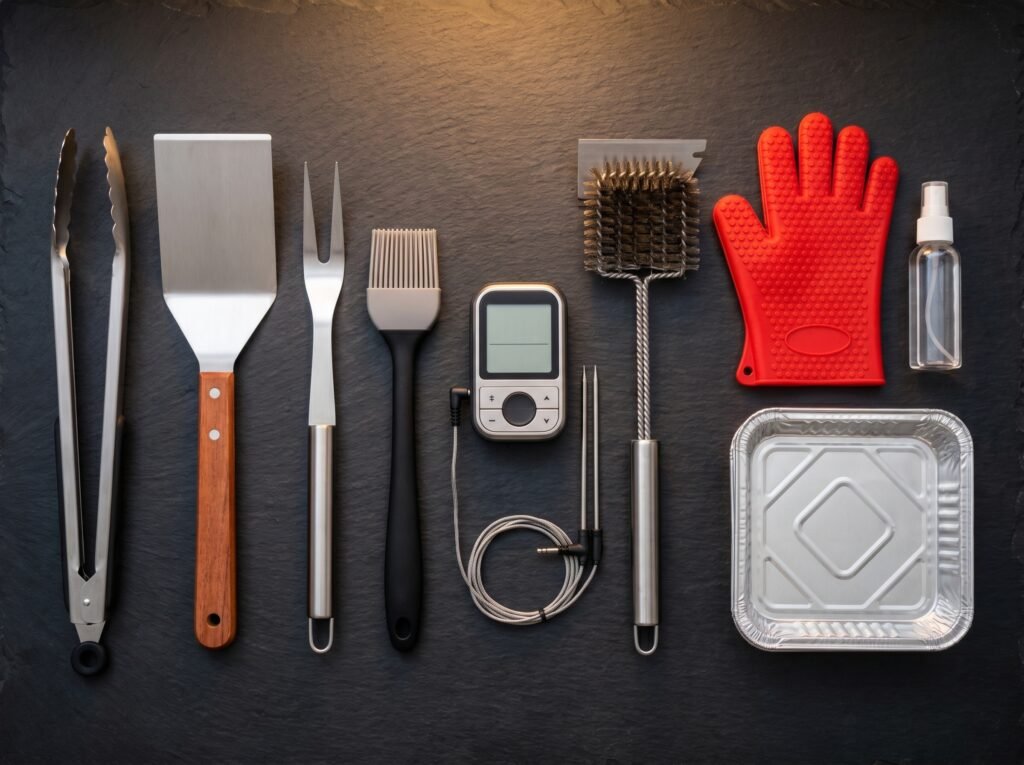
These seven tools cover 95% of everything that happens at the grill during a cookout. A quality BBQ tool set that includes all of these — in one organized case or roll — is one of the best investments you can make for your outdoor BBQ party setup.
🛒 Our pick: The Grilljoy 24-Piece Heavy-Duty BBQ Grilling Tools Set includes long-handled tongs, a wide stainless spatula, a fork, a basting brush, corn holders, skewers, a meat injector, and a carry bag — all in heavy-gauge stainless that doesn’t flex or warp over a hot grill. This is the tool kit we recommend to anyone setting up for a serious Independence Day cookout.

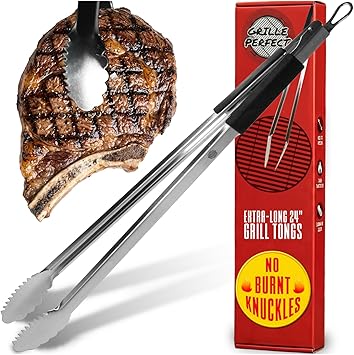
Tool #1 — Long-Handled Tongs (16″) Tongs are your primary grilling instrument. You’ll use them more than everything else combined. Get a 16-inch pair minimum — anything shorter puts your hand too close to the heat when managing coals or moving large cuts. Look for scalloped, non-slip gripping ends that don’t puncture the meat (unlike fork-style ends).
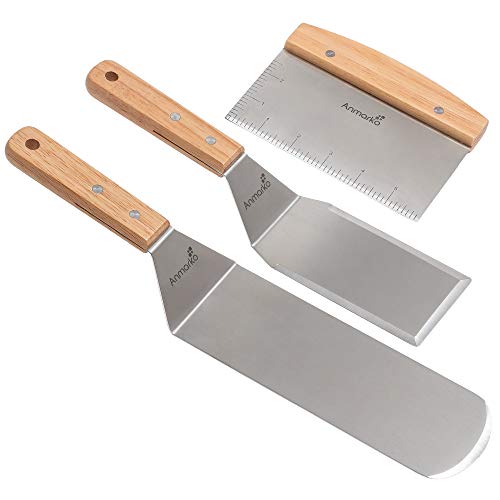
Tool #2 — Wide Offset Spatula A wide, offset spatula is what separates a perfectly flipped burger from a destroyed one. The “offset” angle (where the blade sits lower than the handle) gives you leverage to slide under a burger without the handle getting in the way of the grill lid.
Tool #3 — Grill Fork Use sparingly — pricking meat releases juices you don’t want to lose — but a long fork is essential for moving large cuts (like a whole chicken or brisket) that tongs can’t fully grip. Also useful for checking the doneness of sausages and hot dogs with a quick poke.
Tool #4 — Silicone Basting Brush For applying sauces, marinades, and butter bastes during the final phase of cooking. Silicone heads are heat-resistant, don’t shed bristles into food (unlike old-school nylon brushes), and clean up completely in a dishwasher. Get at least two — one for raw protein, one for sauces applied to nearly-cooked meat.

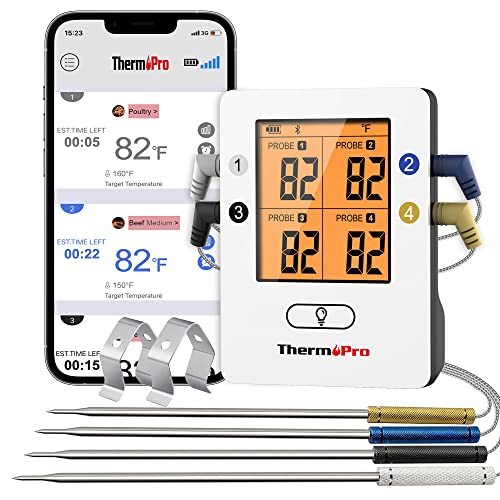
Tool #5 — Wireless Dual-Probe Meat Thermometer This is the single most important BBQ tool in your entire setup. Not knowing internal temperatures is the number one reason backyard cooks serve undercooked chicken, overcooked brisket, and dried-out burgers.
A wireless meat thermometer with dual probes lets you monitor two different proteins simultaneously — one probe in the chicken, one in the brisket — from up to 500 feet away via your phone. You can socialize with guests while the grill does its work, and your phone alerts you the moment you hit target temperature.
🛒 Our pick: The ThermoPro TP25 4-Probe Bluetooth Wireless Meat Thermometer is our top recommendation for a 4th of July BBQ setup with multiple proteins on the grill. Four probes, app-controlled, 300-foot Bluetooth range, and preset target temperatures for every protein type. This tool pays for itself the first time it saves a $40 brisket from being pulled 20 minutes too early.
Tool #6 — Grill Brush / Cleaning Scraper Clean your grill grate immediately after it preheats (before food goes on) and again after the last item comes off. A clean grill grate prevents sticking, eliminates old flavor contamination, and extends the life of your grate. Get a brush with a scraper attachment — the scraper handles buildup that a brush alone won’t clear.
Tool #7 — Heat-Resistant Silicone Grill Gloves When you need to physically move the grill grate, add coals mid-cook, or pull a heavy cast iron pan off the grill, bare oven mitts don’t cut it. Silicone grill gloves rated to 450°F+ give you full hand protection and, crucially, enough grip dexterity to actually hold things securely.
The Next 3 — Game-Changers Most Hosts Forget
Tool #8 — Spray Bottle Filled with Water A simple plastic spray bottle filled with water is your first line of defense against flare-ups. When grease drips hit live coals and produce a sudden large flame, a targeted spray immediately knocks it back. Keep this bottle on your prep cart within one arm’s reach of the grill at all times.
Tool #9 — Instant-Read Thermometer (Backup) Your wireless thermometer handles the long cooks. An instant-read thermometer handles the spot-checks — burgers, chicken breasts, sausages, anything quick-cooking where you want a temperature read in 2–3 seconds rather than waiting for a probe readout. It’s the “quick question” tool versus the wireless thermometer’s “long conversation” role.
Tool #10 — Large Aluminum Tray / Half Pan Keep a stack of large aluminum half-pans on your prep cart. They serve as resting trays for finished meat coming off the grill, staging trays for raw proteins waiting to go on, and catch-all trays for any sauce, marinade, or debris. They’re disposable, which means zero cleanup stress.
Setting Up Your Prep and Plating Area
A grill station without a prep area is like a kitchen without a counter. You need a dedicated surface for raw protein prep, sauce organization, plating finished food, and staging everything that goes on and comes off the grill.
The Prep Cart: The Single Most Useful Purchase for Your Cookout Setup
If there’s one piece of equipment — beyond the grill itself — that transforms a disorganized backyard cookout setup into a smooth operation, it’s a dedicated outdoor prep cart.
A stainless steel outdoor prep cart or folding side table positioned directly beside your grill gives you a stable, weather-resistant work surface within arm’s reach of everything happening on the grill. No more using lawn chairs as tool rests. No more running to the kitchen for every little thing. No more placing raw chicken directly on the deck railing.
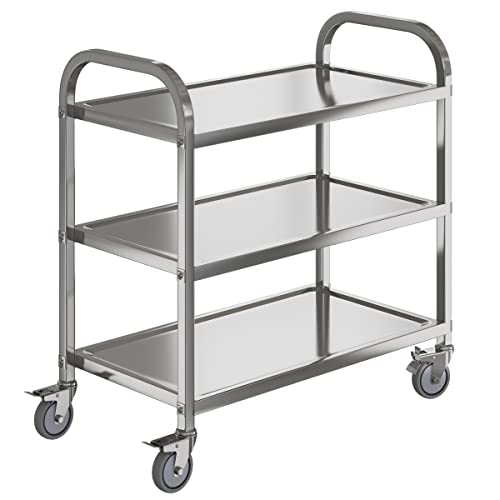
🛒 Our pick: The 3-Tier Stainless Steel Utility Cart Grill Prep Table is our top recommendation for a 4th of July outdoor BBQ setup. It has a full stainless prep surface on top (food-safe, weather-resistant), two lower shelves for sauce bottles, drip pans, and supplies, and locking casters so it stays exactly where you put it on the deck. It positions flush beside most standard kettle and gas grills — essentially extending your grill’s side table into a full workstation.
How to organize your prep cart for a 4th of July cookout:
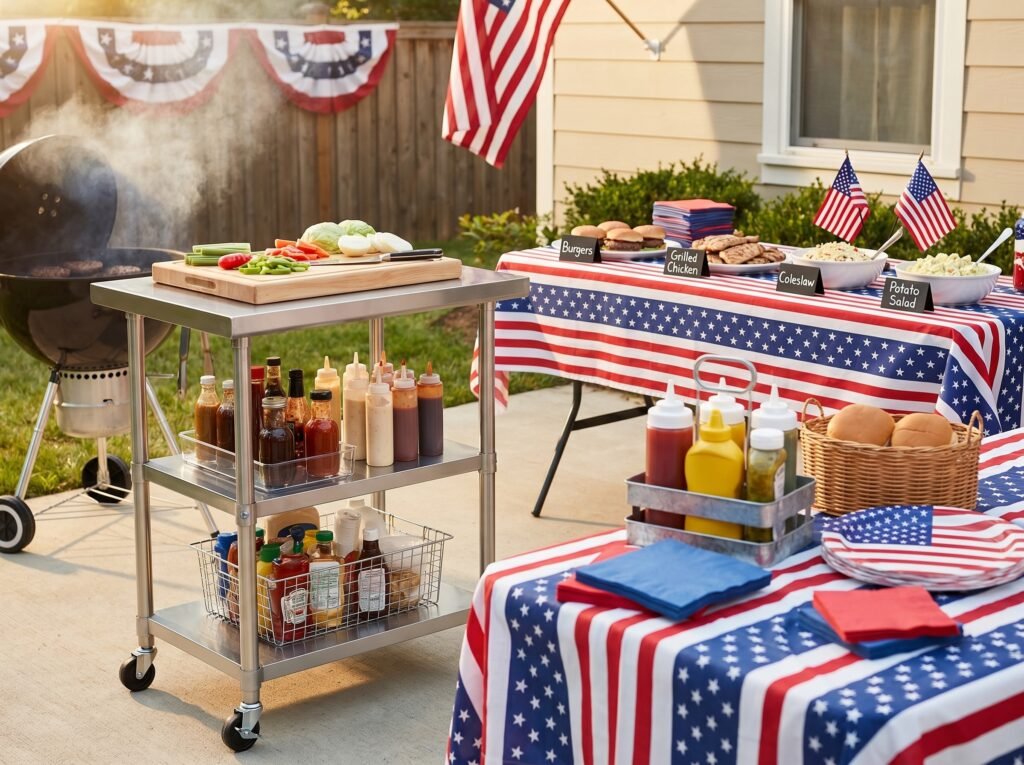
Top surface: This is your active work zone. Keep it clear except for whatever is actively being prepped. Place a large cutting board here for slicing and resting cooked meat.
Middle shelf: Your sauce station. Line up your BBQ sauce, hot sauce, rubs, marinade brush, basting sauce pot, and any other condiments you’ll apply at the grill. Everything in a dedicated spot — never hunting.
Bottom shelf: Supplies and backup. Extra drip pans, a roll of paper towels, a trash bag for used gloves and scraps, extra aluminum foil, extra utensils still in packaging. This shelf is your “resupply layer” during the cook.
The Serving Station: Separate From the Grill, Always
A critical layout mistake at most backyard BBQ parties is placing the serving table right next to the grill. This creates a dangerous, congested bottleneck where guests crowd around the heat source to fill their plates.
Place your outdoor serving station 8–12 feet away from the grill — close enough for you to easily shuttle cooked food over, but far enough that guests can browse the food spread without hovering around your cooking area.
Your serving station should include:
- A 6-foot folding table covered with a tablecloth or table cover (patriotic/red-white-and-blue for the 4th)
- Plates, napkins, and cutlery organized in a clear flow (plates first, then food, then utensils and napkins at the end — this is the serving line sequence that prevents bottlenecks)
- Labeled serving dishes for each food category (mains, sides, condiments)
- A dedicated condiment section with squeeze bottles for ketchup, mustard, and BBQ sauce
- A bread/bun station with a warming basket or covered container
🔗 Serving burgers at your cookout? A properly set-up DIY burger topping bar is one of the easiest ways to give guests a premium experience with minimal extra effort. Our full guide — The 4th of July BBQ Burger Bar: DIY Setup Guide — covers exactly how to build a topping station display that guests will talk about all day.
Keeping Food Safe — Cooler and Cold Station Setup
Food safety at an outdoor backyard cookout is the part most hosts underestimate until something goes wrong. In summer temperatures — especially on a July afternoon that can hit 85–95°F — bacteria in improperly held food can reach dangerous levels in as little as two hours.
Here’s how to run a safe, organized cold station that keeps everything at the right temperature from the moment guests arrive to the moment the last plate is cleared.
The Two-Cooler Rule
Every experienced outdoor party host runs at least two coolers at a 4th of July cookout. Here’s the logic:
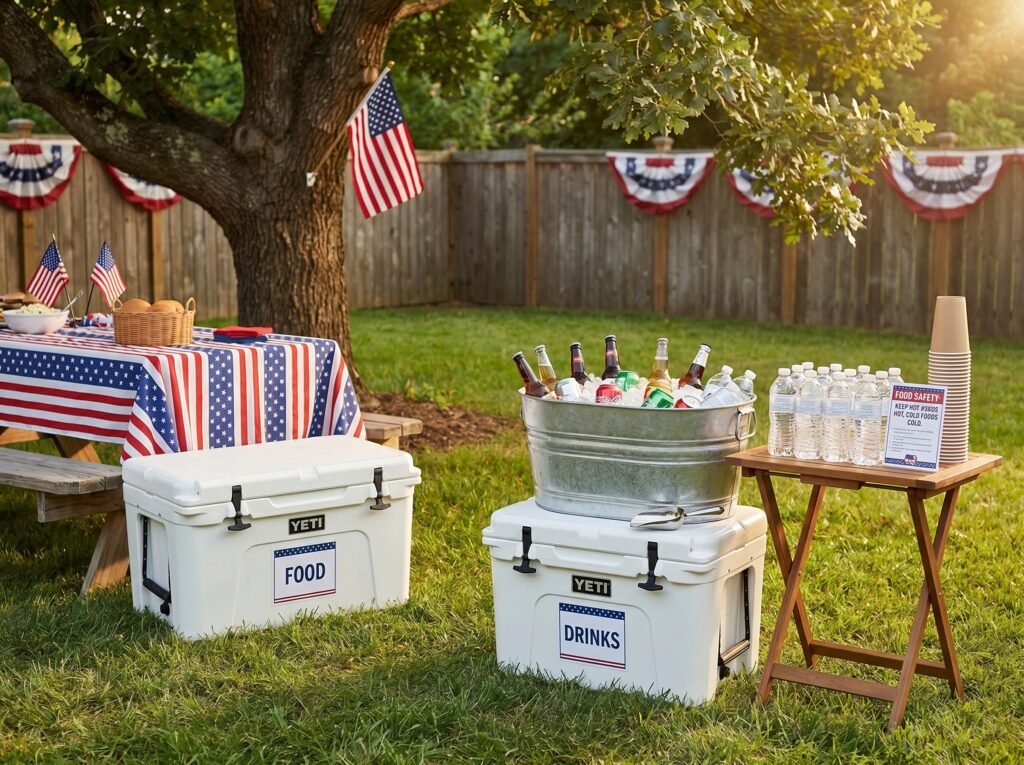
Cooler #1 — The Drink Cooler Drinks are the most-opened, most-accessed item at any cookout. Every time someone opens the cooler for a soda, beer, or water, warm air enters and ice melts faster. Dedicating one cooler entirely to drinks means you don’t have to worry about this cooler staying cold for food safety — just for temperature preference.
Cooler #2 — The Food Cooler This cooler is for raw proteins waiting to go on the grill and cooked items that need to be held cold (think: sliced watermelon, pre-made pasta salad, deviled eggs, anything that must stay below 40°F). This cooler stays closed except when you’re retrieving food for the grill. No snacking, no digging around, lid closed.
Choosing the Right Cooler
Your cooler for the food station is not the place to cut corners. A cheap cooler that can’t hold temperature for 6–8 hours creates a genuine food safety risk at a summer outdoor BBQ party.
🛒 Our recommendation: The YETI Tundra 45 Hard Cooler is the benchmark for outdoor BBQ party ice retention — it holds temperature for up to 72+ hours with proper packing, uses commercial-grade polyurethane insulation, and the latching lid creates a near-airtight seal. If the YETI price point is a concern, the Coleman Xtreme 5-Day Cooler (70 Qt) offers excellent ice retention at a more accessible price — it’s our “best value” recommendation for backyard cookout setup on a budget.


Cooler packing tips for a 4th of July cookout:
- Pre-chill your cooler the night before with a sacrificial bag of ice. Drain it in the morning and load it with fresh ice plus your food. A cold cooler retains temperature far longer than a warm one.
- Use block ice, not cubed. Block ice melts far more slowly than cubed ice. Use block ice for the base layer of your food cooler, and cubed ice for the drink cooler where faster melt is acceptable.
- Raw protein on the bottom, under ice. Raw meat goes on the bottom of the food cooler — coldest zone — separated from ready-to-eat items by a layer of ice.
- Keep it in the shade. Position your food cooler in a shaded spot — under a table, beneath a pop-up canopy, or in a shaded corner of the deck. Direct sun dramatically accelerates ice melt.
Food Temperature: The Numbers Every Cookout Host Must Know
| Food Category | Safe Hold Temperature | Maximum Time in “Danger Zone” |
|---|---|---|
| Raw poultry | Below 40°F until cooking | 2 hours total |
| Raw beef / pork | Below 40°F until cooking | 2 hours total |
| Cooked meat (holding) | Above 140°F | 2 hours max before discard |
| Cold sides / salads | Below 40°F | 2 hours total |
| Cut fruit | Below 40°F | 2 hours total |
The danger zone is 40°F–140°F. Any food sitting in this temperature range for more than 2 cumulative hours should not be served. This is especially critical at an outdoor July 4th cookout where ambient temperatures are at their seasonal peak.
The Drink Station: Give Guests a Self-Serve Zone They’ll Love
Keep the drink cooler fully self-serve. Label it clearly, stock it with a variety of options (water, sodas, lemonade, iced tea), and position it somewhere guests can access it without crossing the grill zone or disrupting the serving line.
A galvanized metal drink tub filled with ice alongside the drink cooler makes a beautiful display point for bottled drinks — line them up with labels visible, arrange the ice artfully, and add a scoop. It looks intentional and organized, which guests notice and appreciate.
🔗 Want to build a dedicated outdoor bar and drink station that becomes a centerpiece of your party? Our guide — DIY Outdoor BBQ Bar Cart Setup Guide covers the rolling bar cart, beverage dispenser, cocktail supplies, and patriotic display styling that turns a plain drink cooler into a full party feature.
Lighting Up the Evening — Grill Lights and Outdoor Ambiance
Here’s a scenario that happens at nearly every 4th of July backyard cookout: the party runs long (as it should), the sun sets, and suddenly the host is squinting at the grill in the dark trying to tell if the chicken is done by the glow of a cell phone flashlight.
Don’t let that be you.
An evening grilling setup is something most cookout hosts never think about until they need it. Plan for it in advance and you can keep the grill going well into the night — which is exactly what you want on Independence Day, when the real celebration begins at dusk.
Tool #1: The Clip-On Grill Light
A clip-on LED grill light is the single most underrated BBQ accessory for outdoor evening cooking. It attaches to the handle of your grill lid, illuminates the entire cooking surface with bright focused light, and costs next to nothing compared to the frustration it eliminates.
🛒 Our pick: The Flexible LED BBQ Grill Light clips to any standard grill handle in seconds and features two bright LED panels on a fully flexible arm — meaning you can angle the light exactly where you need it. It’s weather-resistant, battery-operated, and bright enough to clearly see the color and texture of your meat even in full darkness. This is one of those inexpensive purchases that genuinely improves your backyard BBQ party setup in a way you’ll notice immediately.
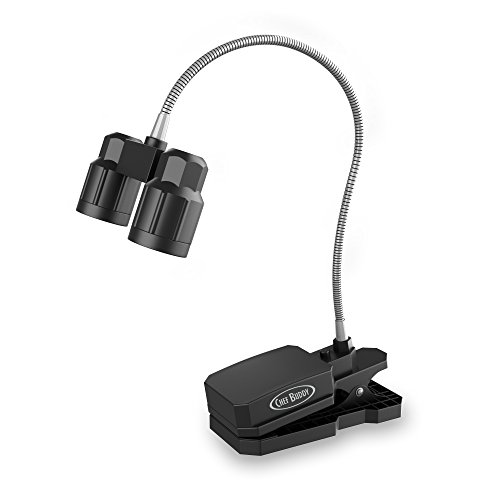
Mount this light before the party starts. You won’t need it at 2 PM, but at 8:30 PM when you’re flipping the last batch of chicken and the sun has dropped below the fence line, you’ll be very glad it’s there.
String Lights and Atmosphere Lighting
Beyond the grill itself, the ambient lighting of your outdoor space transforms the post-sunset phase of your 4th of July cookout from “people slowly leaving” to “nobody wants to go home.”
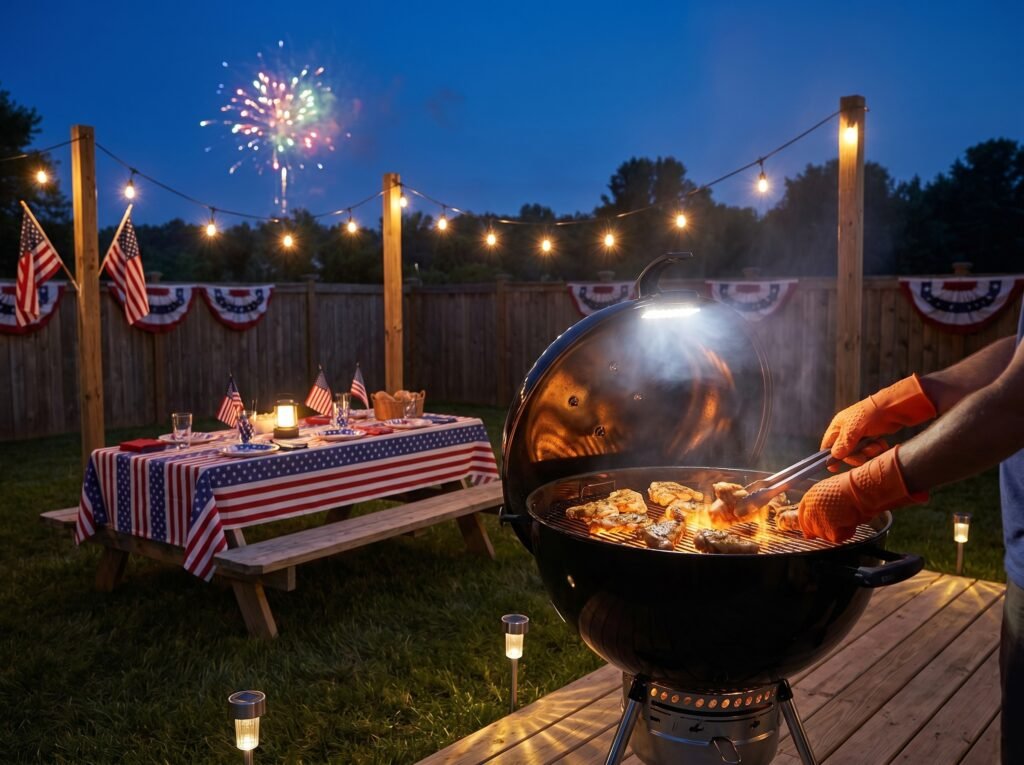
Overhead string lights hung between two anchor points (fence posts, trees, a porch railing) above your dining and entertaining area create an instantly warm, inviting atmosphere that makes your backyard feel intentional and beautiful after dark. For the 4th of July, warm white LED string lights (rather than colored or cool white) create the most universally flattering and welcoming atmosphere.
Pathway lighting — simple solar stake lights along the edges of your yard, walkway, or deck perimeter — guides guests safely around the space after dark without the need for extension cords or harsh overhead fixtures.
Table candles or lanterns on the serving and dining tables add intimate warmth at eye level that overhead lighting alone can’t provide. Battery-operated LED lanterns are the outdoor-safe choice — no fire risk, no dripping wax, and they’ll run all evening on fresh batteries.


Putting It All Together: Your Zone-by-Zone BBQ Setup Summary
Before you light the first coal, run through this zone-by-zone summary to confirm your 4th of July BBQ setup is complete.
🔥 Zone 1 — Grill Station
- Grill positioned 10+ feet from structures, upwind from guests
- Grill mat placed underneath on deck/patio surface
- Drip pans set inside grill before lighting
- Grill tools organized on prep cart or pegboard within arm’s reach
- Spray bottle filled with water positioned at grill side
- Wireless thermometer probes calibrated and ready
- Grill light mounted and tested (for evening use)
🔪 Zone 2 — Prep and Plating Station
- Prep cart positioned immediately beside grill
- Large cutting board on top surface
- Sauces and rubs organized on middle shelf
- Backup supplies (drip pans, foil, paper towels) on bottom shelf
- Serving table positioned 8–12 feet from grill
- Plates, utensils, napkins in correct serving flow order
- Labeled serving dishes and condiment caddy in place
🧊 Zone 3 — Food and Drink Station
- Food cooler pre-chilled, loaded with block ice and raw proteins
- Drink cooler stocked, labeled, and positioned for self-serve
- Galvanized drink tub filled with ice and bottled drinks (optional but recommended)
- Food safety thermometer accessible for checking hold temperatures
- Shade cover over food cooler
💡 Zone 4 — Atmosphere and Lighting
- String lights hung and tested before dark
- Clip-on grill light mounted on grill handle
- Solar pathway lights positioned along deck/yard perimeter
- Table lanterns on serving and dining tables
Final Thoughts — Your Best 4th of July Cookout Starts with Setup
A great 4th of July BBQ isn’t about the most expensive grill or the most elaborate menu. It’s about showing up prepared. When your grill station is organized, your food is safely stored, your tools are within arm’s reach, your serving station flows logically, and your lighting is ready for the evening — you’re not managing chaos. You’re hosting a celebration.
Follow this 4th of July BBQ setup guide zone by zone, check everything off before the first guest arrives, and then put the checklist down. Because the whole point of getting the setup right is so that you can actually enjoy the party you worked to create.
Happy 4th of July. Fire it up.🔥
Frequently Asked Questions
- How early should I set up my grill for a 4th of July cookout?
Set up your full 4th of July BBQ station at least 2–3 hours before guests are scheduled to arrive. This gives you time to position and light the grill, confirm your tools are organized, pre-chill your cooler, set up the serving and drink stations, and handle any unexpected problems without time pressure. For a charcoal grill specifically, budget an additional 30–45 minutes for coals to reach proper cooking temperature before your first protein goes on.
- How much charcoal do I need for a 4th of July party?
For a standard backyard cookout setup with a 22-inch kettle grill, plan for approximately 100 standard briquettes (roughly one full chimney) for a two-hour cook session. If you’re cooking all day — multiple rounds of burgers, chicken, ribs — stock at least 2–3 full bags (8–10 lbs each) and plan to add coals every 45–60 minutes to maintain temperature. For a propane grill, always have at least one full backup 20-lb tank on standby — running out mid-party is one of the most avoidable cookout mistakes.
- What is the best grill for a 4th of July backyard party?
For most hosts planning an Independence Day cookout, the Weber Original 22-inch Kettle Grill is the best all-around recommendation. It handles every protein type (burgers, chicken, ribs, sausages) on both direct and indirect heat, produces superior flavor compared to propane, and lasts for decades with minimal maintenance. If you prefer propane for the convenience of instant ignition and easier temperature control, a 3 or 4-burner propane grill gives you multiple independent cooking zones for a high-volume outdoor grill party.
- How far should a grill be from the house for a backyard BBQ?
The standard safety recommendation for backyard grill setup is a minimum of 10 feet between the grill and any structure — including the home’s exterior walls, wooden fencing, deck railings, and any overhanging tree branches or roof eaves. This distance applies to both charcoal and propane grills. In addition to structure clearance, position the grill so prevailing wind carries smoke away from your entertaining and dining area rather than through it.
- How do I keep raw meat cold at an outdoor party?
Use a dedicated food cooler (separate from your drink cooler) packed with block ice and loaded before guests arrive. Raw proteins should be stored at the bottom of the cooler under the ice, below 40°F, and only removed immediately before going on the grill. Raw meat left sitting at room temperature in summer heat (85–95°F) reaches the bacterial danger zone within 2 hours. For full food safety guidance at your outdoor BBQ party, see our dedicated resource on keeping food at safe temperatures throughout the event.
- What do I need for a grill station setup at a backyard cookout?
A complete grill station setup for a 4th of July backyard cookout includes: the grill itself (charcoal or propane), a grill mat to protect the deck surface beneath it, drip pans inside the grill, a prep cart or side table within arm’s reach, a full grill tool set (tongs, spatula, brush, fork, gloves), a wireless meat thermometer, a spray bottle for flare-up control, and a clip-on grill light for evening cooking. Together, these elements create a fully organized, safe, and efficient outdoor cooking station that can handle a crowd without you breaking a sweat.
- Do I need a grill mat under my grill on a wood deck?
Yes — a grill mat or deck protector is strongly recommended for any grill positioned on a wood or composite deck. Grease drips and ash fallout will permanently stain and, over time, damage decking without a protective mat underneath. Heat-resistant, ember-resistant grill mats specifically designed for this purpose cost very little and protect a deck surface worth far more. Place the mat before positioning the grill — never try to slide a used grill onto one.
- What lighting do I need for an evening backyard cookout?
For a 4th of July evening cookout, plan for three layers of lighting: a clip-on LED grill light on your grill handle for safe cooking visibility after dark, overhead warm white string lights hung between anchor points above your entertaining area for ambient atmosphere, and low solar stake lights along the perimeter of your deck or yard for safe navigation. This three-layer approach gives you functional safety lighting, beautiful atmospheric ambiance, and no extension cords running across the party space.