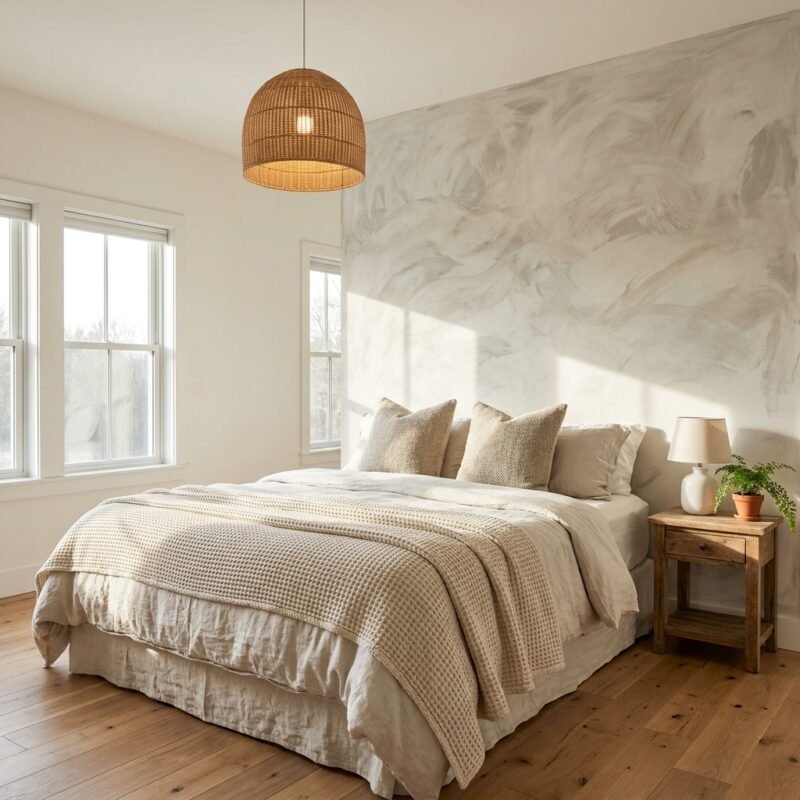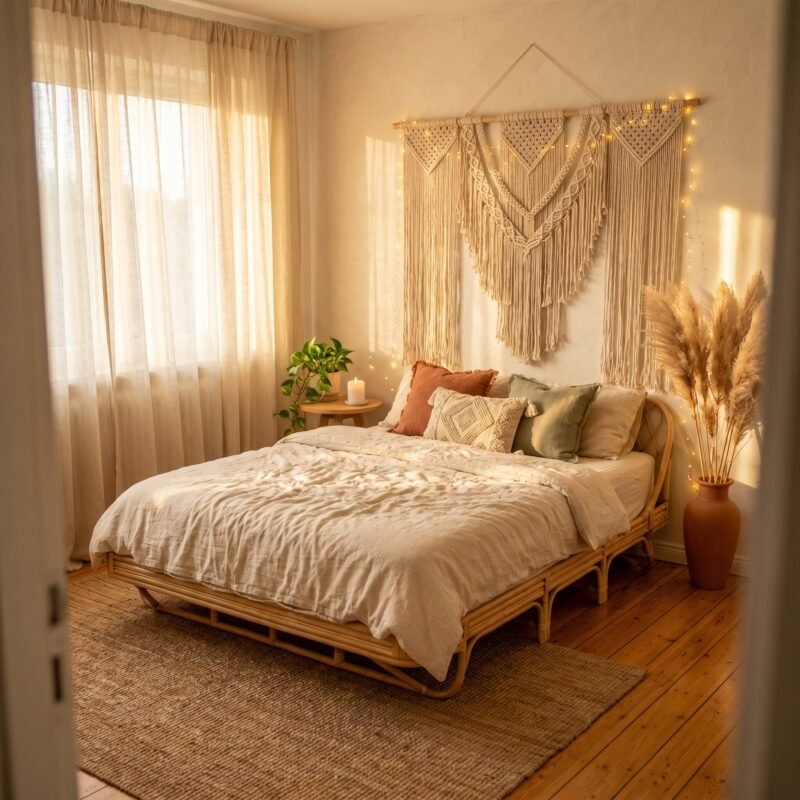
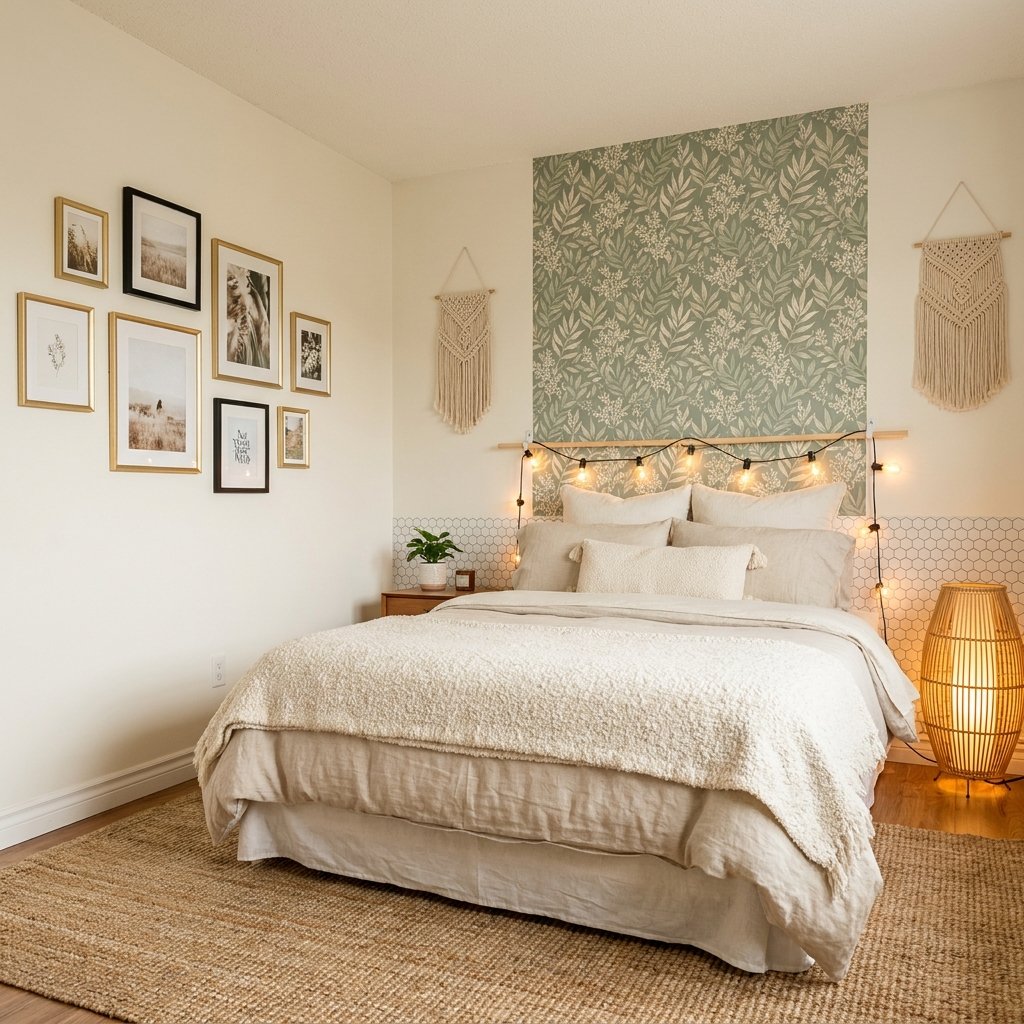
As an Amazon Associate we earn from qualifying purchases. Here’s how it works.
Transform your rental bedroom from bland to beautiful — with zero holes, zero damage, and zero risk to your security deposit.
Here’s the thing nobody tells you when you sign a lease: “no permanent changes” is not the same as “live with bare walls and a mattress on the floor for two years.”
There is an entire world of renter-friendly bedroom upgrades that go up in an afternoon, look genuinely stunning, and come down completely — without leaving a single mark — when you move out. No nail holes. No paint patches. No awkward conversation with your landlord at checkout.
The rental decor industry has exploded in the past five years, and the products available now — removable wallpaper, peel-and-stick tiles, damage-free adhesive strips, temporary window treatments — are genuinely good. Not “acceptable for a rental” good. Actually beautiful. The kind of good that makes guests ask “did you design this space yourself?”
Yes. Yes, you did.
This guide covers 17 renter-friendly bedroom upgrades, each one completely reversible, most of them achievable in under two hours, and all of them budget-conscious without looking budget. Whether you’re in a studio apartment in a high-rise, a shared house with strict landlord rules, or a condo with strata regulations — these upgrades work for you.
Let’s transform your rental bedroom.
The Golden Rules of Renter-Friendly Decorating
Before we dive into the upgrades, three principles that protect your deposit every single time:
Rule 1: Test Before You Commit Adhesive products — Command strips, peel-and-stick wallpaper, removable tiles — all behave differently on different wall paint finishes. Always test a small piece in an inconspicuous spot (inside a wardrobe, behind a door) and leave it for 48 hours before committing to a full installation. Different paint brands, ages, and finishes respond differently to the same adhesive.
Rule 2: Remove Slowly The single most common cause of rental deposit deductions from “damage-free” products is removal done too fast. Peel at a 45-degree angle, slow and steady, ideally in a warm room. Heated adhesive removes more cleanly — a hairdryer on low held a few inches away softens most adhesives beautifully before removal.
Rule 3: Photograph Everything Before installing anything, photograph your walls, floor, and surfaces. After removing everything when you move out, photograph them again. This documentation protects you if there’s any dispute about pre-existing damage.
UPGRADE 1 — Removable Peel-and-Stick Wallpaper
The single highest-impact renter-friendly bedroom upgrade available. Nothing else in this list transforms a rental bedroom space as dramatically as a panel of removable wallpaper on your feature wall. And since the products have improved enormously in the past three years, it now looks genuinely beautiful — not cheap or bubble-prone.
What it does: Turns a plain off-white wall into a designer feature wall with pattern, color, and texture — completely removable when you leave.
Best for: Bedroom accent walls, the wall behind the headboard, inside wardrobe doors, or as a wainscoting-style lower wall panel.
Popular styles that work particularly well in rental bedrooms:
- Botanical/leaf prints in sage green, terracotta, or warm neutrals
- Geometric patterns in navy or forest green
- Textured finishes that mimic grasscloth, linen, or limewash
- Vintage-inspired maximalist florals for a bold statement
👉 Peel-and-Stick Wallpaper — Sold by the panel, so you can do a single accent wall without committing to a whole room.

👉 Removable Wallpaper — more premium option with beautiful contemporary patterns. Particularly good on smooth painted walls.

Step-by-Step: How to Install Peel-and-Stick Wallpaper
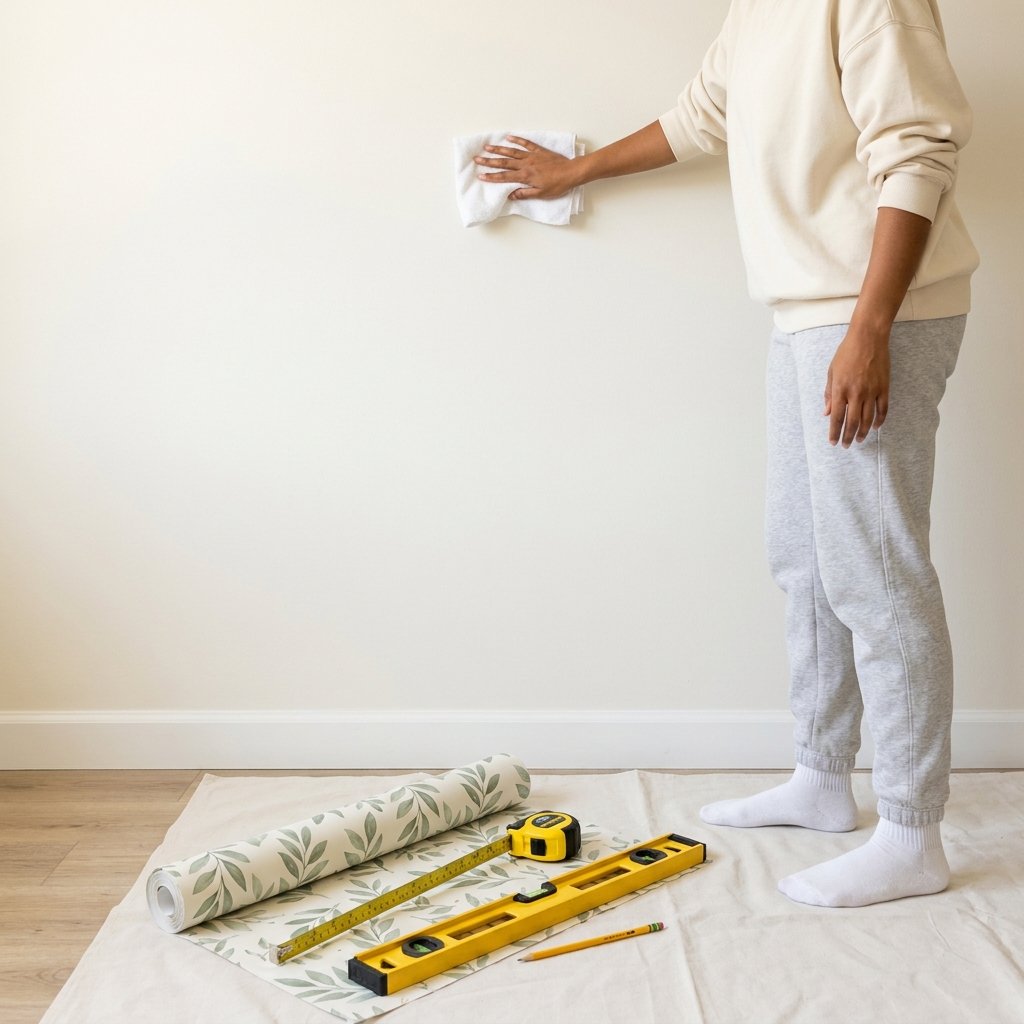
Step 1 — Clean and measure the wall Wipe the wall section with a damp microfiber cloth to remove dust and oils. Let it dry completely (30 minutes). Measure the wall height and width of the section you’re papering. Mark light pencil guidelines for the first panel’s position using your level — vertical lines ensure your first strip goes up perfectly plumb.
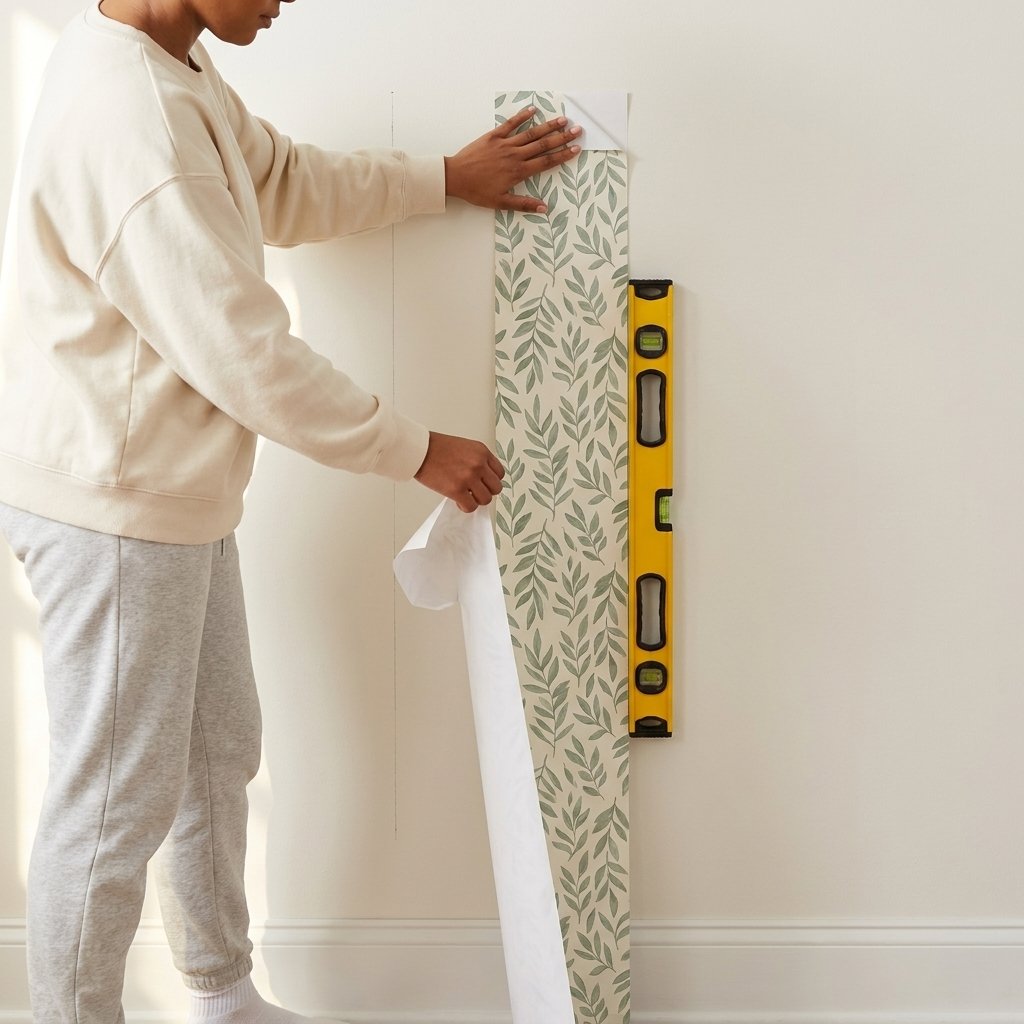
Step 2 — Hang the first strip Peel back the top 8–10 inches of backing paper only. Align the top edge of the wallpaper strip to your ceiling/crown molding line and press it to the wall, using your level to confirm it’s plumb. Once the top is set, slowly peel the backing away downward while smoothing the strip flat against the wall with your other hand. Work from top to bottom, smoothing outward from the center to push out air bubbles as you go.

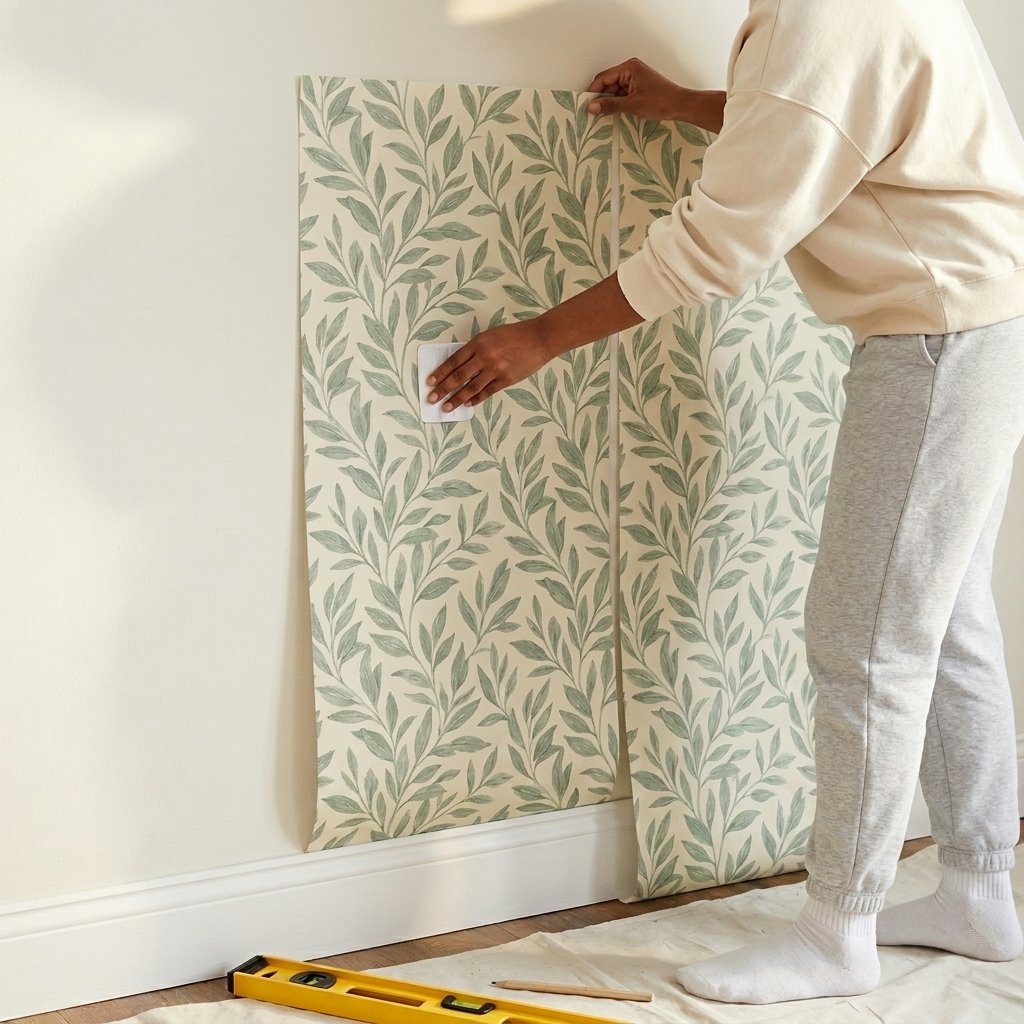
Step 3 — Smooth and match the pattern Use a flat-edged plastic card (a loyalty card works perfectly) to smooth the strip firmly from center outward, releasing any air pockets. For the second and subsequent strips, align the pattern carefully at the seam before committing — most peel-and-stick wallpapers are repositionable for several minutes after initial placement, which makes pattern-matching far less stressful than traditional wallpaper. Trim any excess at the baseboard and ceiling with a sharp craft knife and straight-edge.
Cost: $35–$80 for a standard queen-size feature wall (approx. 8’×9′) depending on the brand and pattern.

UPGRADE 2 — Command Strip Gallery Wall
A gallery wall of framed art is the most personal, expressive upgrade any renter can make — and with proper Command strips, it’s just as deposit-safe as an empty wall. The key is matching the Command strip weight rating to your frame weight, and the removal technique matters as much as the installation.
Best for: Any bedroom wall that currently feels cold and bare. The wall opposite the bed (the one you look at every morning) is almost always the best choice.
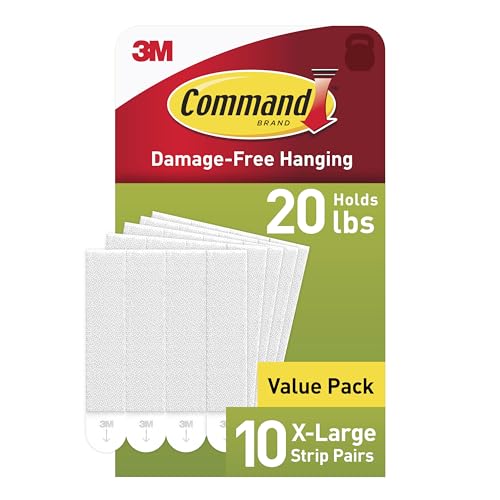
👉 Command Picture Hanging Strips Large (4-pack) → — rated for up to 16 lbs per pair. Use two pairs per frame for anything heavier than 5 lbs.
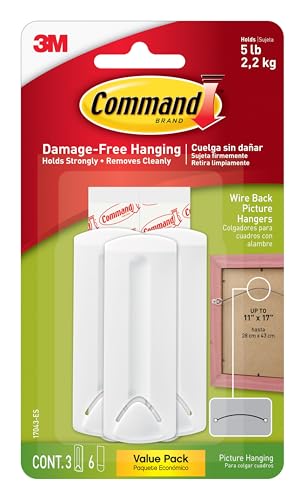
👉 Command Adhesive-Backed Hooks (Value Pack) → — for lighter items: macramé hangers, small mirrors, wreaths.
Step-by-Step: How to Create a Command Strip Gallery Wall
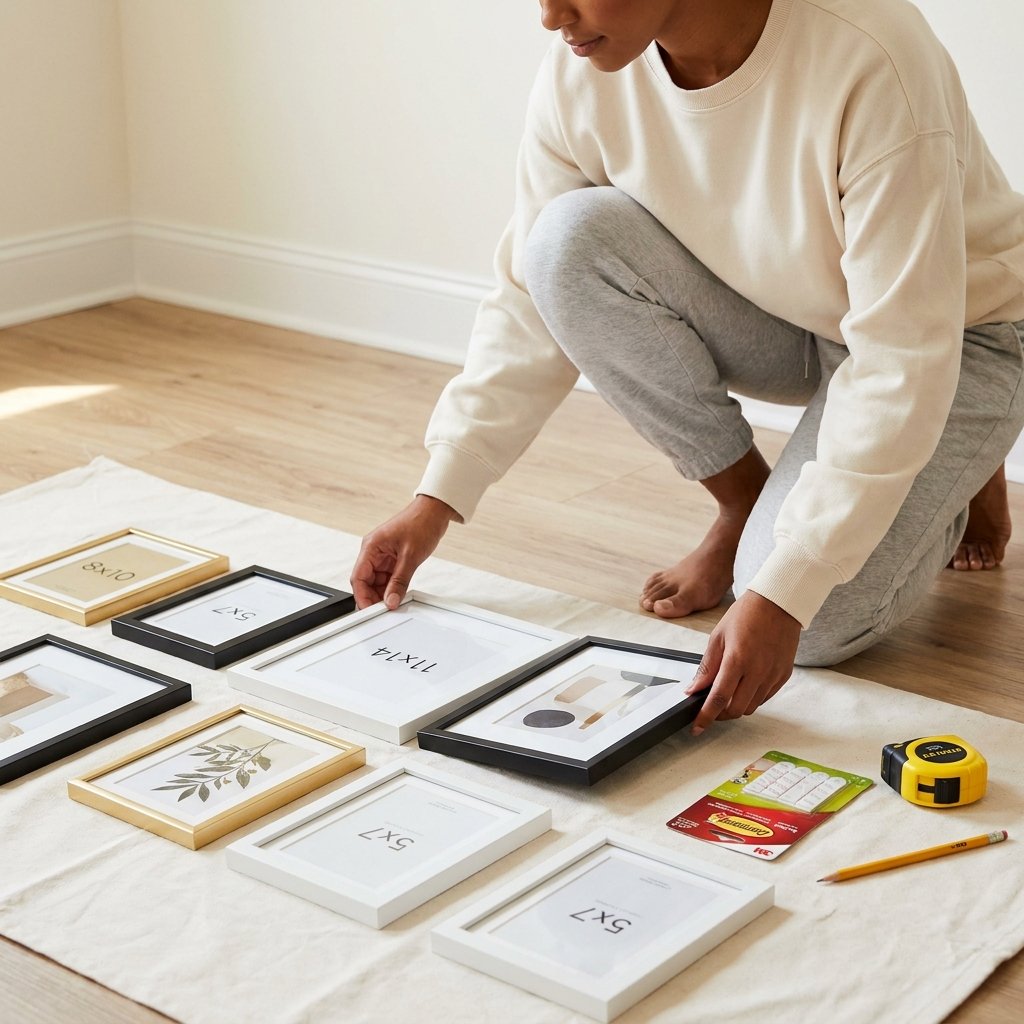
Step 1 — Plan your layout on the floor Before a single Command strip goes on the wall, arrange all your frames on the floor in the footprint of your intended gallery wall. Take a photo of the arrangement you love — this becomes your reference guide. Measure the total width and height of the arrangement and mark the corresponding area on your wall lightly in pencil.
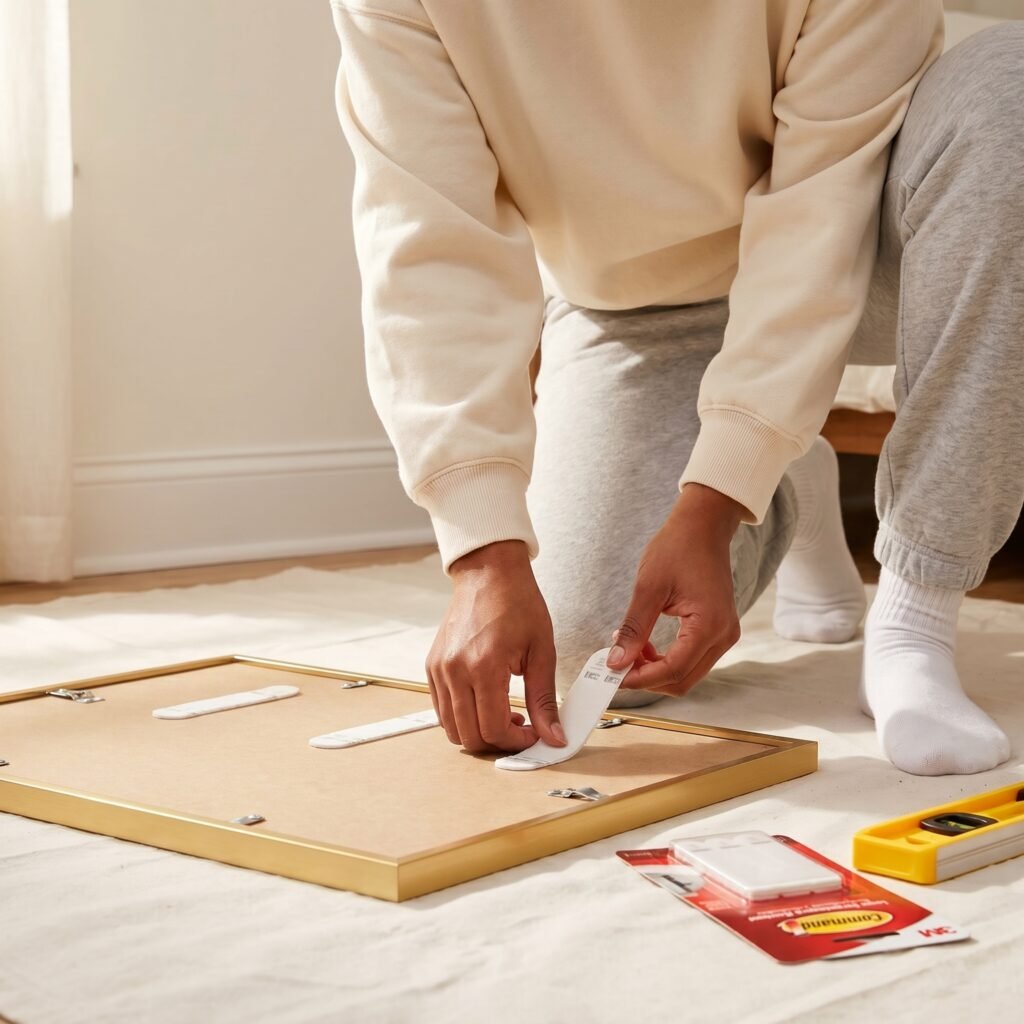
Step 2 — Attach Command strips to frames Apply Command strips to the back of each frame following the package instructions: attach the two halves of each strip together, peel the liner from the wall side, position the frame, press firmly to the wall for 30 seconds, then remove and let the strips cure for 1 hour before re-hanging. For frames over 5 lbs, use two pairs of Large strips. Never exceed the weight rating — this is the most important step for a clean, hold-forever result.
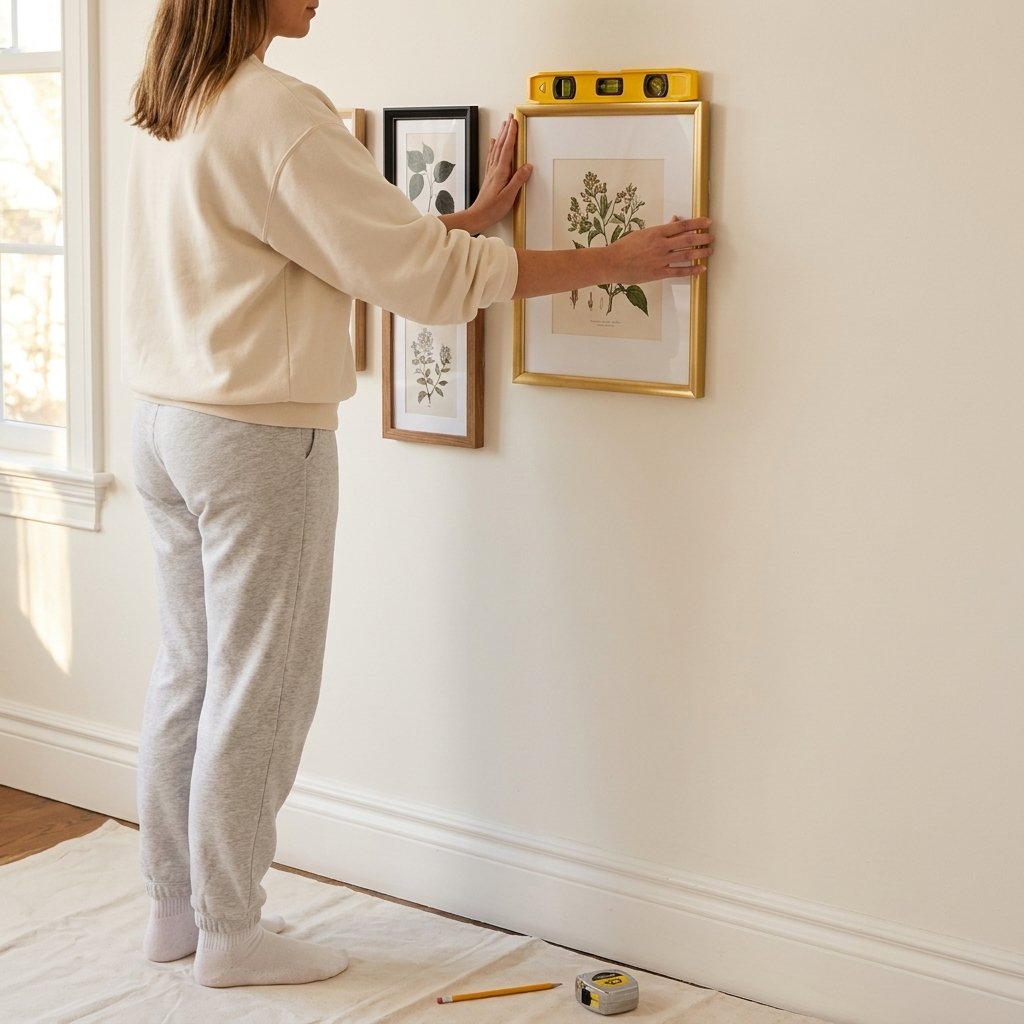
Step 3 — Mount and level each frame Press each frame firmly against the wall for 30 seconds. Use your level on top of each frame to confirm horizontal alignment. For the overall gallery, stand back every three to four frames and assess the arrangement from across the room — slight adjustments are easy to make while Command strips are fresh.
Cost: $15–$40 for Command strips depending on pack size. Art prints from $3–$20 each. Thrift-store frames: $1–$8 each.
UPGRADE 3 — Peel-and-Stick Backsplash Tiles
This is one of the most underused renter-friendly bedroom upgrades — and one of the most impactful when you see it. A small panel of peel-and-stick tiles used as a bedside “backsplash” behind the headboard or as a decorative panel beside the vanity area creates a genuinely architectural look that’s 100% temporary.
Best for: The wall section directly behind the headboard (below the removable wallpaper if you have one), the area behind a small vanity or desk, or inside a bookshelf for a pop of pattern.
Popular tile styles:
- White marble hexagon peel-and-stick tiles — classic, clean
- Moroccan pattern tiles in terracotta or navy — bold statement
- Subway tile effect peel-and-stick panels — Hamptons style
- Geometric black-and-white mosaic — graphic and modern
👉 Art3d Peel-and-Stick Backsplash Tile Sheets — the most widely reviewed peel-and-stick tile brand. Available in dozens of patterns and textures.

👉 Aspect Peel-and-Stick Stone Backsplash — for a more luxurious natural-stone look. Particularly beautiful in bedroom vanity areas.

Step-by-Step: Peel-and-Stick Tile Installation
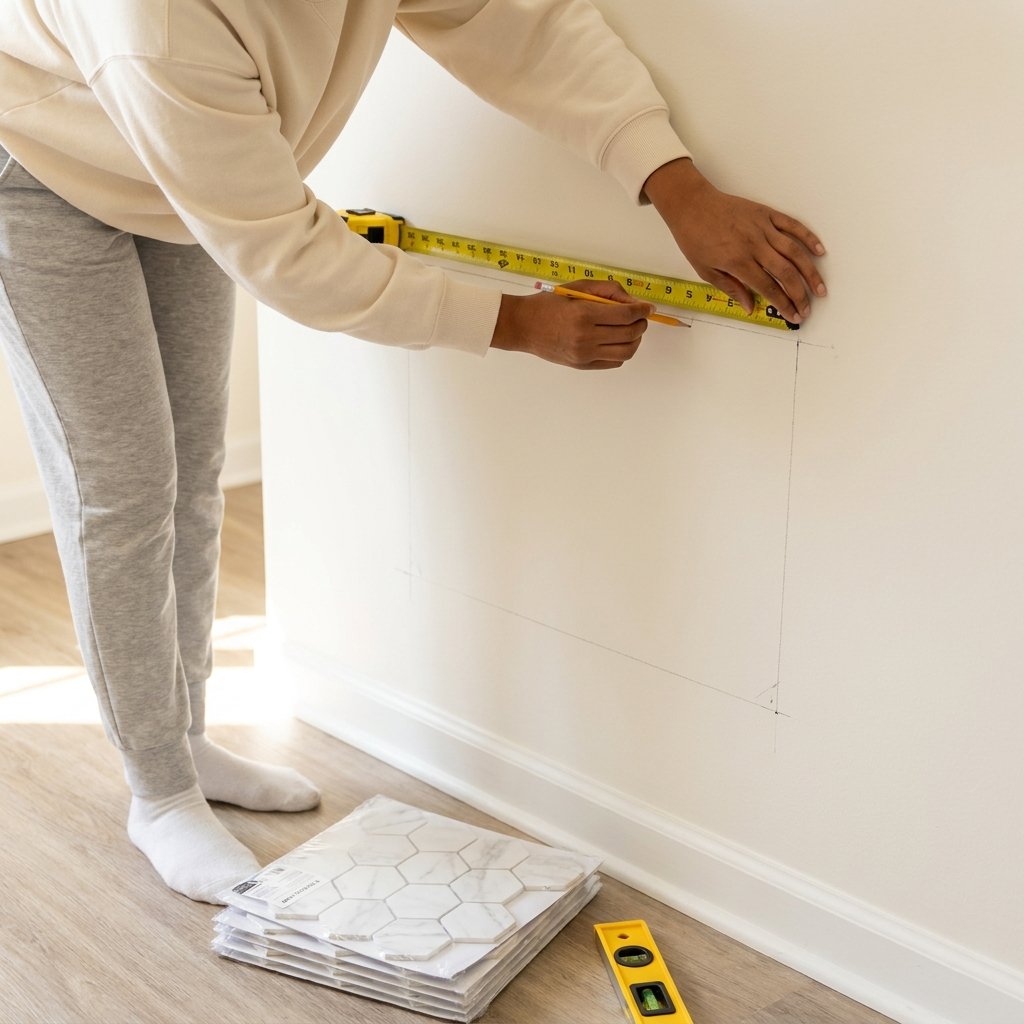
Step 1 — Measure and mark your tile area Decide on the area size and shape for your tile panel. Mark the corners and edges lightly in pencil on the wall. For a headboard backsplash panel, a typical size is 36–48″ wide by 24–30″ tall — large enough to be a statement, compact enough to feel intentional rather than overwhelming.
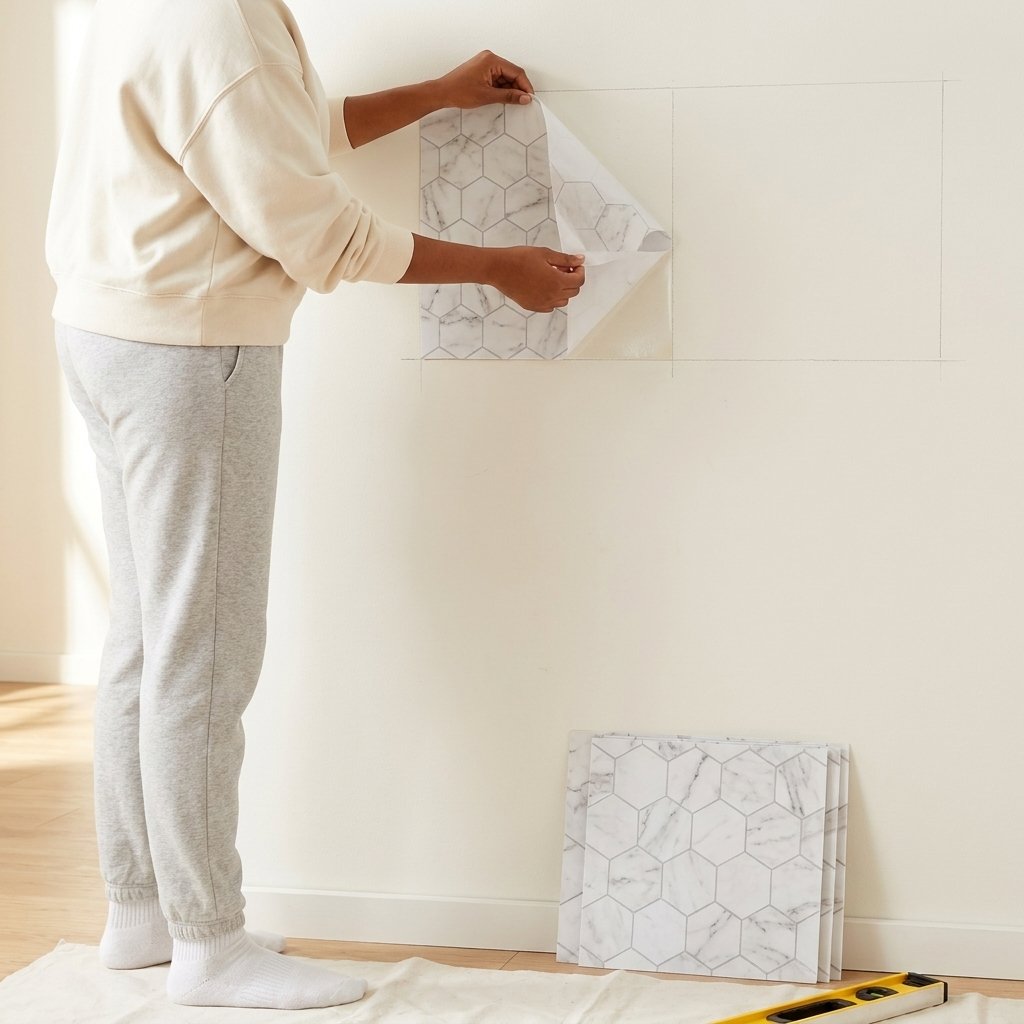
Step 2 — Apply the first tile sheet Peel back a corner of the backing paper — don’t remove it all at once. Start from one corner of your marked area (typically upper-left if you’re right-handed) and align the sheet precisely with your pencil guide marks. Press the first few inches firmly, then gradually peel the backing while smoothing the sheet flat as you go. Smooth firmly with your palm or a flat credit card — no air bubbles.
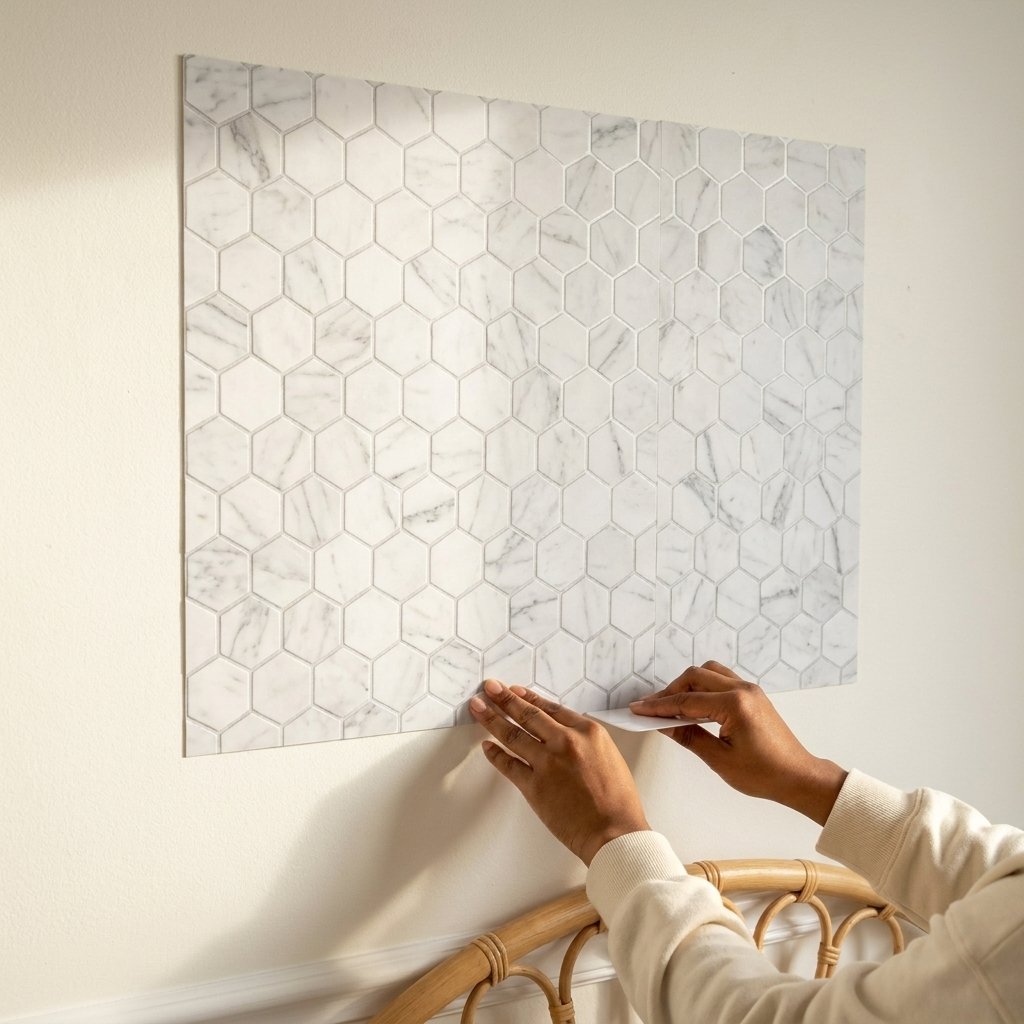
Step 3 — Complete the panel and trim edges Work across the wall in rows, butting each tile sheet edge-to-edge with the previous one. Most peel-and-stick tile sheets have a connecting edge design that creates continuous grout lines across sheets. For any partial sheets at edges, score the sheet face-down with a straight edge and sharp craft knife, then snap cleanly. Press all edges firmly — edges and corners are where peel-and-stick tiles fail first if not well-adhered.
Cost: $20–$55 for a standard bedside backsplash panel depending on tile style and brand.
UPGRADE 4 — Removable Fabric Wall Panels (Tapestry Alternative)
Standard tapestries and fabric wall hangings hung on nails are not renter-friendly. But fabric wall panels mounted on wooden dowels and suspended from Command hooks are both gorgeous and completely removable. This creates the softness and color of a large-scale textile piece without a single hole.
What it does: Adds warmth, pattern, texture, and color to a large empty wall — the soft fabric also has minor acoustic benefits in hard-floored rentals.

👉 Wooden Dowel Rods 1/2″ diameter → — cut to width at any hardware store, or buy pre-cut lengths.

Step-by-Step: Mounting a Fabric Panel
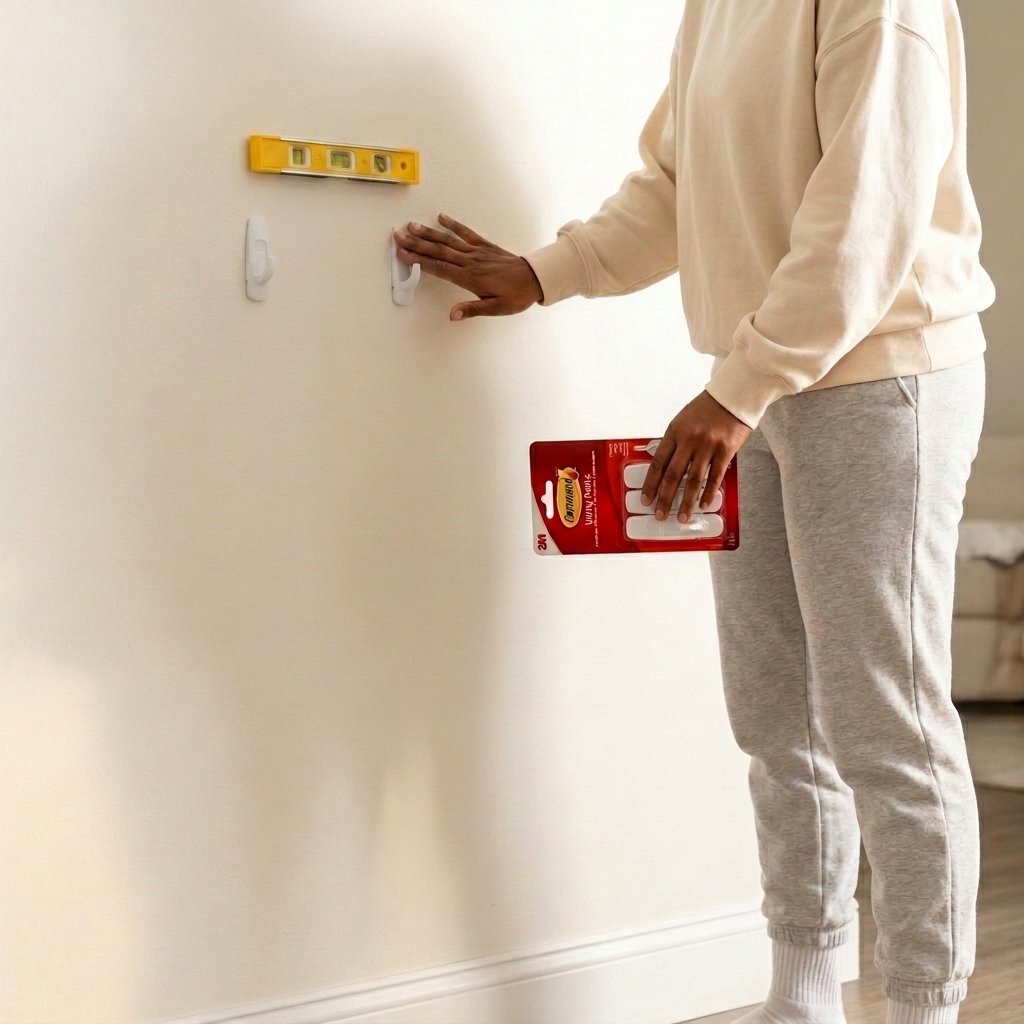
Step 1 — Mount two Command hooks Mark the wall at the height you want your fabric panel to hang. The two hooks need to be level with each other and spaced to match the width of your wooden dowel minus 2 inches on each side. Press each hook firmly for 30 seconds, then wait 1 hour before loading with weight.
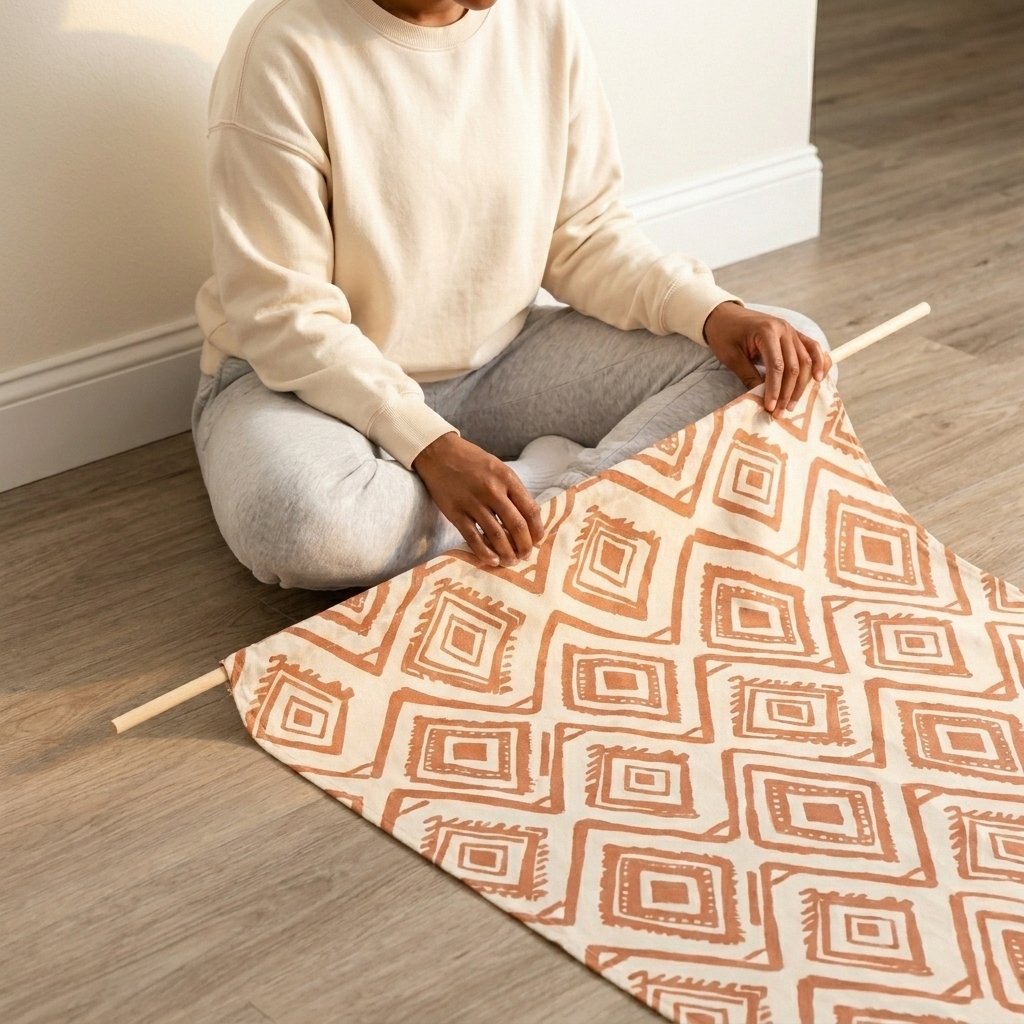
Step 2 — Thread the dowel through the fabric A good fabric wall panel (or any fabric you’re converting into a wall hanging) should have a rod pocket — a folded channel at the top — for the dowel to thread through. If your fabric doesn’t have one, fold the top 2 inches under twice and stitch or iron-hem it to create the channel. Thread your wooden dowel through this channel so it extends a few inches beyond each edge of the fabric.
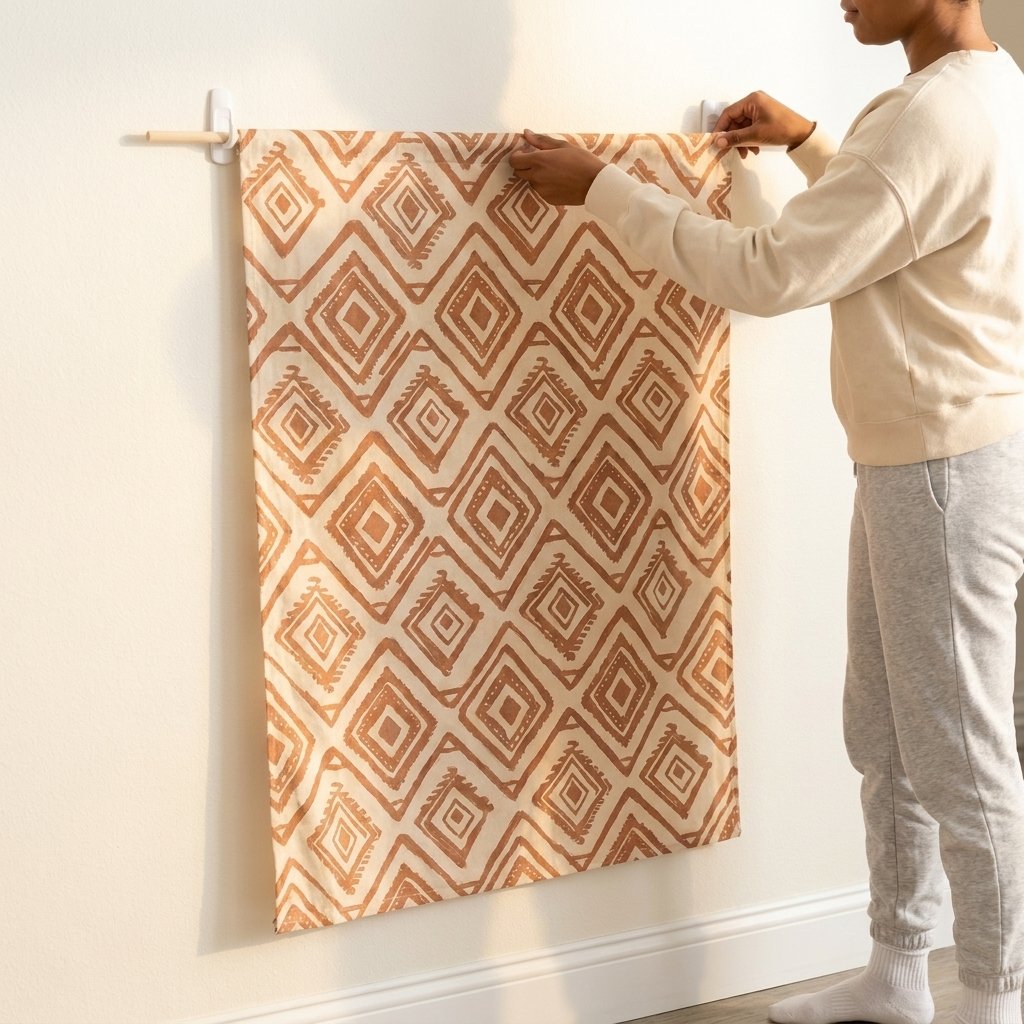
Step 3 — Hang on Command hooks and adjust Simply rest each end of the dowel onto its Command hook. The fabric will drape naturally below. Adjust the fabric so it hangs evenly — tug gently on the lower corners to straighten if needed. For a fabric panel that touches the floor intentionally (a luxurious look), choose a panel that’s at least 1.5× the wall height measurement.
Cost: $15–$45 for the fabric panel. $5–$10 for the dowel. $8–$12 for Command hooks.
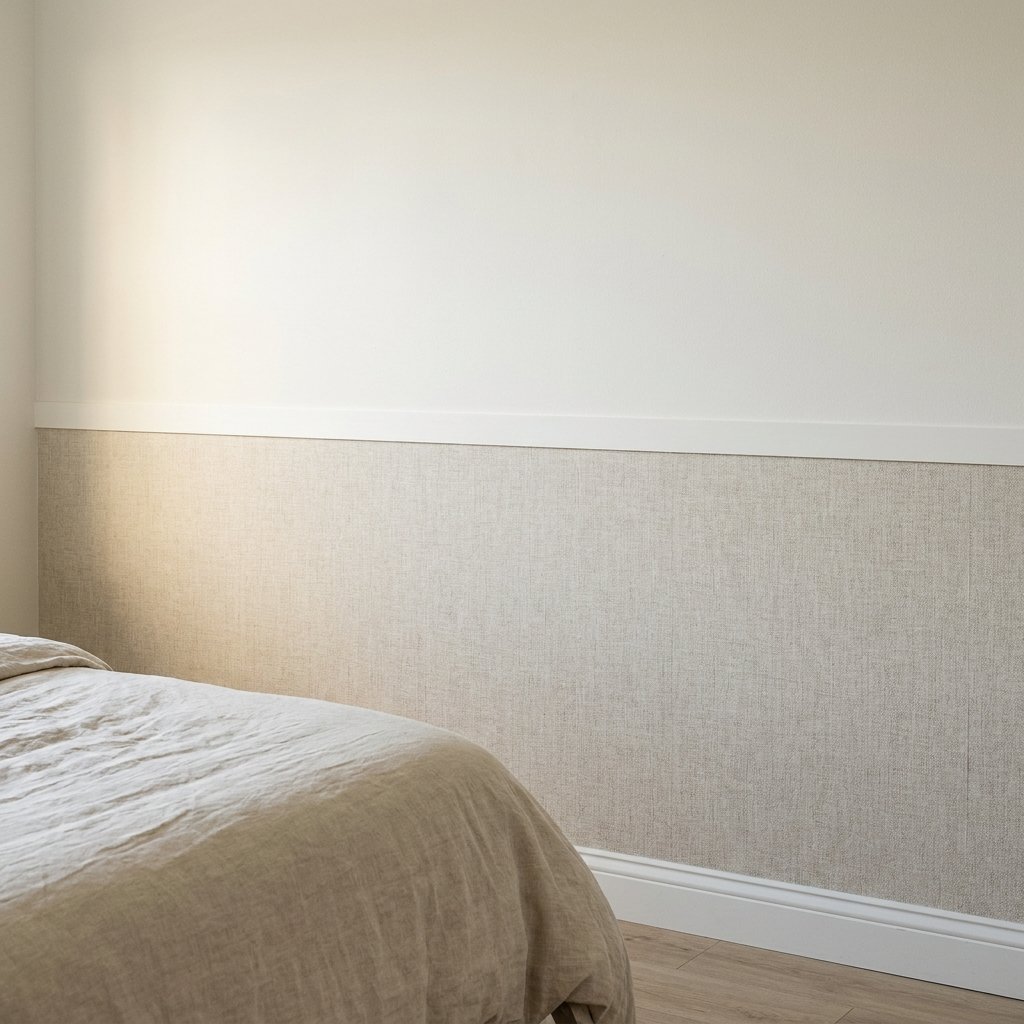
UPGRADE 5 — Peel-and-Stick Removable Wallpaper Accent Panel (Wainscoting Effect)
This is one of the most underrated deposit-safe bedroom ideas — instead of covering the full wall with removable wallpaper, you apply it only to the lower portion of the wall (below an imaginary chair rail height of 36″) to create the look of board-and-batten or wainscoting paneling. A strip of decorative border tape at the “chair rail” line completes the architectural illusion.
👉 Removable Wallpaper — Textured Linen Look → — the linen-texture peel-and-stick is the best for this technique because it mimics real paneled wall texture convincingly.

👉 Decorative Border Tape / Washi Tape Wide → — the “chair rail” dividing line. Choose a color that coordinates with your removable wallpaper.


Cost: $30–$60 for a standard bedroom lower-wall wainscoting panel.
UPGRADE 6 — Temporary Window Treatments
Standard rental blinds or curtain rods that damage walls are the bane of every renter’s bedroom. But there are now several genuinely beautiful no-drill window treatment options that work on virtually any window frame.
Options ranked by impact:
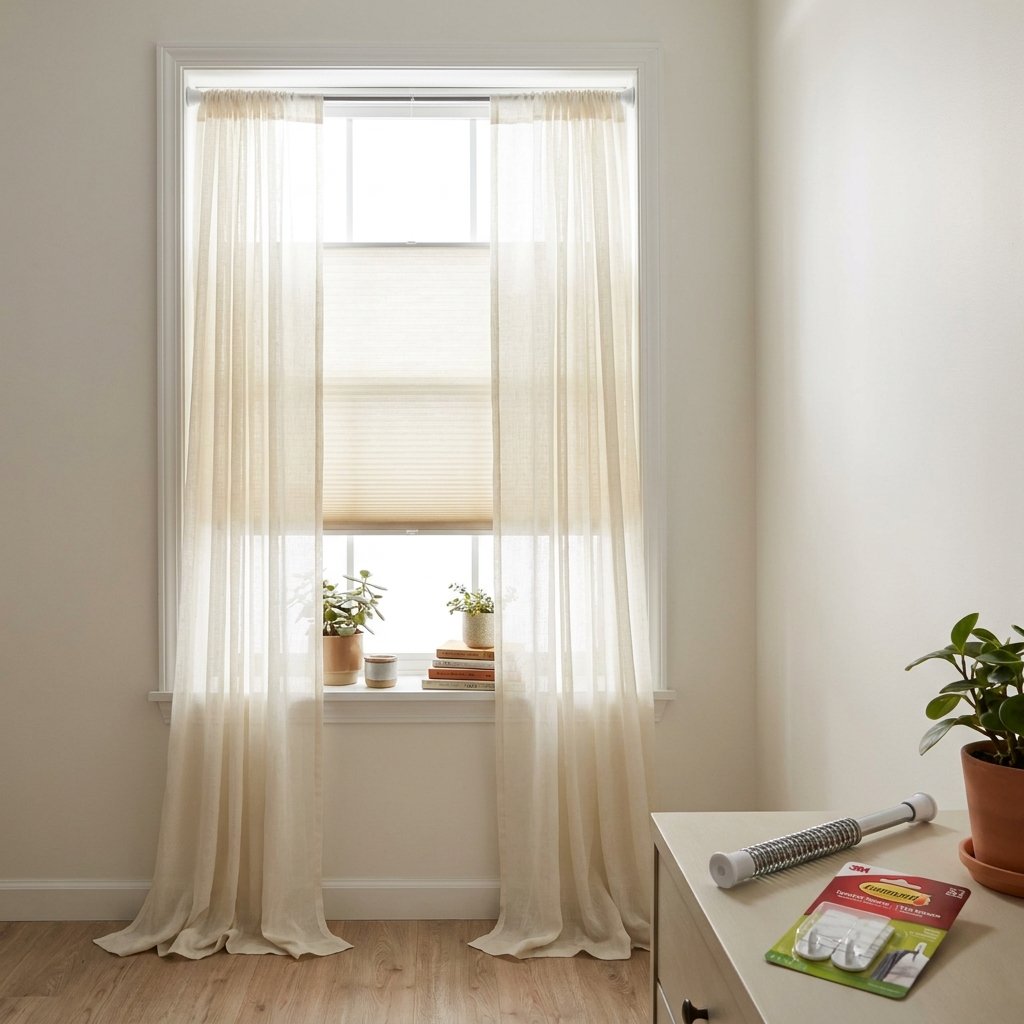
Tension rod curtains — the classic solution. Tension rods require zero installation, hold standard curtain panels beautifully, and come down in seconds. Work best on windows up to 48″ wide.
👉 Ivilon Tension Curtain Rod (28″–48″) — the most reliable tension rod for bedroom curtains. Holds up to 15 lbs.
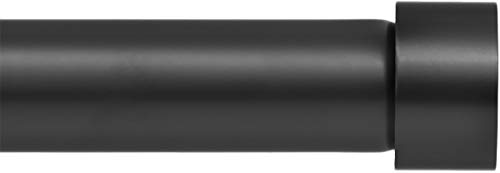
Peel-and-stick curtain rod brackets — for heavier drapes on wider windows. These adhesive bracket systems can hold standard curtain rods without drilling.
👉 No-Drill Curtain Rod Brackets — works with any standard curtain rod up to 1″ diameter.

Roman shade with Command strips — for a clean, architectural window treatment without a rod.
👉 Cordless Cellular Shade — inside-mount cellular shades that fit snugly in the window frame without any installation.

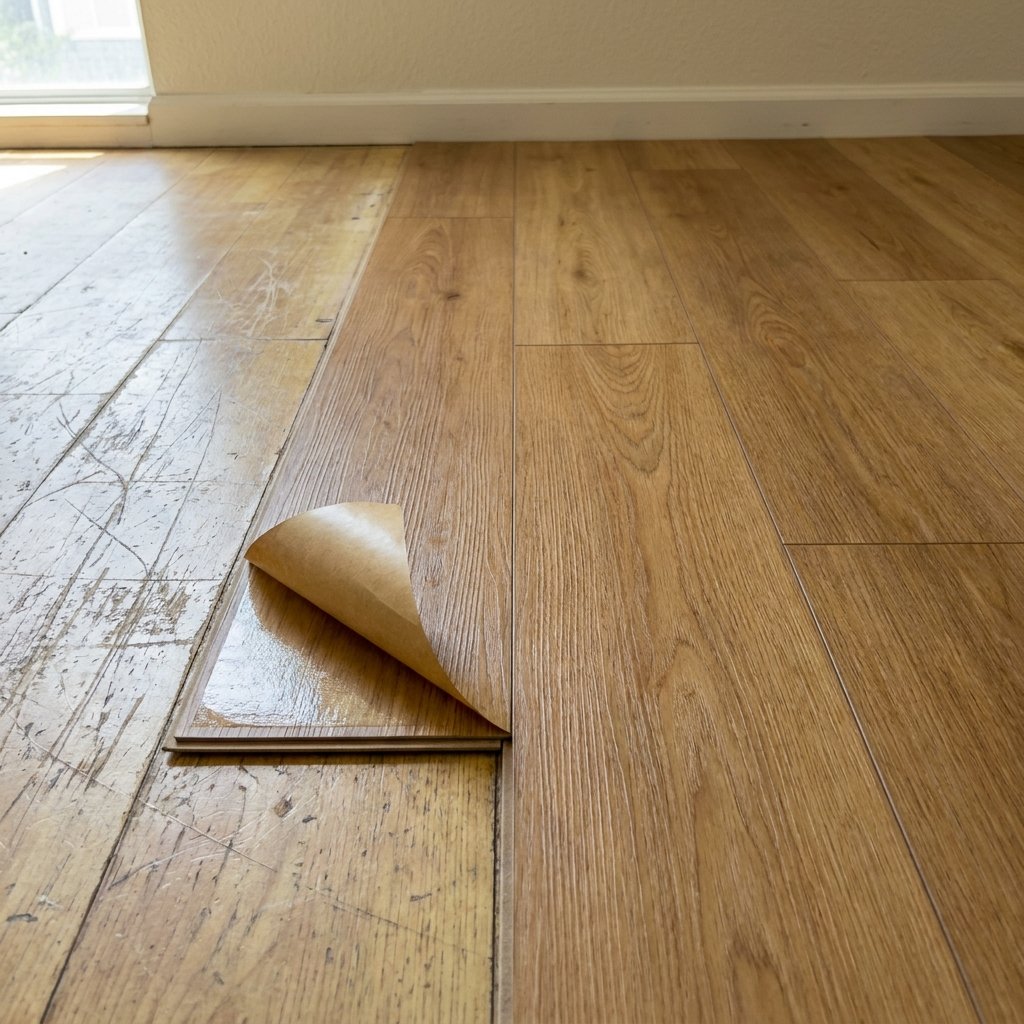
UPGRADE 7 — Peel-and-Stick Floor Tiles or Vinyl Plank Over Carpet
If your rental has ugly vinyl flooring or damaged laminate in the bedroom, peel-and-stick vinyl plank tiles are a completely legal and removable upgrade in most rental situations — the original floor goes untouched beneath. Check your lease, but the vast majority of leases don’t prohibit floor coverings.
For carpeted bedrooms, a large area rug is the classic solution — but peel-and-stick vinyl can be laid over hard floors for a dramatic upgrade.
👉 Achim Home Peel-and-Stick Vinyl Floor Tiles — 12″×12″ tiles that go directly over existing smooth hard flooring. Come up cleanly without adhesive residue.

👉 Art3d Peel-and-Stick Luxury Vinyl Plank — a more premium option with a more realistic wood-look finish.

Cost: $30–$80 for a standard bedroom floor (approx. 120 sq ft) depending on tile brand and style.
UPGRADE 8 — String Light Canopy / Fairy Light Installation
The most atmosphere-creating bedroom upgrade that requires zero tools and zero holes. String lights mounted with Command hooks create a canopy of warm light above the bed — the single most photographed and Pinterest-saved renter-friendly bedroom upgrade of the past decade.
👉 Govee RGBIC Smart String Lights → — app-controlled color changing, can be warm white or any color. Perfect for setting different moods.

👉 Brightown Bedroom String Lights Warm White → — classic warm Edison-effect string lights for the timeless bedside canopy look.

Step-by-Step: String Light Canopy
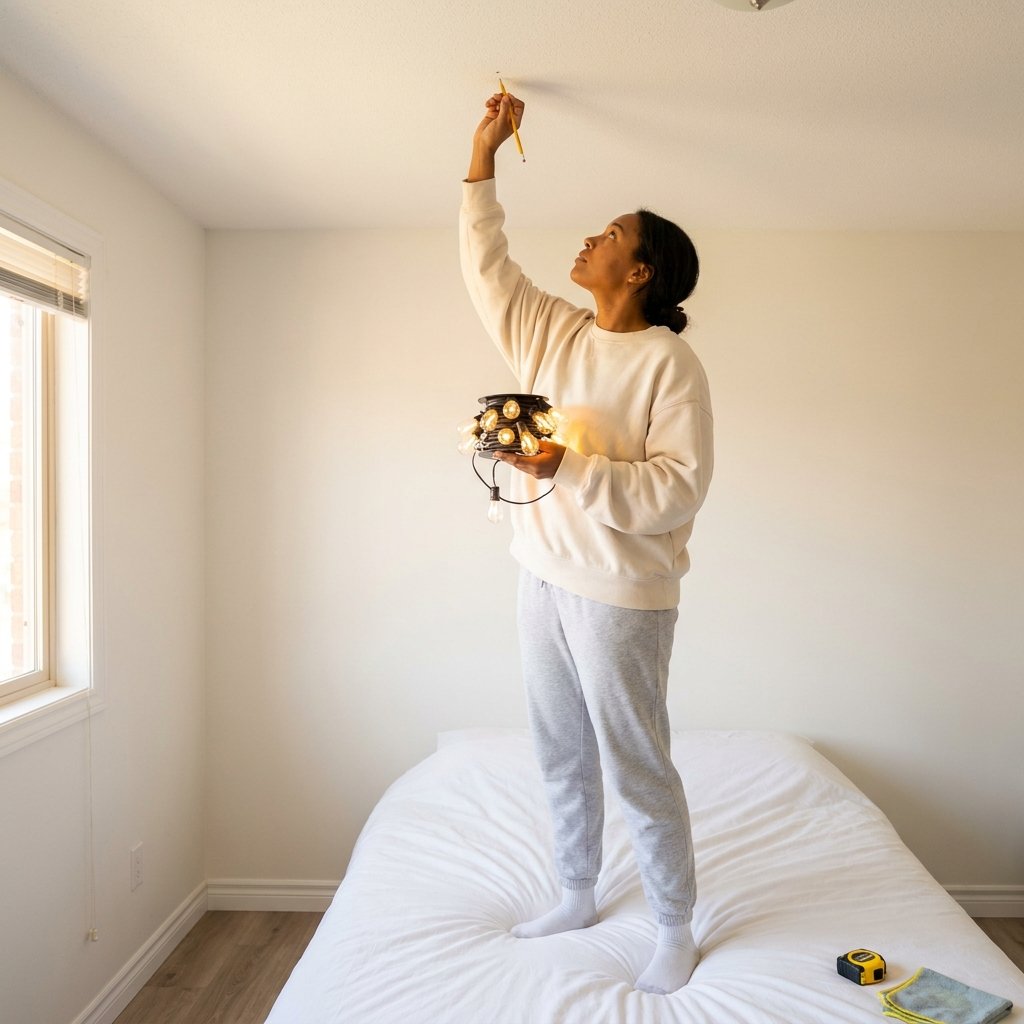
Step 1 — Map your hook positions Decide on your light canopy shape — the two most popular are a simple V-shape (two hooks on the wall above the bed, lights draping from a central ceiling hook down to both sides) or a perimeter canopy (hooks on all four ceiling corners, lights strung around the perimeter above the bed). Lightly mark each hook position with a pencil dot.
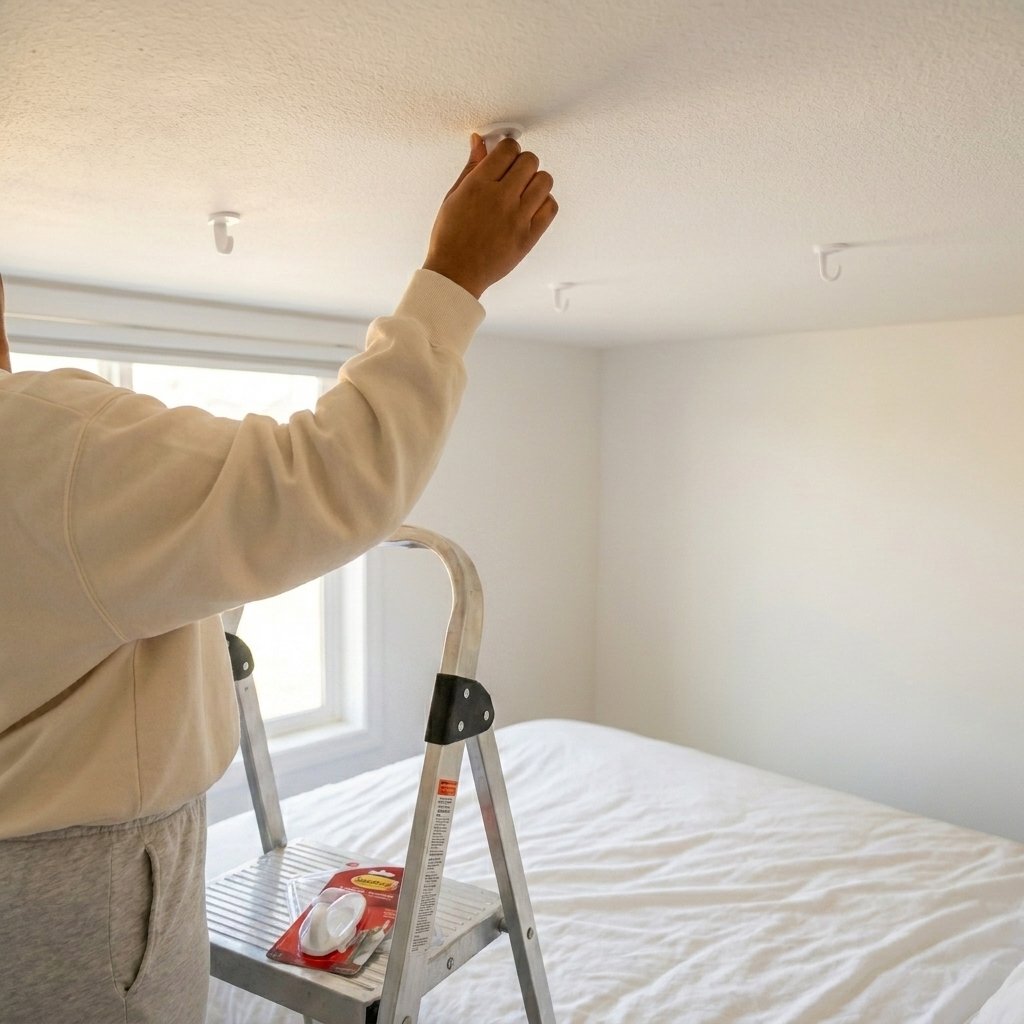
Step 2 — Install Command ceiling hooks Use Command ceiling hooks (specifically rated for ceilings — they have a wider base for better plaster adhesion). Press each hook firmly for 30 seconds and wait the full 1 hour before loading. For string lights (typically 1–3 lbs total), the small Command utility hooks are sufficient.
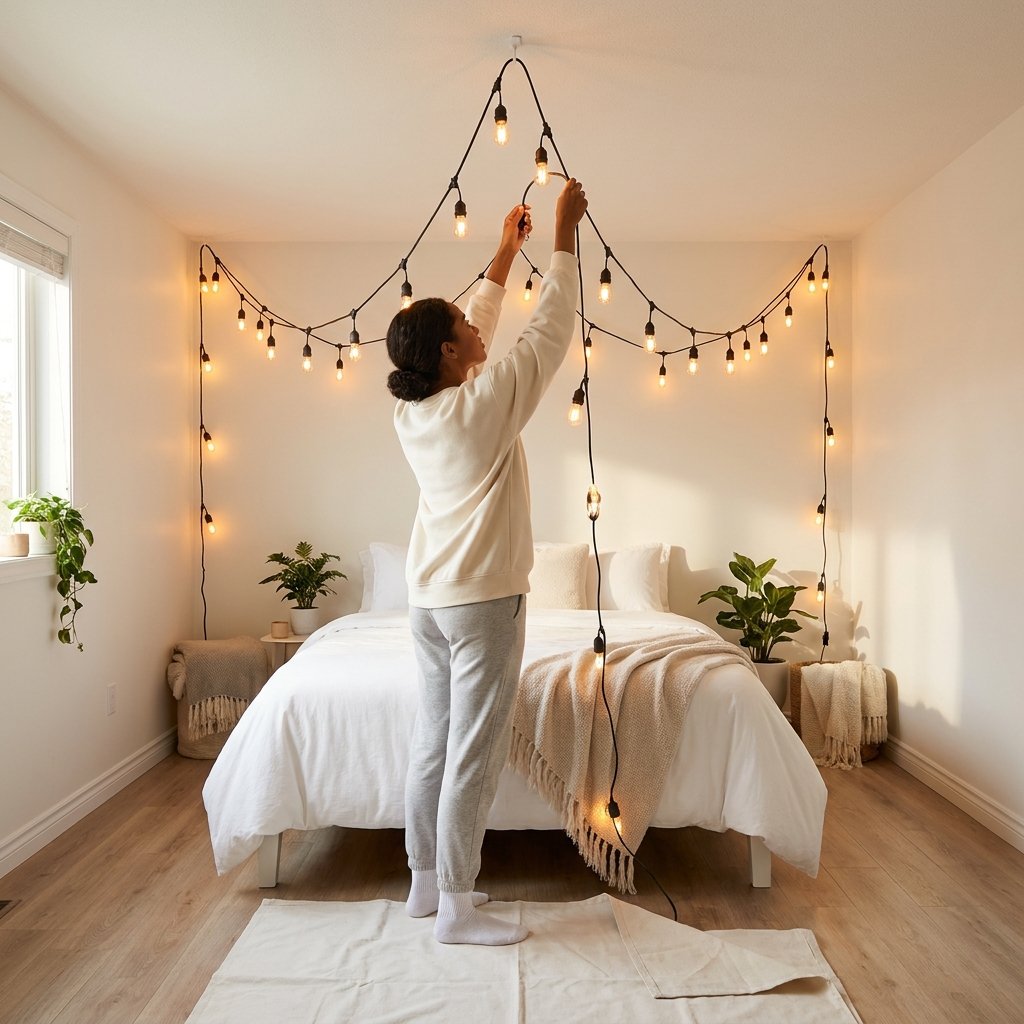
Step 3 — Drape and style the lights Loop the string lights over each Command hook, adjusting the drape until it looks natural and even. Plug in and turn on to assess the effect — you can adjust the tension and drape easily since the hooks allow repositioning. For the classic V-canopy above a bed: two wall hooks at headboard height (mounted with Command picture strips into the wall, not ceiling) and one central ceiling hook create the perfect triangular drape.
Cost: $12–$35 for string lights. $8–$12 for Command hooks.
UPGRADE 9 — Removable Mirror Arrangement
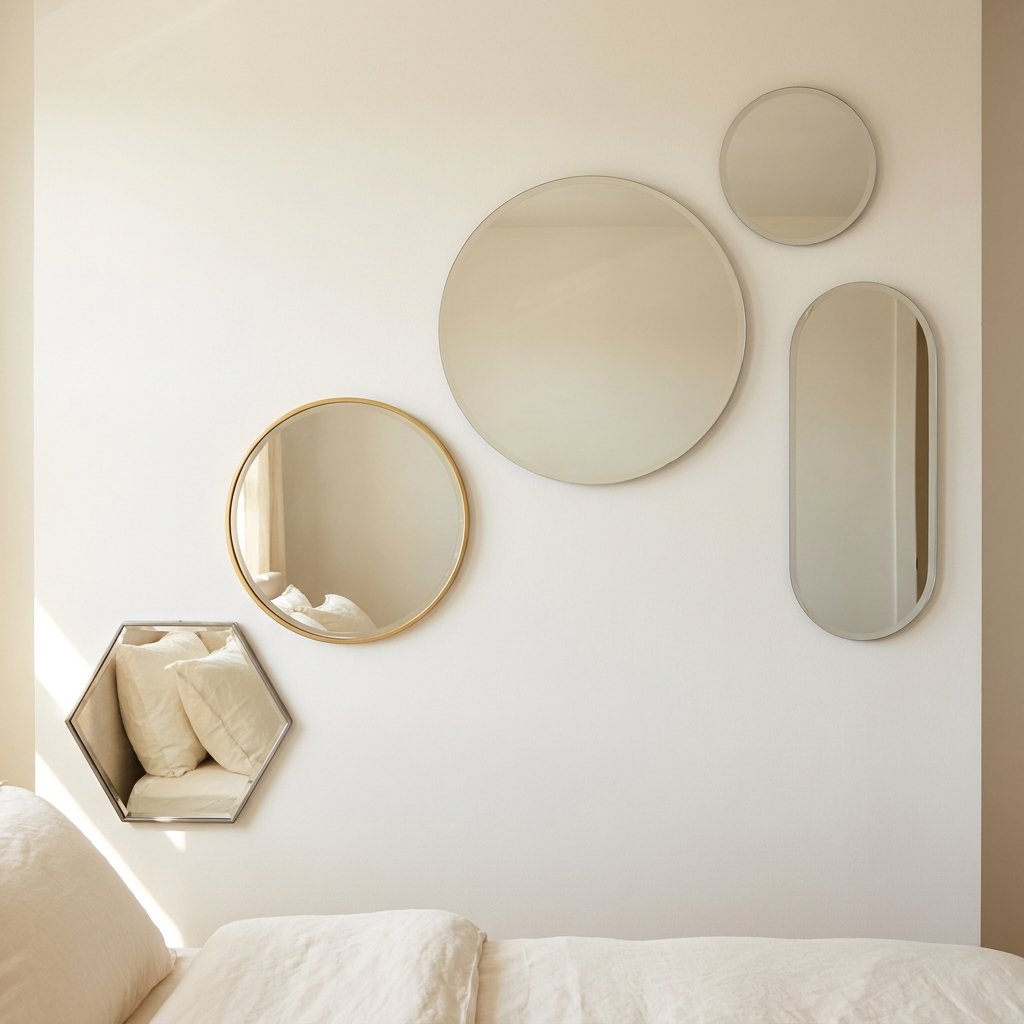
A cluster of mirrors — especially varied round and oval shapes in different sizes — makes any rental bedroom feel larger, brighter, and significantly more styled. Command strips hold mirrors beautifully, with one important caveat: mirrors must be within the weight rating, and you should always use a safety backing or check for “shatterproof” labeling.
👉 Hexagon Mirror — lightweight, modern, under 2 lbs each. Perfect for Command-strip hanging.

👉 Frameless Round Mirror Set of 3 → — in varying sizes or same sizes. Beautiful clustered arrangement over a bedside table.
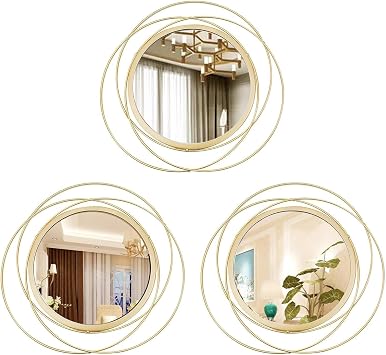
👉 Command Large Picture Strips (4-pack) → — for mirrors up to 16 lbs per pair.
Cost: $25–$80 for a mirror arrangement of 3–5 pieces.
UPGRADE 10 — Tension Rod Closet Organization
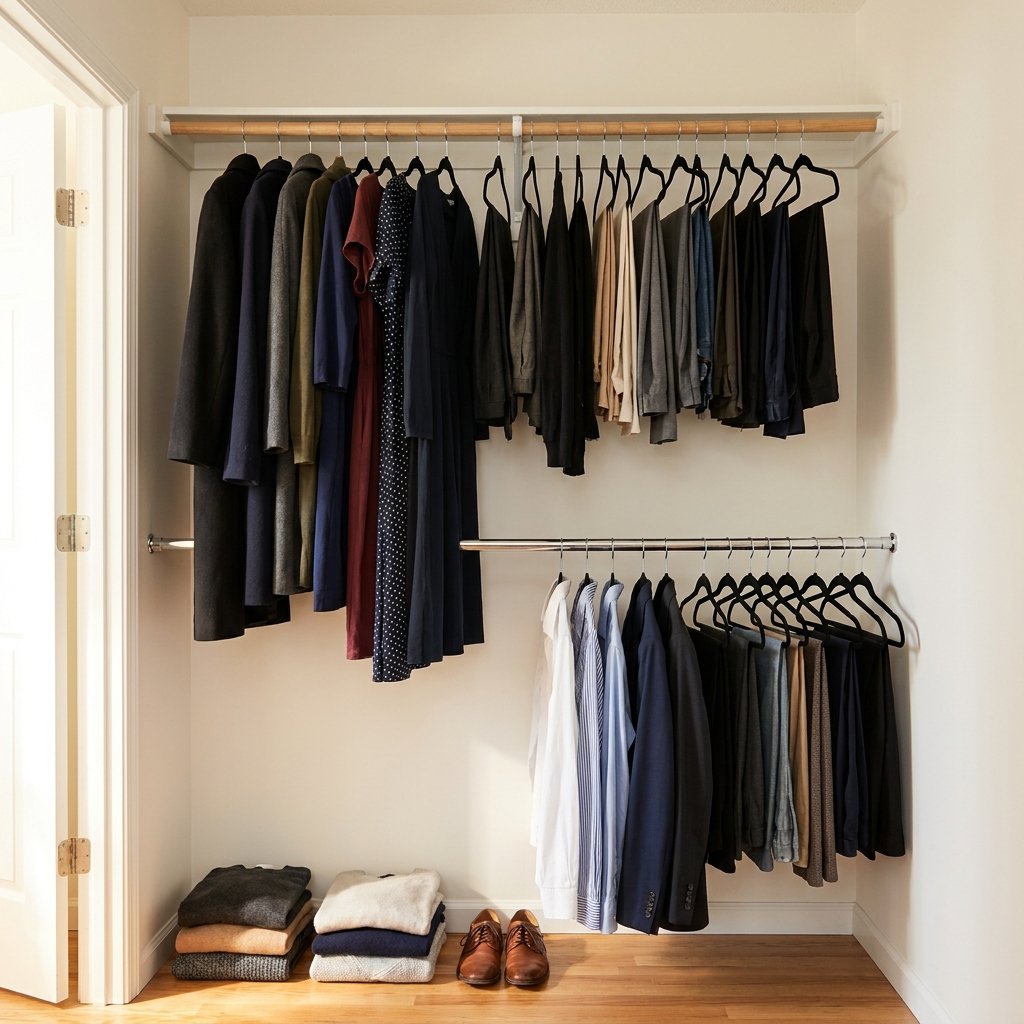
This isn’t a visible bedroom upgrade in the traditional sense — but if your rental closet is a disaster of single-rail hanging space with no shelving, a tension rod installed at a lower height creates a double-hanging system that doubles your hanging capacity instantly. No tools, no wall damage.
👉 Expandable Closet Tension Rod — adjusts from 24″ to 48″. Holds up to 30 lbs. Takes 60 seconds to install.

UPGRADE 11 — Floating Shelf Look with Damage-Free Brackets
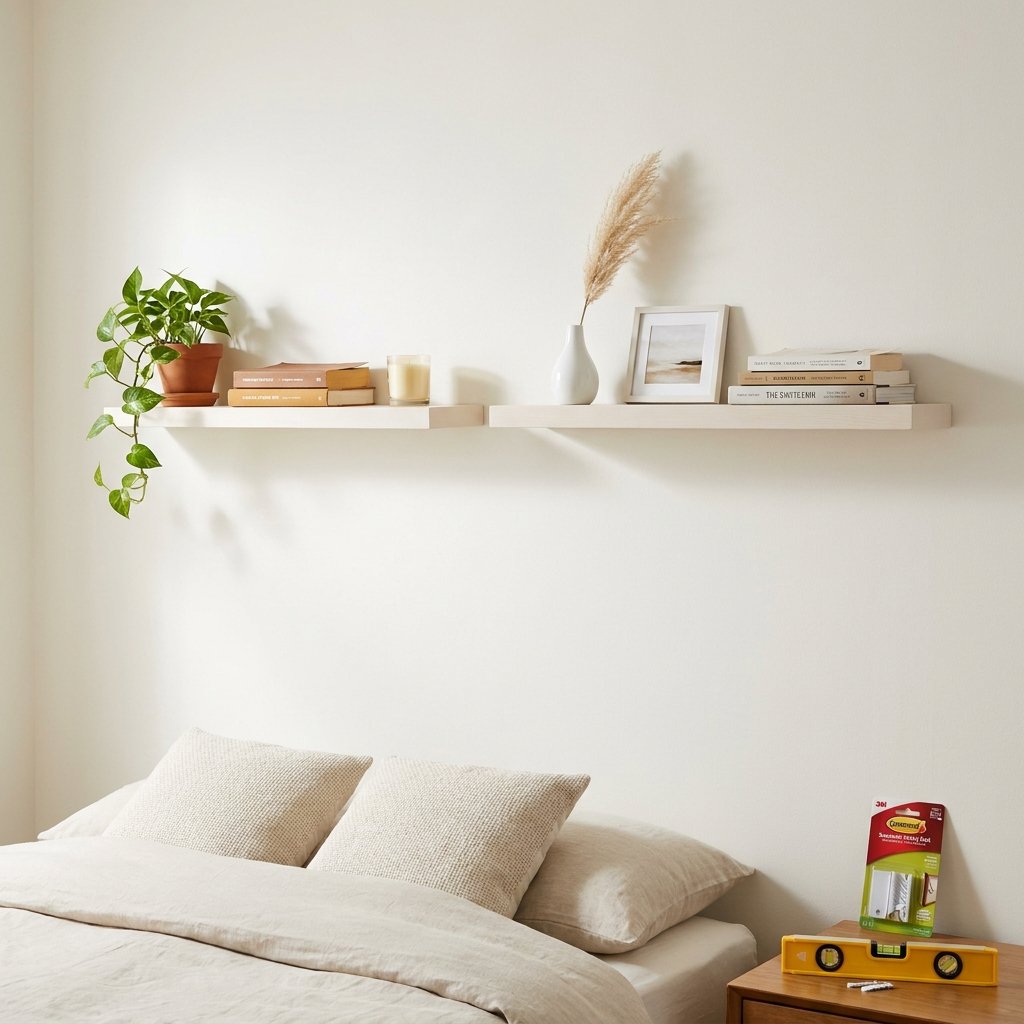
Command makes a shelf bracket system that holds genuine wooden shelves up to 15 lbs — enough for books, plants, a lamp, and decorative objects. A pair of floating shelves above the bed or beside the wardrobe adds the architectural layering that makes rental bedrooms look styled rather than empty.
👉 Command Sawtooth Adhesive Shelf Brackets — holds up to 7.5 lbs per bracket. Use four brackets for anything heavier. Works best on smooth, painted walls.

👉 Unfinished Wood Shelf Board (36″×6″) — plain pine board from any hardware store. Paint or stain before installing.


Cost: $15–$25 for Command brackets. $8–$20 for a wooden shelf board.
UPGRADE 12 — Bed Canopy Frame (Freestanding)
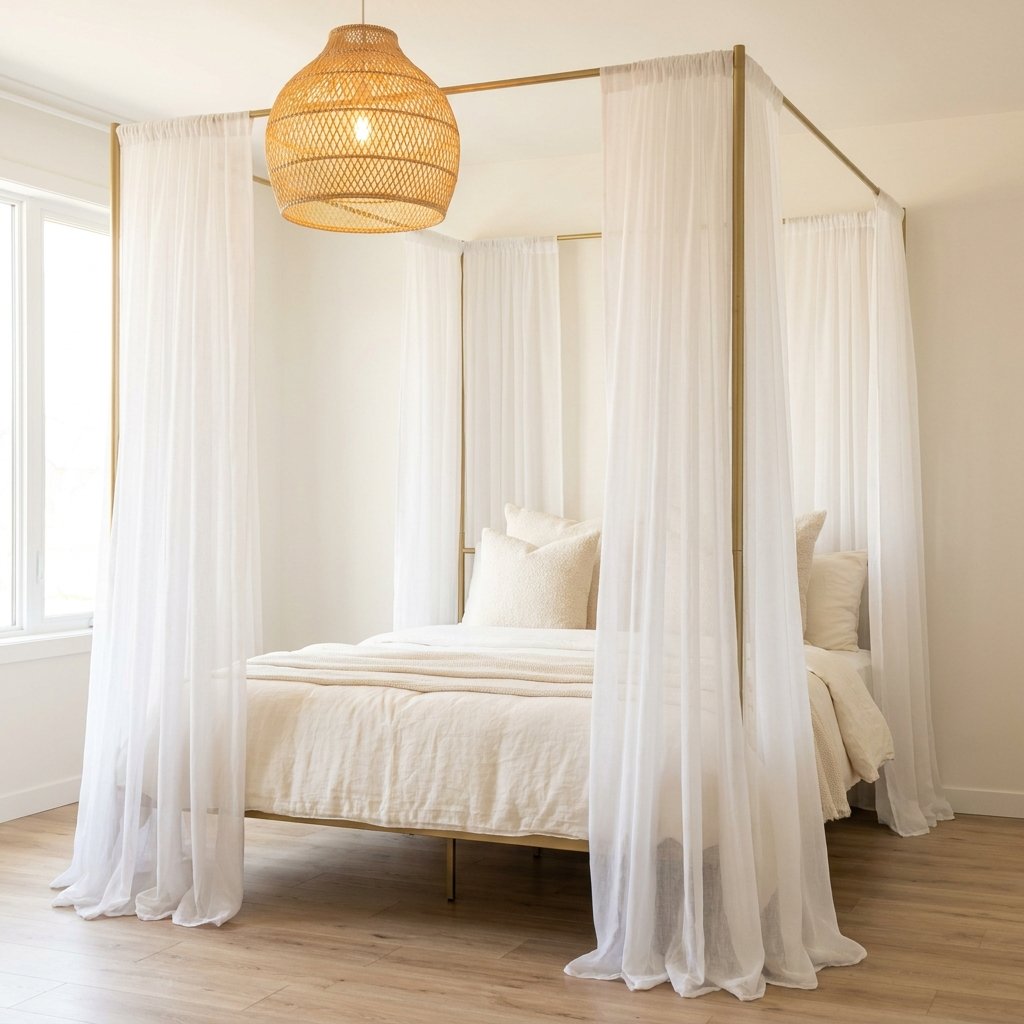
A freestanding four-poster bed canopy frame requires zero wall installation and turns any basic rental bedroom into something that looks extraordinarily luxurious. The frame stands over the bed, curtains attach to the frame, and the whole thing moves out when you do.
👉 BedStory Freestanding Bed Canopy Frame — fits most bed sizes, fully freestanding, comes in gold, black, and white finishes.

👉 Sheer Canopy Curtains for Bed Frame — sheer white panels that create the romantic canopy effect.

Cost: $45–$120 for the frame. $15–$30 for canopy curtains.
UPGRADE 13 — Peel-and-Stick Stair Riser Decals (For Rental Properties with Stairs)
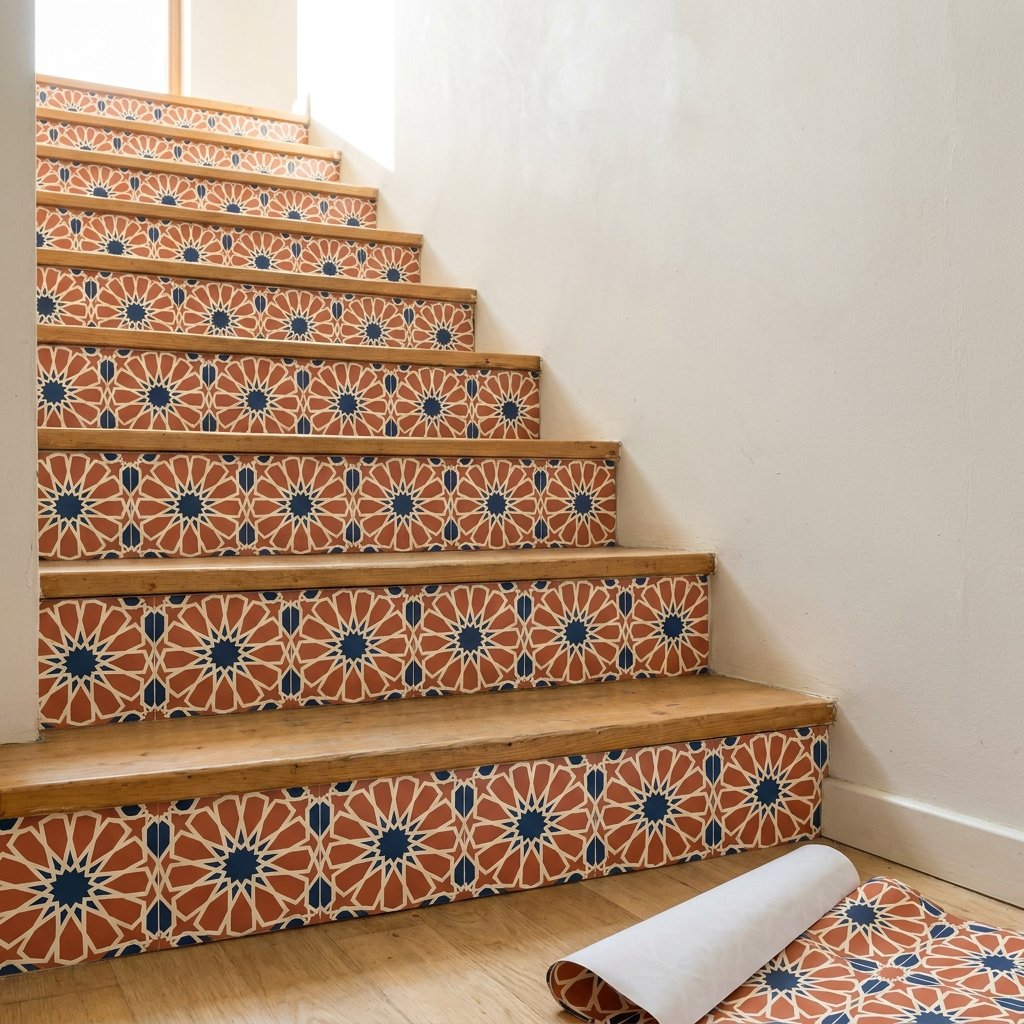
If your rental has interior stairs, peel-and-stick stair riser decals are one of the most dramatic and completely reversible upgrades available. In a loft apartment or duplex rental, this transforms a plain staircase into a genuine design feature.
👉 Walplus Peel-and-Stick Stair Riser Stickers — in Moroccan, botanical, geometric, and marble patterns. Sold per stair or in sets.

UPGRADE 14 — Bookshelf Room Divider (Freestanding)
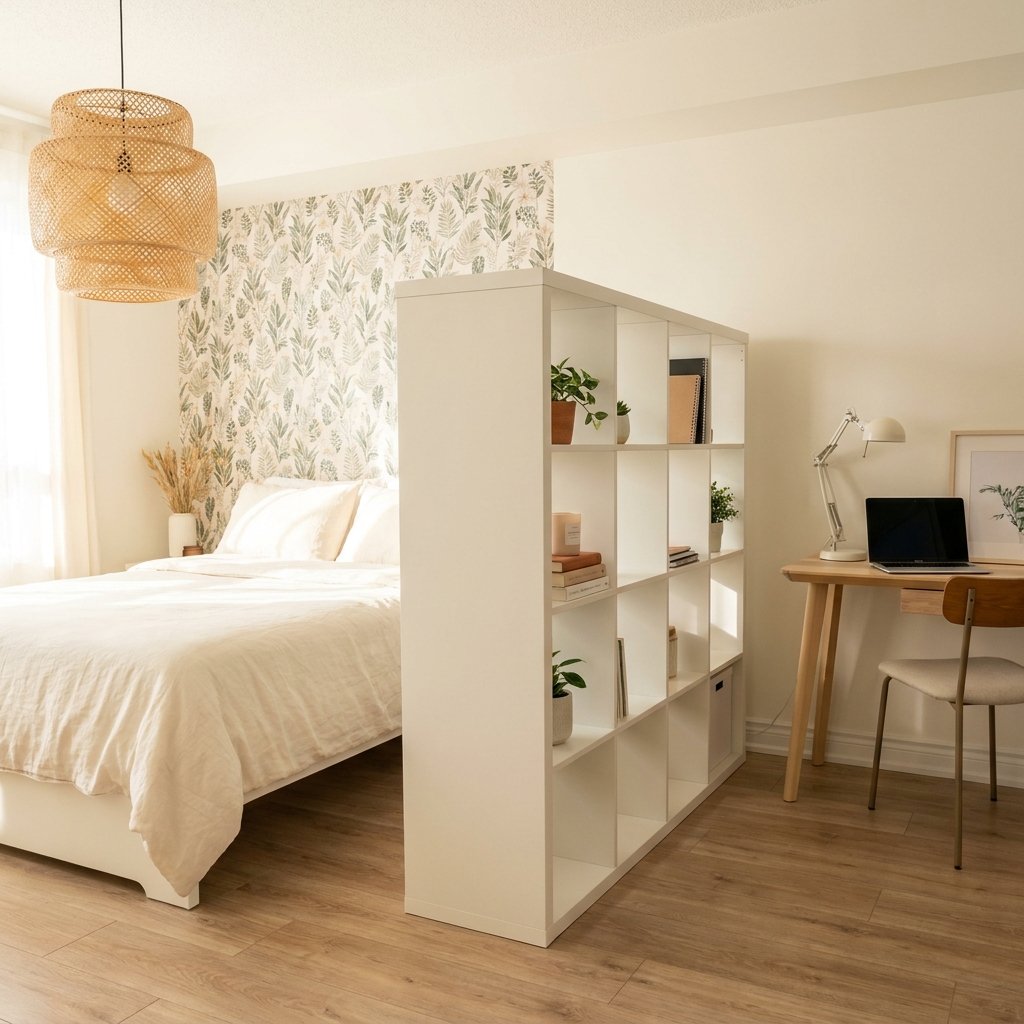
In a studio rental or a bedroom that doubles as a home office, a freestanding bookshelf used as a room divider creates zones without any wall installation. Position a low-to-medium height open bookshelf between the sleeping area and working area — style it with books, plants, and objects that face both directions.
👉 Gadroad Geometric Bookcase — the most versatile freestanding room divider for rental spaces. Available in multiple sizes and finishes.

UPGRADE 15 — Magnetic Primer + Magnetic Wall Panels
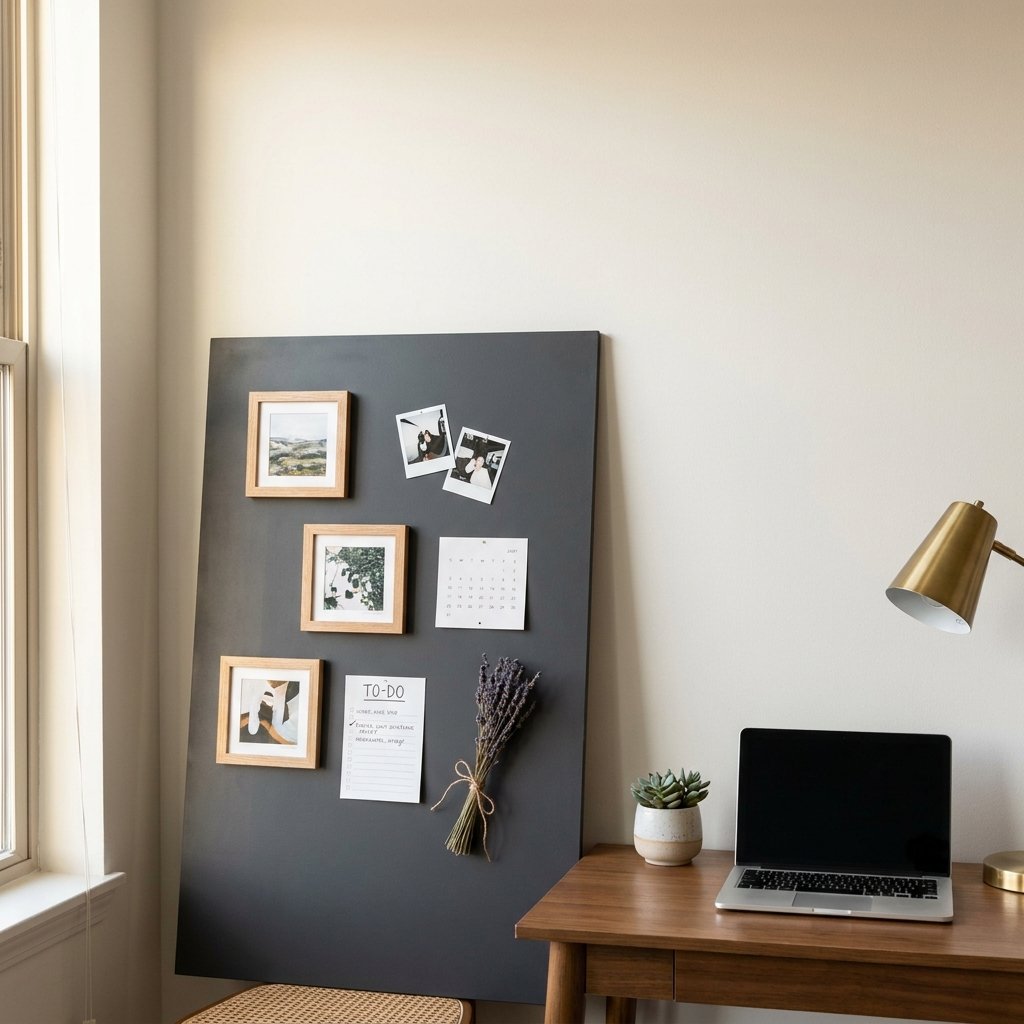
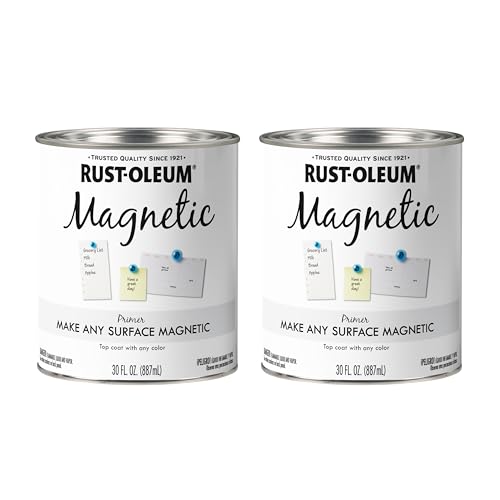
For renters who want a functional display wall without holes, magnetic primer painted onto a removable medium-density fiberboard (MDF) panel creates a large magnetic surface that leans against the wall or hangs with Command strips. You get the functionality of a magnetic wall without touching the rental wall surface.
👉 Rust-Oleum Magnetic Primer — apply to MDF or foam board for a portable magnetic surface.
UPGRADE 16 — Temporary Shiplap Look with Peel-and-Stick Wood Planks
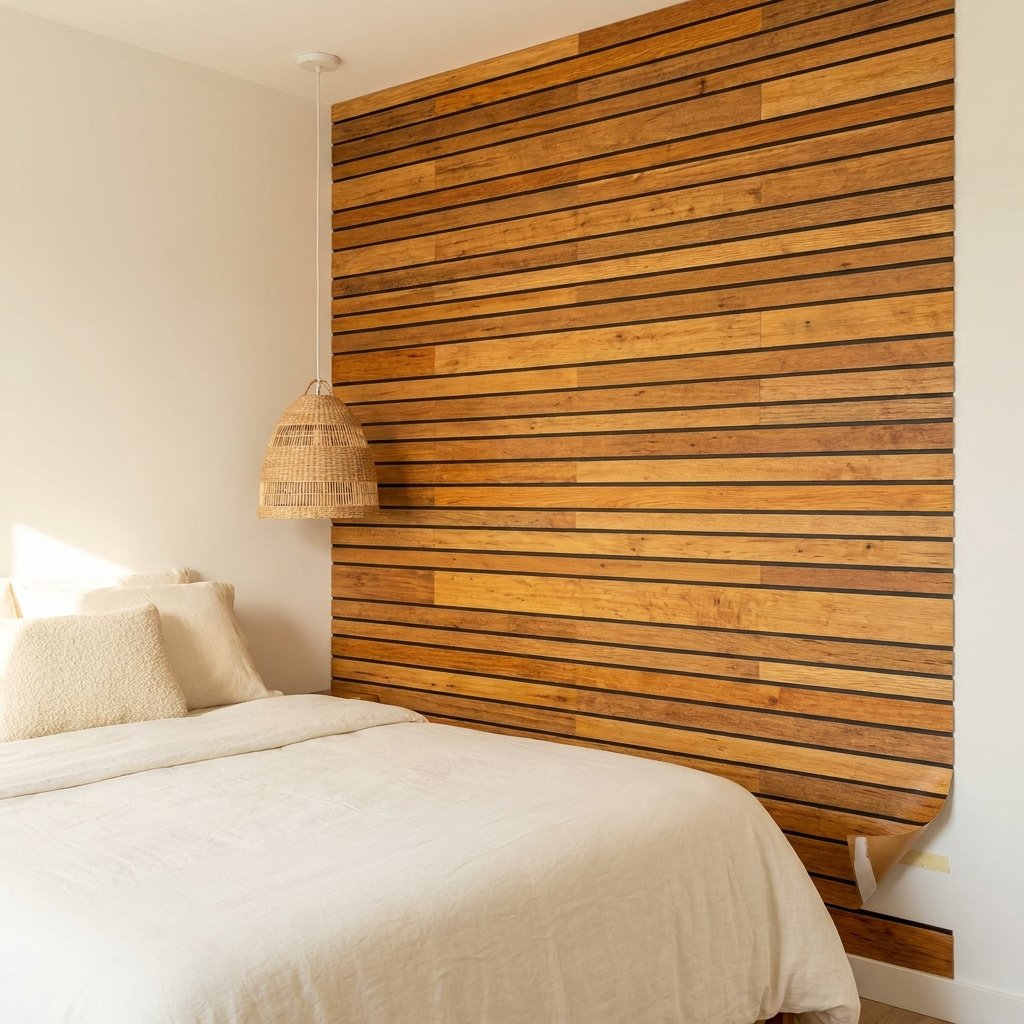
Peel-and-stick wood planks (also called Stikwood) give walls the look of real shiplap or reclaimed wood paneling — completely removable, no nails, no cutting. A single feature wall can be completed in 2–3 hours and removed in 30 minutes.
👉 Peel-and-Stick Reclaimed Wood — real thin-sliced wood with adhesive backing. Ships in panels that cut to size with scissors.

👉 Art3D Wall Panels Peel and Stick — a more affordable faux-wood look in PVC that still photographs beautifully.
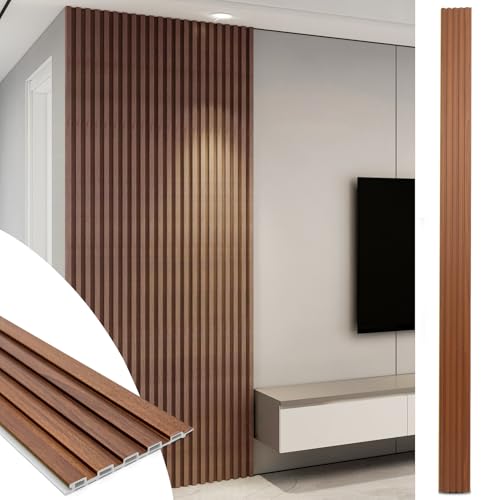
Cost: $45–$120 for a standard queen-size feature wall depending on coverage area and brand.
UPGRADE 17 — Washi Tape Geometric Wall Art
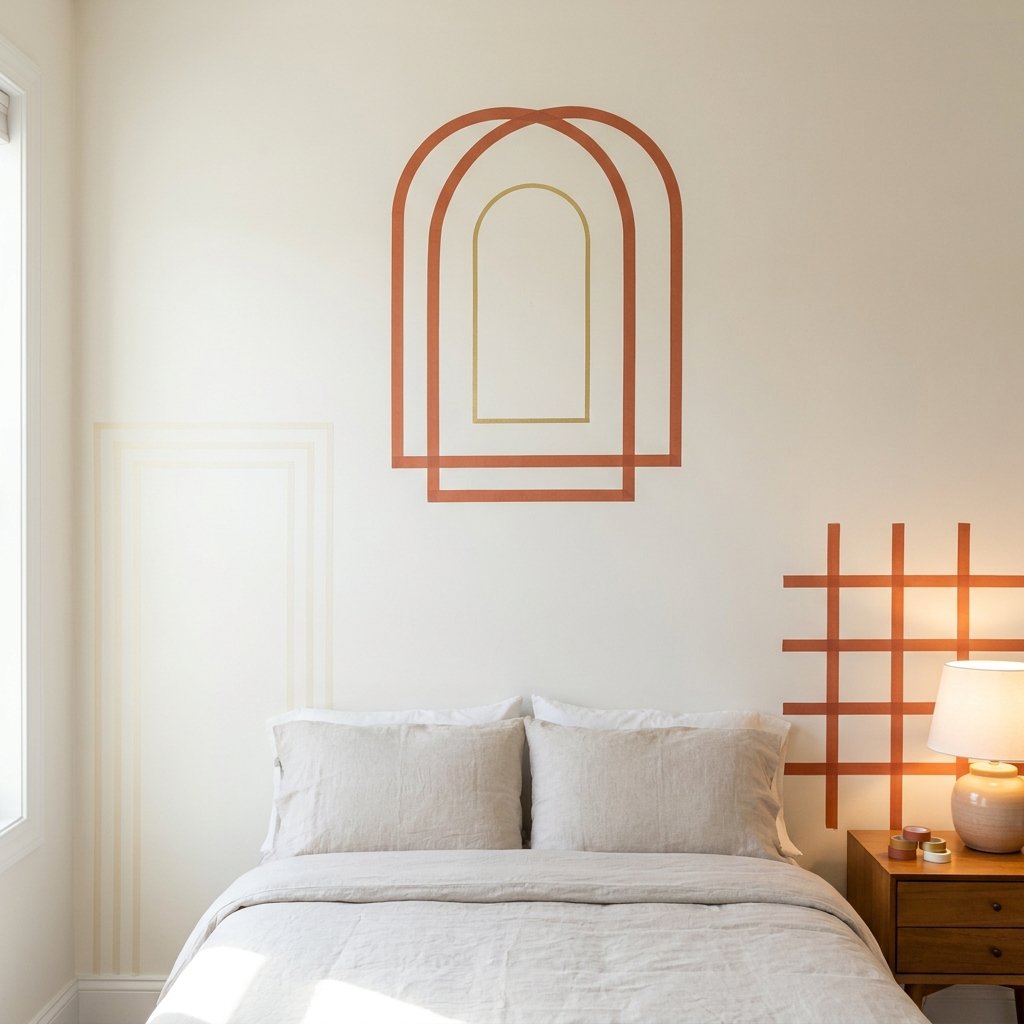
The most budget-friendly renter-friendly bedroom upgrade on this list, and one that’s genuinely creative and personal. Washi tape — a decorative masking tape — comes in hundreds of patterns and colors, adheres to walls without damaging them, and peels off completely cleanly. Use it to create geometric frames around windows, grid patterns across a feature wall, a faux headboard outline, or large-scale wall art shapes.
👉 WASHI TAPE SET 48-Pack Assorted Patterns — wide variety of colors and patterns. Enough for a large-scale wall project.

👉 Wide Washi Tape 1-inch (Solid Colors) — for clean geometric lines and borders.
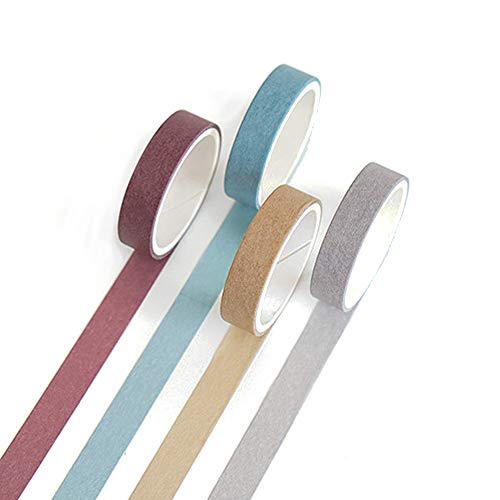
Cost: $8–$18 for a washi tape wall art project.
What to Do When You Move Out?
The Removal Checklist — Protecting Your Deposit
When it’s time to leave your rental, reverse every upgrade in the correct order:
- String lights and Command hooks: Pull Command hook tabs slowly downward at a 45° angle. Go slow — 30 seconds per hook is normal.
- Gallery wall frames: Remove Command strips by stretching the tab downward between wall and frame. Never pull the frame away from the wall first.
- Removable wallpaper: Start from a top corner, peel back slowly at a 45° angle. A hairdryer on low held 3 inches away softens the adhesive and makes removal cleaner.
- Peel-and-stick tiles: Start from a corner, use a plastic scraper (never metal) under the edge, and peel slowly. Any remaining adhesive residue cleans up with Goo Gone on a cloth.
- Fabric panels and tension rods: Simply unhook or decompress — the fastest and cleanest removals.
- Washi tape: Peel from one end slowly. Always test first — some wall paint finishes are more vulnerable than others.
- After everything is removed: Wipe walls with a barely-damp cloth. Any light pencil marks from your planning stage erase cleanly with a white eraser.
Ready to Transform Your Rental Bedroom?
The moment you’re done reading this, your blank rental bedroom has about 17 different paths toward becoming the most beautiful, personal, and intentional space you’ve ever lived in.
The beauty of renter-friendly decorating isn’t just about protecting your deposit — though that matters. It’s about claiming the space you live in as genuinely yours, even temporarily. The right removable wallpaper, the right string light canopy, the right gallery wall built from things you actually love — these things change how you feel when you wake up every morning.
None of the upgrades in this guide require a handyman, a power drill, or permission from anyone. Most of them can be done solo in an afternoon. And every single one of them comes down cleanly, completely, and deposit-safely when it’s time to move.
Save this post to your apartment decor board. Share it with every renter you know who’s staring at bare walls and feeling stuck.
Also Read: DIY Limewash Bedroom Wall: The Organic Texture Trend for $30
Frequently Asked Questions
- Will removable wallpaper actually come off cleanly without damaging the rental wall?
In the vast majority of cases, yes — with one important qualification: the wall’s paint finish matters enormously. Removable wallpaper on flat or matte paint comes off most cleanly because the paint itself is slightly porous and doesn’t bond to the adhesive. On eggshell or satin paint, removal is still usually clean but can occasionally lift the paint slightly in areas where the paint has been applied thinly or over repairs. Always test a small section in an inconspicuous corner — inside a wardrobe door or behind the bedroom door — and leave it for 72 hours before doing the full wall. Removal technique also matters: peel slowly at a 45-degree angle in a warm room (use a hairdryer on low if the room is cold), and go slowly. Rushing removal is the number-one cause of paint damage from otherwise excellent products.
- How much weight can Command strips actually hold? Are they enough for a real gallery wall?
Command strips are far more capable than most people realize when used correctly. The Large Picture Hanging Strips are rated for up to 16 lbs per pair. Medium strips hold up to 12 lbs per pair. For a typical 8×10 framed art piece, even a heavier wood frame with glass rarely exceeds 3–4 lbs — so two pairs of large strips give you a significant safety margin. The keys to Command strip reliability are: clean the wall surface with isopropyl alcohol before applying (not just a wipe — proper alcohol cleaning), press each strip for 30 full seconds, and wait the full 1-hour cure time before loading any weight. The vast majority of Command strip failures happen because one of these three steps was shortened or skipped. For very heavy mirrors (over 10 lbs), use four pairs of large strips and consider additional strips in the center of the mirror back as insurance.
- Can I put peel-and-stick wallpaper on textured rental walls?
Peel-and-stick wallpaper performs best on smooth, flat walls. On lightly textured walls (very mild orange peel texture), it can work — the adhesion is slightly reduced in the valleys of the texture, but for most residential rental textures, it still holds adequately if you press firmly and work air bubbles out from the center. On heavily textured walls (knockdown, skip-trowel, or heavy sand texture), peel-and-stick wallpaper will not adhere reliably and will begin to lift at edges within days. For textured rental walls, fabric wall panels on Command hooks, large-scale framed art, and tapestry hangings are better alternatives than peel-and-stick products.
- My lease says “no nails or screws in walls.” Does this mean I can’t use Command strips?
Command strips are almost universally permitted even under strict “no nails or screws” lease restrictions because they use adhesive, not hardware, and leave the wall surface intact upon removal. However, if you want complete certainty, read your specific lease wording carefully — some very strict leases prohibit “any wall attachments” more broadly. In that case, freestanding elements (bed canopy frames, bookshelves as dividers, floor lamps) and non-wall-contact upgrades (bedding, rugs, curtains on tension rods in the window frame) are your safest options. When in doubt, a quick email to your landlord asking specifically about adhesive-only wall hangings usually gets a yes — and you have it in writing.
- Are peel-and-stick floor tiles really removable from a rental floor?
Yes — peel-and-stick vinyl floor tiles are genuinely removable from most hard flooring surfaces and are one of the most underutilized renter-friendly bedroom upgrades available. The key considerations: the existing floor must be clean, dry, and smooth (peel-and-stick tiles don’t adhere well to dirty or textured surfaces). They cannot go over carpet. Removal is easiest in a warm room — the adhesive softens slightly with heat, making tiles lift cleanly. If any adhesive residue remains after removal, Goo Gone on a cloth removes it without damaging most hard flooring surfaces. The original floor beneath is untouched and unaltered throughout. As with all adhesive products, testing a tile or two in a corner first is wise before covering the entire bedroom floor.
- How long does it take to do a complete renter-friendly bedroom transformation?
This depends entirely on which upgrades you choose, but a realistic timeline for the most impactful combination — removable wallpaper feature wall + Command strip gallery wall + string light canopy + new bedding and a rug — is one solid weekend: Saturday for the wallpaper and gallery wall installation, Sunday for the string lights and styling. The wallpaper installation alone takes 2–4 hours for a standard queen-size feature wall if you’ve never done it before. A 5–7 piece gallery wall takes 1–2 hours including planning and layout time on the floor. String light canopy installation takes about 45 minutes. The upgrades that require waiting time (Command strip cure time of 1 hour) can be staggered so you’re always progressing on one element while another cures.
- What’s the best renter-friendly bedroom upgrade for the biggest visual impact per dollar spent?
Removable peel-and-stick wallpaper on the feature wall behind the bed delivers the single highest visual impact per dollar of any renter-friendly upgrade — bar none. A $40–$60 roll of quality removable wallpaper on one wall transforms the entire perceived character of the bedroom more dramatically than new furniture, new bedding, or any other element. If budget is very tight, string lights ($12–$20) give you the best atmosphere-per-dollar ratio. A large area rug ($30–$80) changes a bedroom’s feel significantly in rental spaces with hard or carpet flooring. The combination of removable wallpaper + string lights + a good rug covers the three most important sensory dimensions of a bedroom — visual, atmospheric, and textural — and can be achieved for well under $150 total.
- Can I use removable wallpaper on the ceiling of my rental?
Yes — and ceiling wallpaper is one of the most distinctive and underused renter-friendly bedroom upgrades available. The installation technique is the same as wall application, just working horizontally overhead, which does make it more physically challenging (a step ladder is essential). The adhesive performance is generally slightly reduced on ceilings because gravity is working against the bond — choose a removable wallpaper that is specifically reviewed for ceiling use, or opt for a lighter-weight paper. The result — a patterned or textured ceiling above the bed — is extraordinarily impactful and completely unexpected in a rental space. A single 2’×4′ ceiling panel above the bed center (rather than the whole ceiling) is the easiest starting point.
- What should I do if a Command strip leaves sticky residue when I move out?
This is common and completely manageable. The adhesive residue that Command strips occasionally leave (usually on older or improperly cured wall paint) is water-soluble and can be removed in several ways, in order of gentleness: first, rub the residue with your thumb in circular motions — body heat often dissolves it. Second, a barely-damp clean cloth with a tiny amount of dish soap on it, pressed and rubbed gently. Third, Goo Gone adhesive remover on a cloth — hold it against the residue for 30 seconds before wiping. Fourth, a small amount of rubbing alcohol (isopropyl) on a cotton ball. Always test any cleaning method on an inconspicuous wall area first, since some flat paints are sensitive to solvents. In most cases, the residue wipes clean in under a minute and the wall is left completely undamaged and clean.
- Do tension rods work for heavy curtains in a rental bedroom?
Standard tension rods have a weight limit (typically 10–15 lbs for quality rods) and a width limit (most go to 48″, some to 60″). For lightweight sheer panels and light-to-medium weight cotton or linen curtains, tension rods work beautifully. For heavy velvet, thermal-backed blackout curtains, or very wide windows, tension rods become unreliable — they tend to slip and fall overnight, which is frustrating. For heavier curtains in rental bedrooms, the no-drill adhesive curtain rod bracket systems (which mount the rod brackets with adhesive rather than screws) are a better solution, supporting more weight while still remaining hole-free. Alternatively, inside-mount cellular shades or Roman blinds that fit snugly in the window frame require no brackets at all and work for any curtain weight.
- Can I use washi tape on any wall in a rental?
Washi tape is generally one of the safest wall products for rentals because it’s designed to be low-tack and removable. However, its performance varies significantly by wall paint finish. On fresh, well-adhered eggshell or satin paint, washi tape almost always removes without any trace. On old, flat, or flaking paint, washi tape can occasionally lift the paint when removed — especially if left for a very long time (months) or in humid conditions. Always test a small strip in an inconspicuous area first and check removal after 48 hours. If the paint lifts slightly even in the test, restrict washi tape to non-adhesive surfaces (furniture, glass, wood trim) rather than walls. For long-term rental stays, remove and reapply washi tape designs periodically to prevent the adhesive from bonding too strongly to the wall.
- What’s the best order to do renter-friendly bedroom upgrades in?
Start from the top and work down: ceiling first (string lights, any ceiling elements), then walls (removable wallpaper, gallery wall, fabric panels), then windows (curtains, blinds), then floor level (rug, floor tiles). This order prevents the mess or positioning of earlier upgrades from interfering with later ones. Specifically: install your string light canopy framework before the removable wallpaper so you don’t accidentally stick tape or wallpaper over where you need to position ceiling hooks. Hang your gallery wall before styling the bedside tables and floor elements so you can step back and look at the wall arrangement with a clear view. Lay the rug before positioning furniture so you can adjust rug position without moving the furniture twice.
- Are there renter-friendly alternatives to painting a bedroom accent wall?
Several excellent alternatives to paint exist for rental bedrooms, each with a different visual result. Removable peel-and-stick wallpaper is the most dramatic substitute, creating either pattern, color, or texture. Fabric panels and tapestry hangings add color and softness. Peel-and-stick wood planks (Stikwood) or the wainscoting-effect removable wallpaper create textural depth. A large-scale gallery wall creates color and personality through art. Washi tape geometric patterns add graphic boldness. For true paint-like color without paint, some renters apply a layer of peel-and-stick wallpaper in a solid color — effectively a removable “paint” — which is available from several brands specifically for this use case. Of all these alternatives, removable wallpaper in a solid, textured, or painterly finish (some brands offer options that genuinely look like limewash, venetian plaster, or color-wash paint effects) comes closest to the visual impact of actual wall paint.
- Will my landlord be able to tell I’ve used adhesive products on the walls?
In most cases, no — if you’ve used quality products correctly and removed them properly. When Command strips are applied and removed according to the instructions (proper surface prep, 1-hour cure time, slow careful removal with the tab stretched downward), they leave walls completely indistinguishable from untouched walls. Quality removable wallpaper similarly leaves no marks, no adhesive, and no color transfer on removal. The situations where landlords can tell are: removal done too fast causing paint lifting, adhesive residue left behind (which is usually cleanable), or using non-removable products mistakenly labeled as removable. The safest approach is to purchase products with explicit removal guarantees, follow the instructions exactly, and leave cure time and removal time in your move-out schedule — don’t rush either end of the process.
- How do I decorate a rental bedroom that has ugly built-in wardrobes or dated fixtures I can’t remove?
This is one of the most common renter design challenges. The strategy is to draw the eye away from the elements you can’t change by making something else dramatically more beautiful. A stunning feature wall with removable wallpaper directly behind the bed pulls all attention to that wall and away from dated wardrobes on the adjacent wall. String lights above the bed create a focal point and mood that makes built-in features recede visually. A large statement rug grounds the bed area as a separate beautiful zone. For the wardrobes themselves: peel-and-stick wallpaper on the inside of wardrobe doors (if allowed) personalizes them from the inside. Removable contact paper on wardrobe fronts can refresh dated door colors — test removal carefully first. Replacing generic hardware (knobs and handles) with decorative alternatives is usually permitted since it’s reversible — keep the originals in a bag and swap back before you move out.