As an Amazon Associate we earn from qualifying purchases. Here’s how it works.
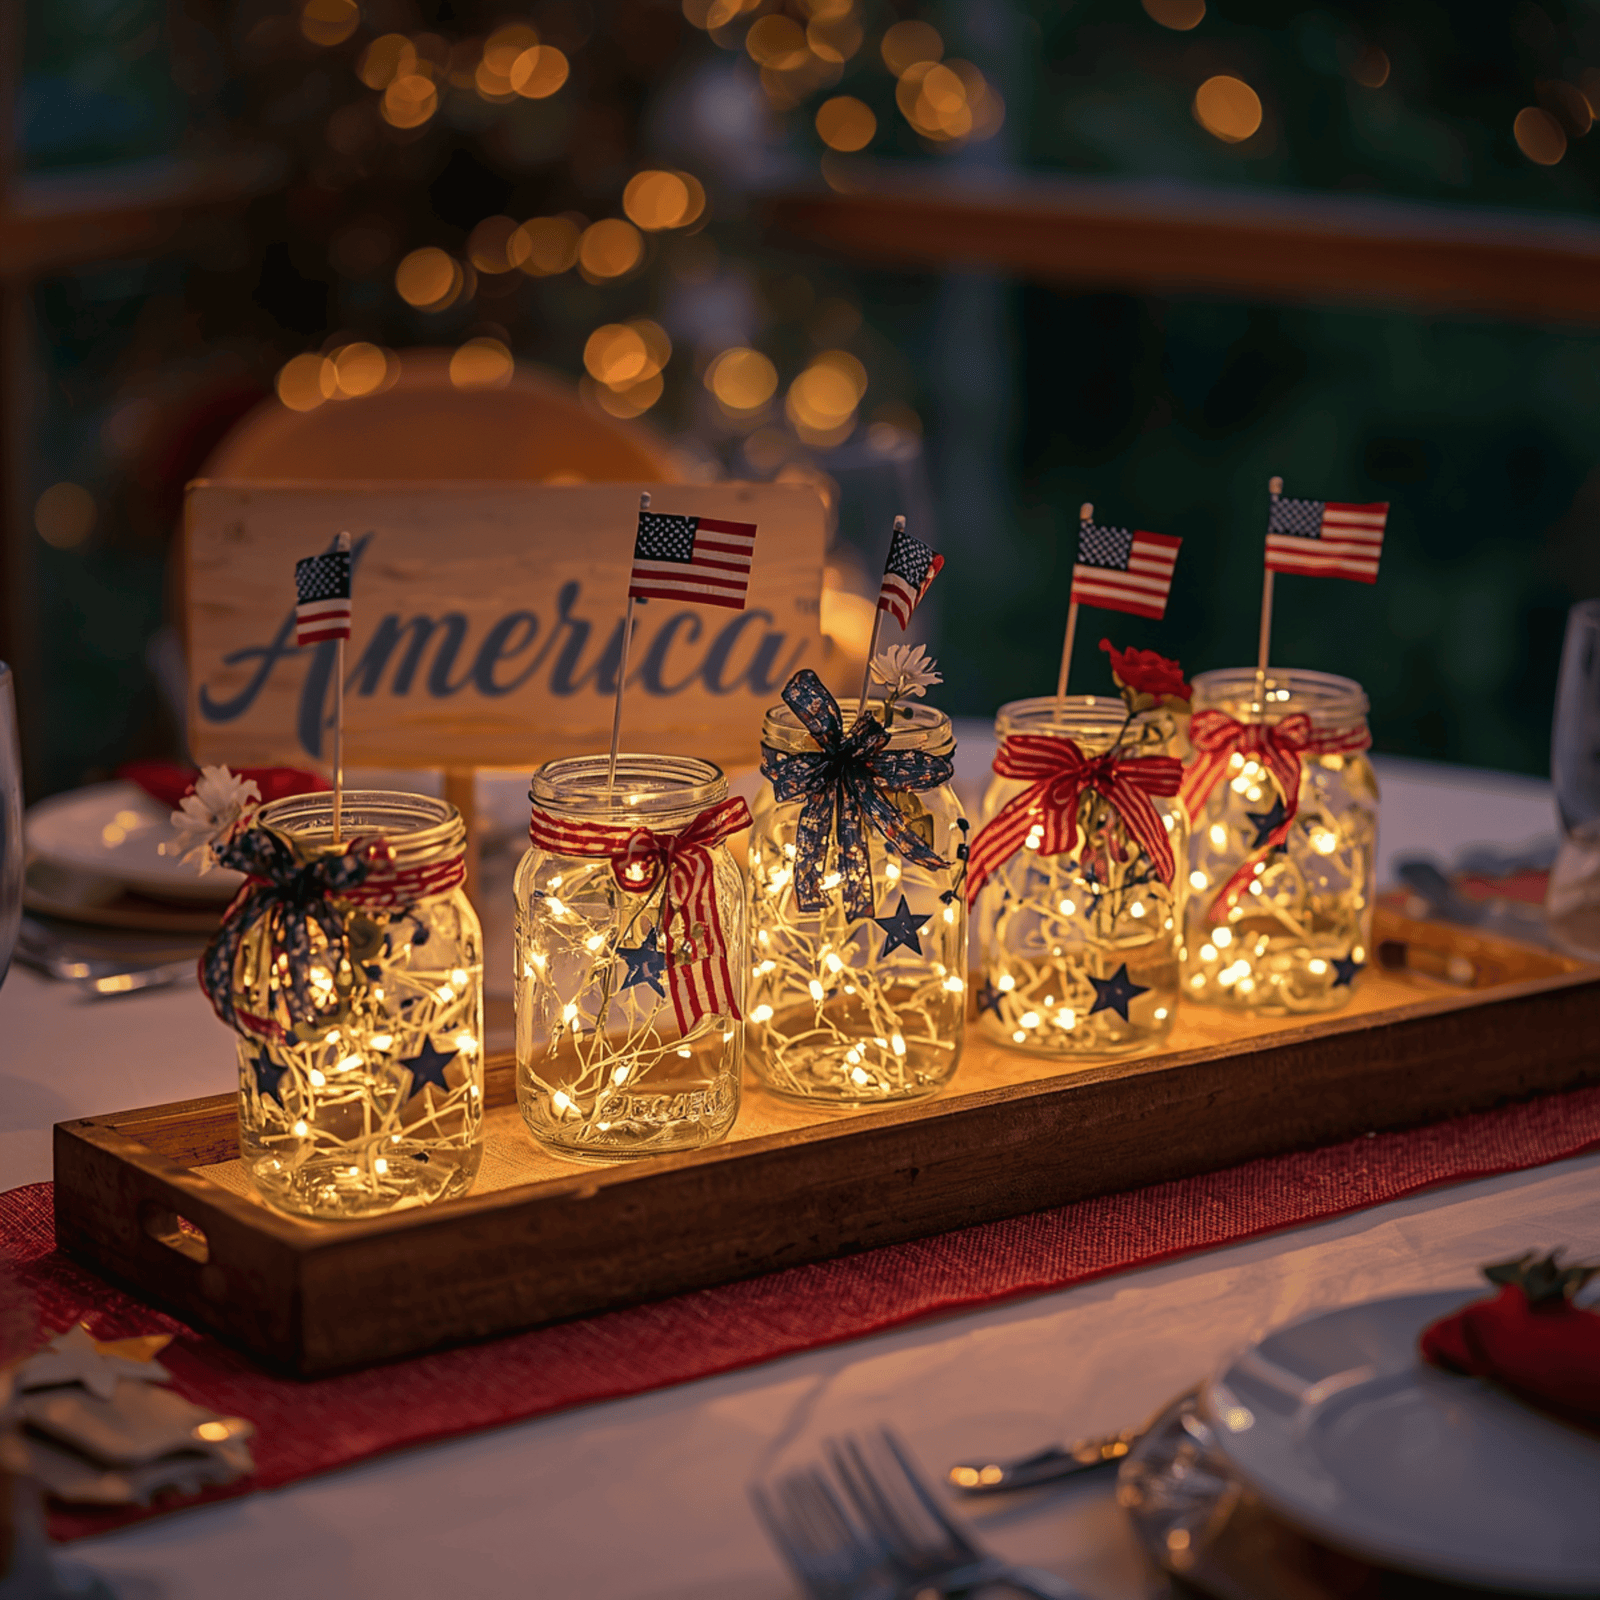
There’s something magical about a table glowing with the warm flicker of fairy lights nestled inside rustic mason jars. Add a patriotic red, white, and blue color palette, and you’ve got the most stunning — and surprisingly easy — DIY mason jar centerpieces for your 4th of July party.
Whether you’re hosting a backyard barbecue, a Fourth of July dinner party, or simply decorating your porch for Independence Day, these patriotic mason jar decorations will impress every guest without breaking the bank. Best of all, you don’t need any craft experience to pull this off. If you can fill a jar, you can make these.
In this step-by-step guide, we’ll walk you through everything you need — materials, assembly, decoration, and display — so you can create gorgeous 4th of July table decor that looks like it came straight from a Pinterest board.
Why Mason Jar Centerpieces Are Perfect for 4th of July?
Before we dive into the steps, let’s talk about why DIY mason jar centerpieces are the ultimate Independence Day decoration choice:
- Budget-friendly: Mason jars cost very little, and most of the fill materials are reusable year after year.
- Customizable: You control the colors, fillers, heights, and lighting — making every centerpiece unique.
- Beginner-friendly: No glue guns, no power tools, and no artistic talent required.
- Versatile: Works on dining tables, mantels, porches, picnic tables, and buffet counters.
- Eco-conscious: Unlike disposable decorations, these rustic mason jar crafts can be repurposed for other holidays and seasons.
Now let’s get crafting!
What You’ll Need? — Full Materials List
Gather everything before you begin. Having all your supplies ready will make the assembly process smooth and enjoyable.
Mason Jars
- Wide-mouth mason jars (quart-size, 1-liter, or any combination of sizes)
- Quantity: 3–5 per table centerpiece cluster

Fairy Lights
- Battery-operated fairy lights (warm white or multi-color)
- Look for sets with 20–30 micro LEDs per strand, approximately 6–7 feet long
- Optional: color-specific fairy lights in red, white, or blue

Patriotic Fill Materials (choose a mix)
- Red, white, and blue decorative sand or colored gravel
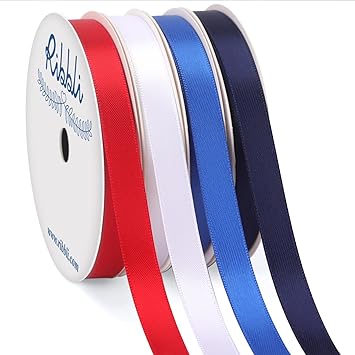
- Patriotic ribbon (satin, burlap, or wired)
- Star-shaped confetti or foam stars
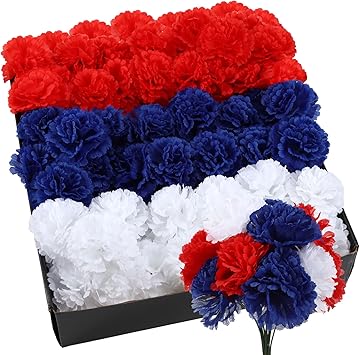
- Silk florals — red roses, white baby’s breath, blue hydrangeas or daisies
- Wooden or metal star ornaments
- Red, white, and blue river rocks or glass gems
- Small American flag picks
- Twine or jute rope




Tools & Extras
- Scissors
- Hot glue gun + glue sticks (optional, for ribbon)
- Wire cutters (optional, for adjusting floral picks)
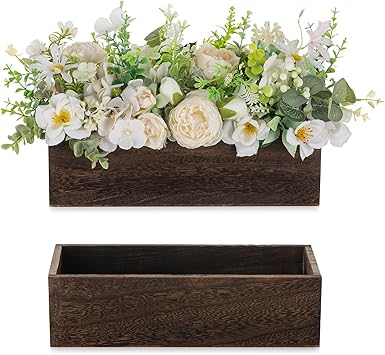
- A tray or wooden crate (to group jars together as a centerpiece cluster)
- Burlap table runner (optional base)



Step-by-Step Instructions
Step 1: Gather and Prep Your Mason Jars
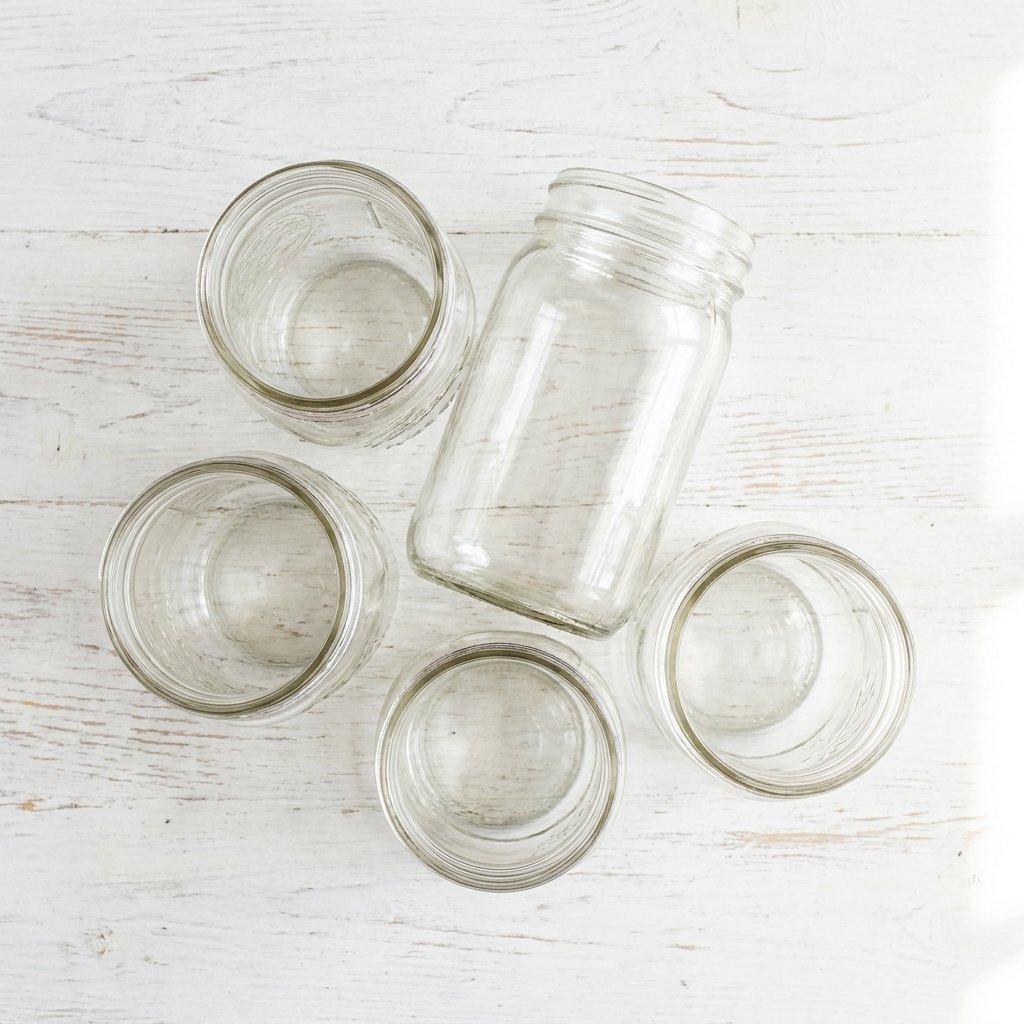
What to Do: Start by collecting your mason jars. You can use brand-new jars purchased from a craft or grocery store, or repurpose clean used jars from your pantry. Aim for a mix of sizes — having jars of different heights adds dimension and visual interest to your mason jar table display.
Wash each jar thoroughly with warm soapy water and dry completely. Any moisture left inside the jar can cause your fairy lights to fog up or your decorative fillers to clump.
Pro Tip: Use Ball or Kerr wide-mouth mason jars for the best results — their wider opening makes layering decorations much easier, and the classic ribbed glass gives that perfect rustic centerpiece look.
You’ll find great multi-pack mason jar sets online at a fraction of the cost of single jars. We’ve linked our favorites here:
Step 2: Layer the Base Fill — Colored Sand or Gravel
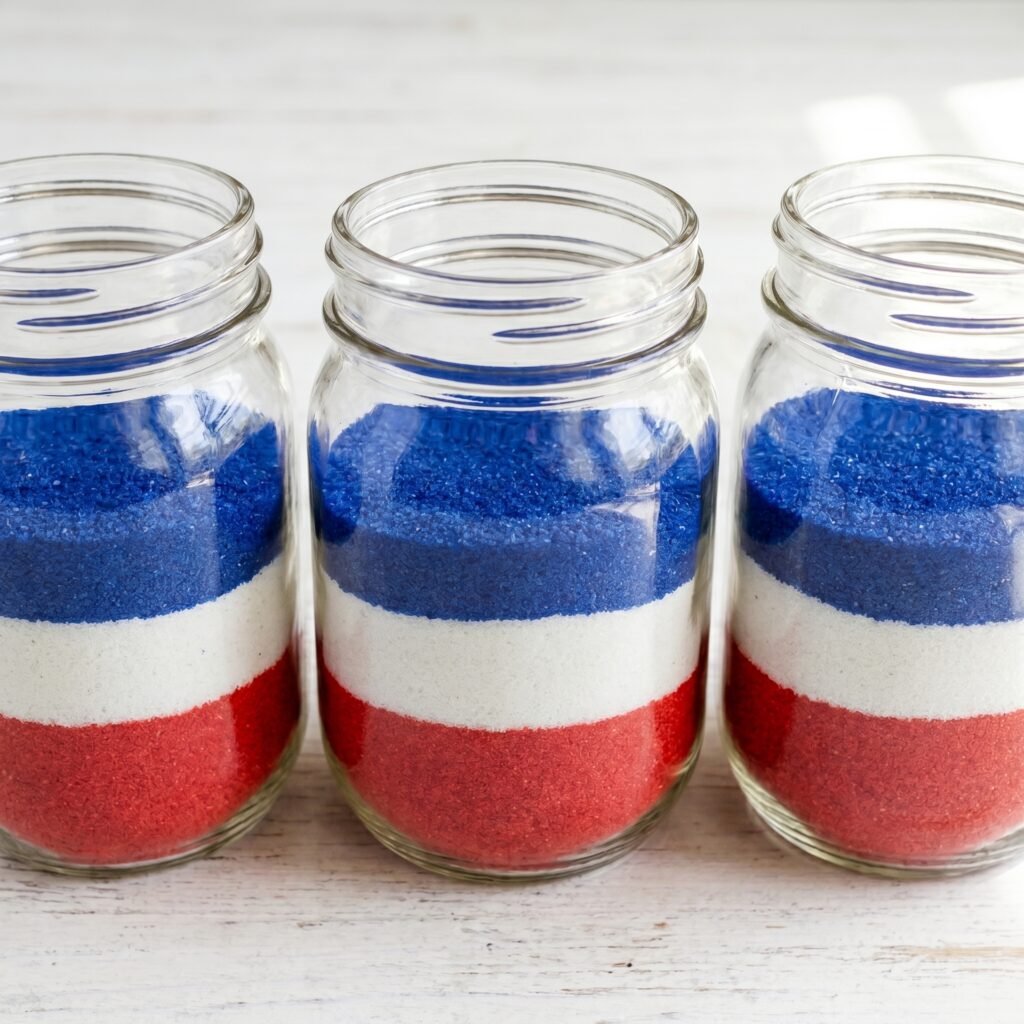
What to Do: The base layer of your DIY mason jar centerpiece is what anchors the look and sets the patriotic color story. Pour your colored decorative sand, gravel, or glass gems into the bottom of each jar, creating a 2–3 inch deep base layer.
For a traditional red, white, and blue 4th of July aesthetic, try this layering approach:
- Bottom layer: Bright red sand or gravel (approximately 1 inch deep)
- Middle layer: White sand or white river rocks (approximately 1 inch deep)
- Top layer: Royal blue sand or blue glass gems (approximately 1 inch deep)
You don’t have to do all three colors in every jar. Some jars can be all red, some all white, some all blue — when grouped together, the cluster will tell the full patriotic color story.
Pro Tip: Use a small funnel or a rolled piece of paper to pour the sand cleanly down the inside of the jar without making a mess on the rims.
Step 3: Add Patriotic Decorative Fillers
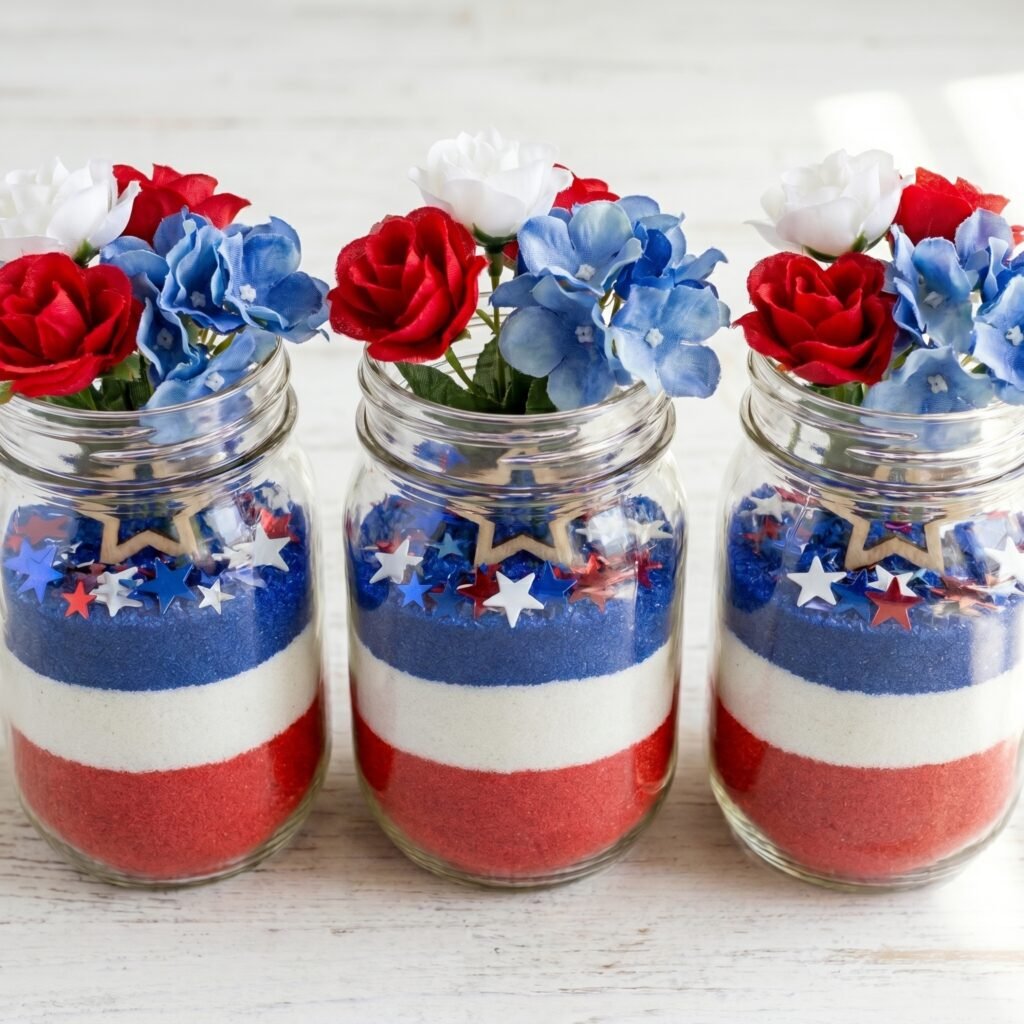
What to Do: Now it’s time to add personality and texture to your patriotic mason jar decorations by layering in your decorative fillers on top of the sand base.
Here are a few combination ideas:
Combination A — Classic Patriotic: Place 2–3 small silk flowers (one red, one white, one blue) into the center of the jar, pressing their stems down into the sand to keep them upright. Fill any gaps around the stems with star-shaped confetti or foam stars.
Combination B — Rustic Farmhouse: Tuck in a small bundle of faux baby’s breath and a few red berry picks into the sand. Scatter a handful of small wooden stars around the base inside the jar.
Combination C — Minimal & Glam: Skip the florals entirely. Instead, fill the jar with a mixture of red, white, and blue glass gems or crystal rocks. Add a few metallic star ornaments pressed into the top layer.
Don’t overfill! Leave at least 3–4 inches of space at the top of the jar. You’ll need this room for the fairy lights in the next step.
Pro Tip: Odd numbers look more visually appealing — so place 3 or 5 flowers/stars rather than 2 or 4.
Step 4: Insert the Fairy Lights
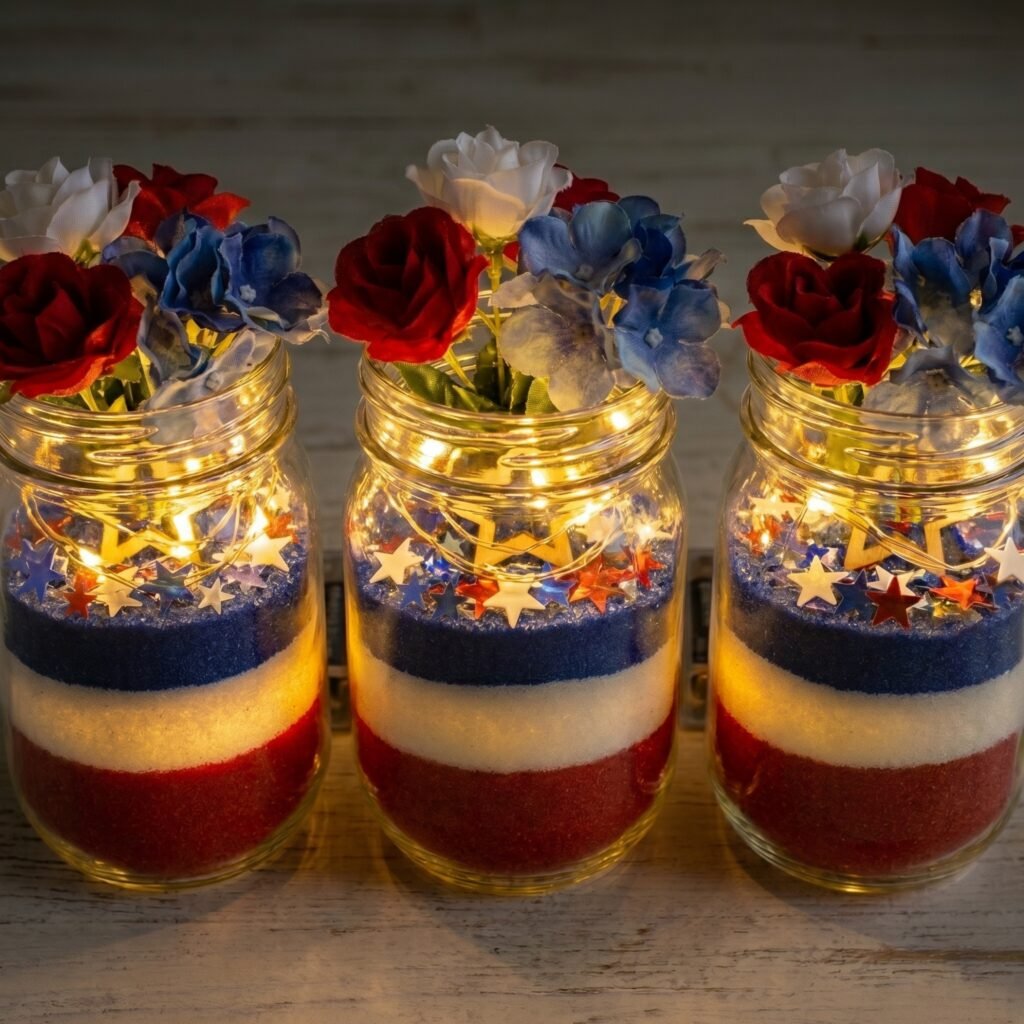
What to Do: This is the step where your mason jar fairy light centerpieces truly come to life. Take your battery-operated fairy light strand and carefully coil or “nest” it down into the jar, starting from the top opening.
Follow these tips for the best glow effect:
- Turn on the fairy lights first before inserting them — this way you can see exactly how the glow distributes as you place them.
- Coil the strand loosely in a spiral as you lower it into the jar. Don’t cram or crush the lights into a tight ball — loose coils distribute the light more evenly and look much more organic.
- Leave the battery pack outside the jar. Thread the wire so the battery compartment hangs over the jar’s rim, or tucks neatly behind the jar. Most battery packs can be hidden under a folded ribbon or behind a crate divider.
- Arrange the lit end at the bottom of the jar, nestled into your decorative fillers, so the glow radiates upward through the entire jar.
For a more dramatic glow: Use warm white LED fairy lights — they cast a golden, candlelight-like glow that looks spectacular through colored sand and glass gems. Cool white or blue-tinted fairy lights give a more electric, modern look.
Pro Tip: Micro LED fairy lights (also called “twinkle lights” or “firefly lights”) work better than larger bulb strings in mason jars because their tiny size creates thousands of tiny light points rather than a few harsh bright spots.
Step 5: Decorate the Outside of the Jars
What to Do: The outside of your DIY mason jar centerpieces deserves just as much attention as the inside. Exterior decorations tie the jars together visually and give them a finished, polished look.
Here are the most popular exterior decoration options:
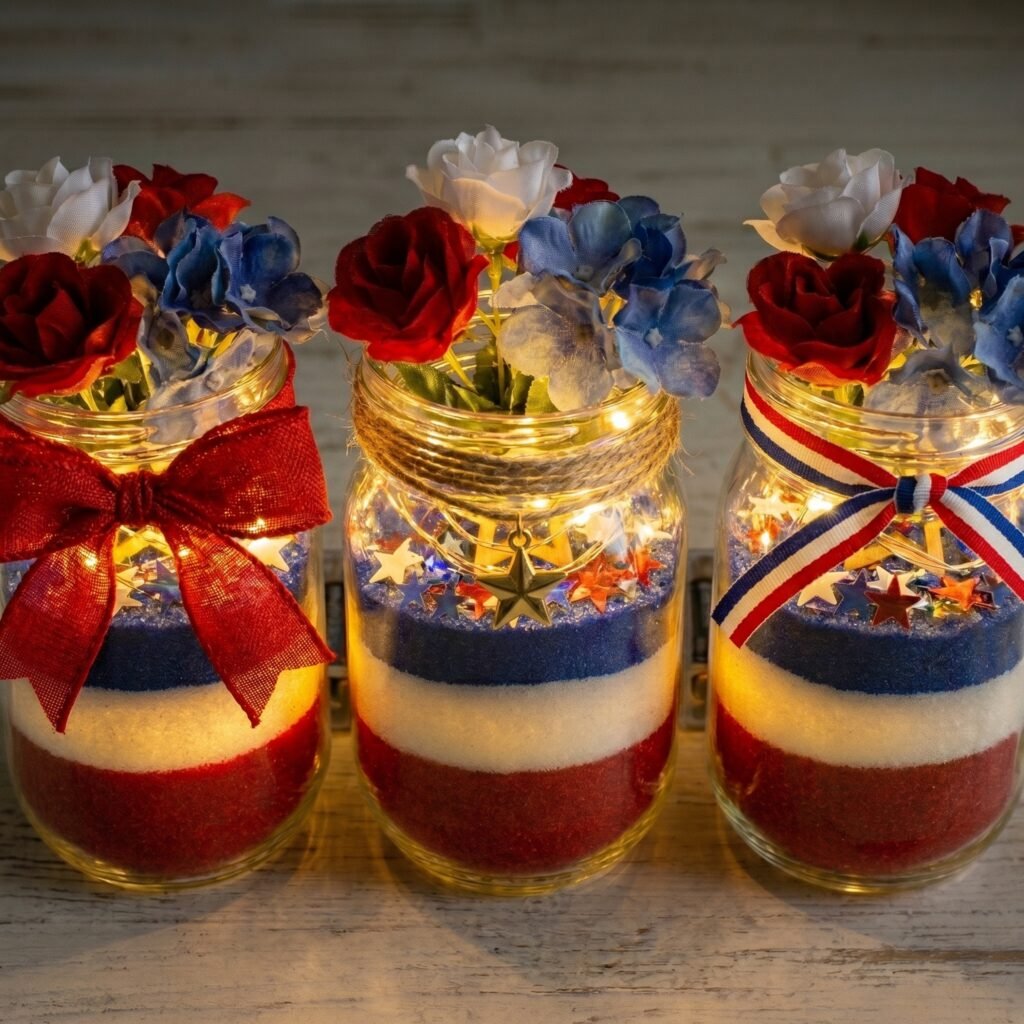
Option A — Patriotic Ribbon Bow: Cut a 12–15 inch length of wired ribbon in red, white, or navy blue. Tie it around the neck of the jar (just below the rim) and finish with a full bow. Wired ribbon holds its shape beautifully even outdoors.
Option B — Twine Wrap with Star Charm: Wrap 3–4 loops of natural jute twine around the jar neck and tie it off with a knot. Hot glue a small metal or wooden star charm to the front of the twine wrap. This gives a rustic farmhouse mason jar look.
Option C — Red, White, and Blue Striped Ribbon: Use a striped patriotic ribbon (available at most craft stores) and tie it around the jar in a simple knot or double bow. The stripes instantly read “4th of July.”
Option D — Mason Jar Label Tags: Print small chalkboard-style label tags that say “Happy 4th of July,” “Land of the Free,” or “America” and attach them to the jar neck with twine.
You can mix and match — some jars with bows, some with twine — for an eclectic, curated centerpiece look.
Step 6: Add American Flag Picks and Star Accents
What to Do: To drive home the Independence Day centerpiece theme, add small decorative picks directly into the tops of your jars. These finishing touches are small but make a huge visual impact.
What to add:
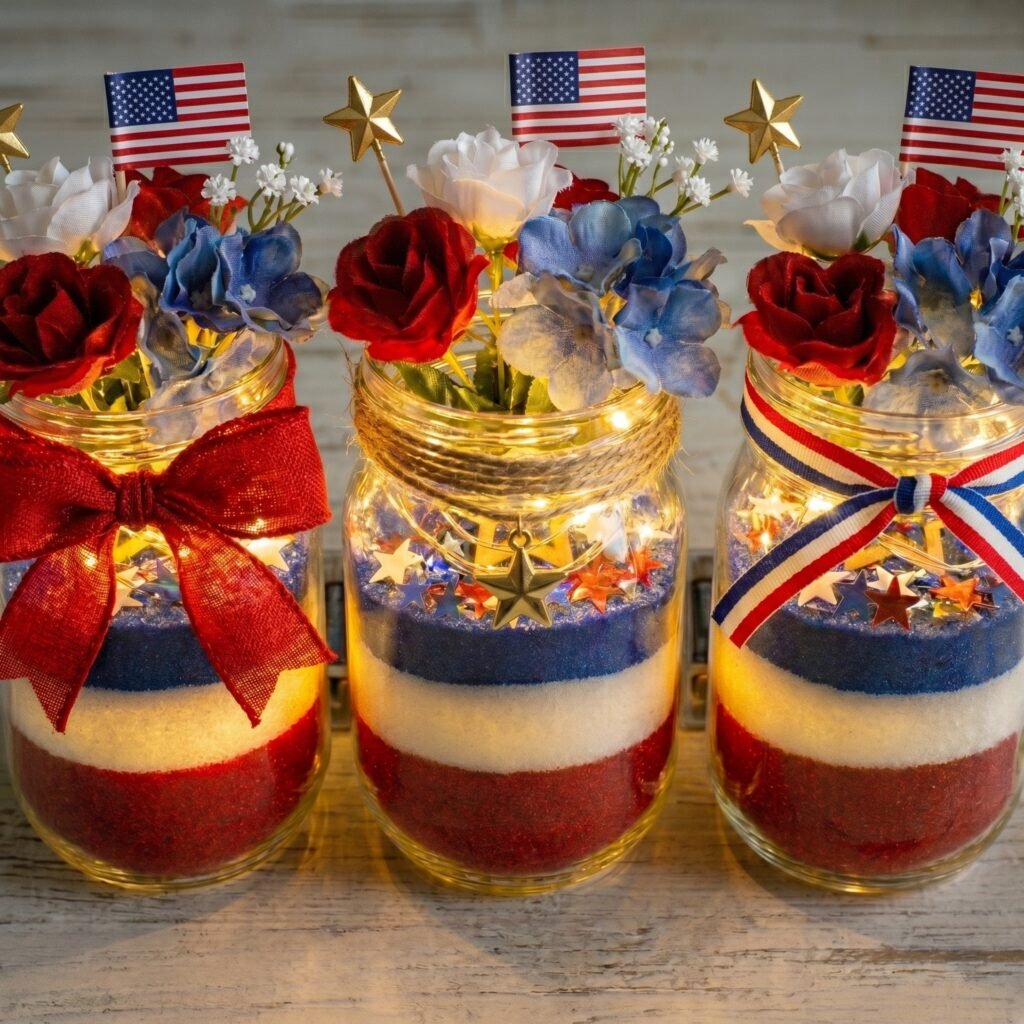
- Mini American flag picks: Insert 1–2 small paper or fabric American flag picks into the top of the sand filler, letting the flags stand upright and wave slightly above the jar rim.
- Star wand picks: Craft stores sell star-tipped floral picks in gold, silver, red, and blue. A few of these peeking out above the jar rim add height and sparkle.
- Berry or floral picks: A few sprigs of faux red berries or white baby’s breath poking out the top look beautiful and add softness.
Height variation tip: Let some picks extend 4–6 inches above the jar rim, while others sit closer to the opening. Varied heights create a more natural, organic arrangement.
Step 7: Arrange Your Centerpiece Cluster on a Tray or Runner
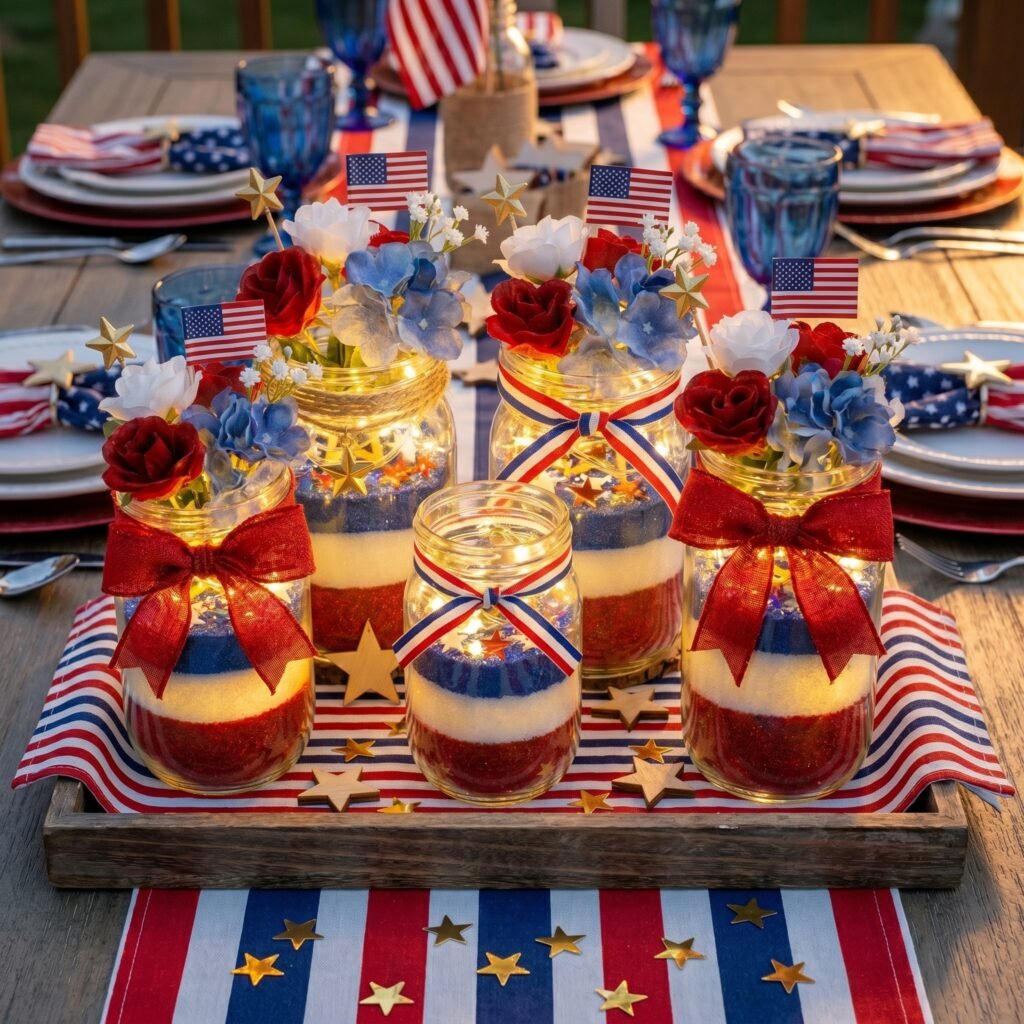
What to Do: A single mason jar is lovely. But a grouped mason jar table centerpiece cluster is absolutely breathtaking. Now it’s time to arrange your finished jars together into a cohesive centerpiece display.
Method A — Wooden Crate or Box: Place your jars inside a small rustic wooden crate or box. This instantly groups them together and adds a farmhouse touch. Fill any gaps between jars with moss, red, white, and blue shredded paper, or additional star confetti.
Method B — Decorative Tray: Arrange jars in an oval or triangular grouping on a round or rectangular wooden serving tray. Surround the jar bases with scattered star confetti, small river rocks, or additional fabric flowers.
Method C — Burlap Table Runner: Lay a burlap or red-white-and-blue striped table runner down the center of your table. Place your jar cluster along the center of the runner, spacing jars at varying heights if possible by propping shorter jars on small books or overturned ramekins hidden under the runner.
Arrangement Tips:
- Place the tallest jar in the center and shorter jars on the sides for a balanced look.
- Group an odd number of jars (3 or 5) — this is a core principle of DIY table decoration design.
- For long dining tables, create 2–3 separate clusters spaced evenly down the table runner.
Step 8: Final Styling — Fill Gaps and Add Finishing Touches
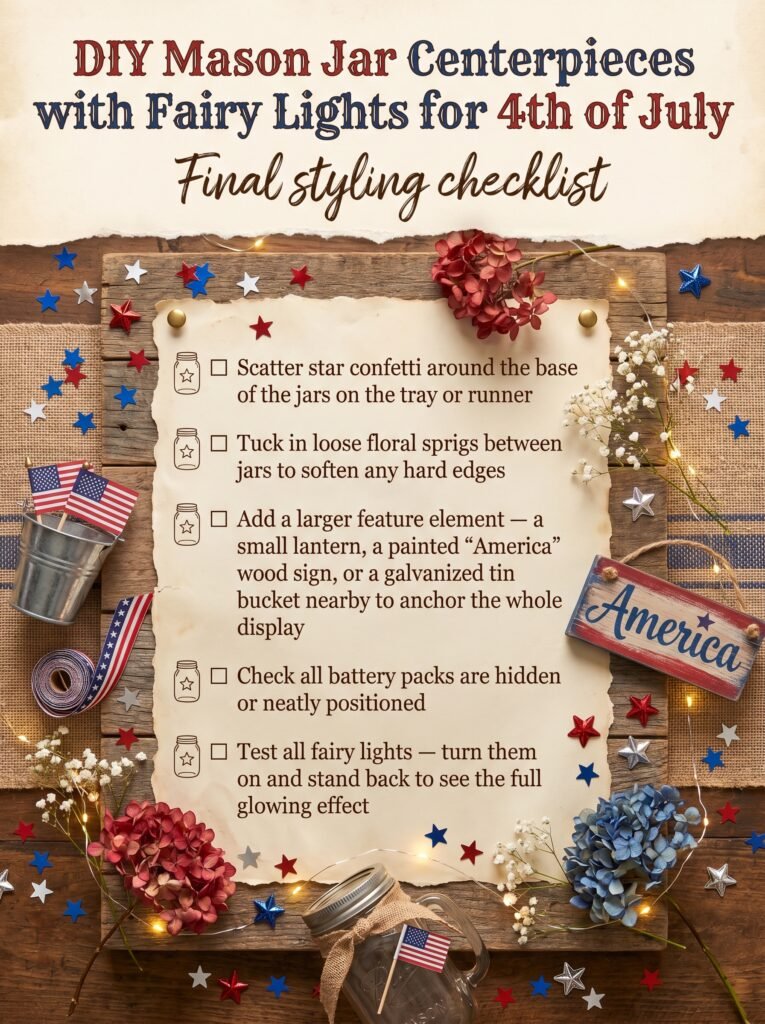
What to Do: Stand back and look at your 4th of July mason jar centerpiece cluster from the perspective a guest would see it. Now is the time to fill any visual gaps and add the small finishing details that elevate the display from “nice” to “wow.”
For an outdoor display: Secure any lightweight decorations (like confetti and flag picks) with a tiny dab of tacit putty or floral wire to prevent wind from scattering them.
For nighttime displays: Dim surrounding lights and let the fairy lights do the work. Your illuminated mason jar centerpiece will create the most beautiful, ambient glow on your 4th of July table.
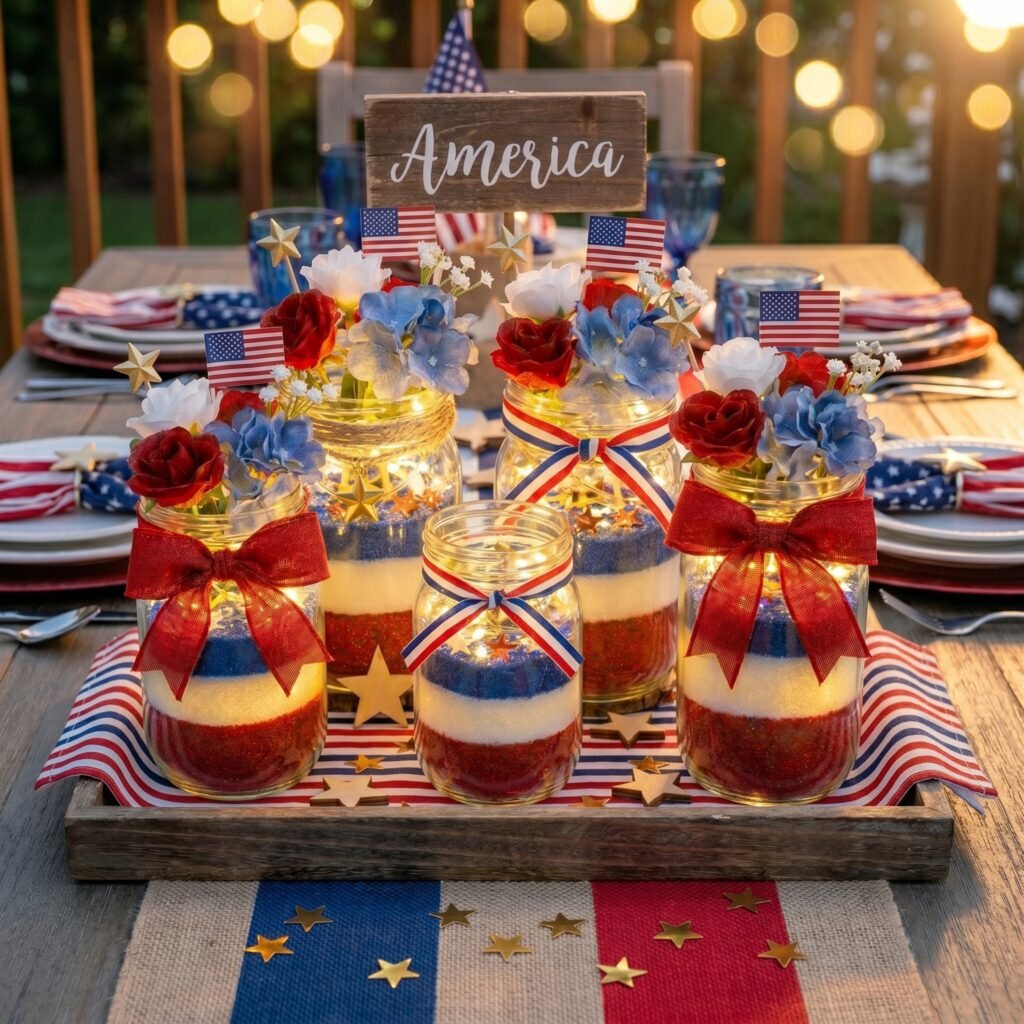
Quick Tips to Take Your Mason Jar Centerpieces to the Next Level
Here are a few extra ideas to make your patriotic mason jar table decorations even more impressive:
Tip 1 — Use Chalkboard Paint for Labeling Paint the bottom third of some jars with chalkboard paint (let it cure for 24 hours). Then use chalk markers to write “July 4th,” “1776,” or patriotic quotes. This creates a fun mixed-media look.
Tip 2 — Add Glitter for Extra Sparkle Before adding your fillers, brush the inside of the jar with a thin layer of Mod Podge and sprinkle fine glitter (red, silver, or gold) around the interior walls. Once dry, the glitter catches the fairy light beautifully.
Tip 3 — Float Candles as an Alternative Light Source If you prefer a candle look over fairy lights, use battery-operated tealight candles instead. These are safer for outdoor use and still create a wonderful warm glow through the mason jar candle holder.
Tip 4 — Mix Jar Styles Combine standard Ball mason jars with hexagonal jars, vintage-style jars, or even Atlas jars for a more eclectic, collected look. Different jar profiles add texture and visual interest to your DIY glass jar centerpiece display.
Tip 5 — Personalize for Your Party Theme Swap out the flower colors for your specific party palette. Hosting a red-and-gold party? Switch white flowers for gold. Doing a nautical theme? Use navy and white with anchor charms. The mason jar centerpiece framework works for any holiday.
Also Try this: DIY Patriotic Front Door Wreath (Step-by-Step Guide)
How to Store Your Mason Jar Centerpieces After 4th of July?
One of the best things about DIY mason jar centerpieces is how easy they are to store and reuse.
- Remove fairy light strands first — coil them carefully and store in a small zip-lock bag to prevent tangling.
- Leave the fillers inside the jars if you plan to reuse for the same holiday next year — just cover the jar top with plastic wrap and a rubber band.
- Store jars upright in a cardboard box with tissue paper between each jar to prevent chipping.
- Refresh decorations each year — swap out wilted silk flowers, replenish sand layers, and replace ribbon that has faded. Your jars themselves will last indefinitely.
Final Thoughts
Creating your own DIY mason jar centerpieces for the 4th of July is one of those rare craft projects that delivers stunning results with minimal effort. With a few glass jars, some patriotic fillers, and the warm twinkle of fairy lights, you can transform any table into a breathtaking Independence Day centerpiece display that your guests will be talking about all night.
Whether you’re a seasoned crafter or a complete beginner, this guide has everything you need to bring your patriotic table decor vision to life. Get your supplies, put on some patriotic music, and enjoy the process — because the best part of any DIY is the moment you step back and see your finished creation glowing beautifully in the evening light.
Happy crafting!
Frequently Asked Questions
- What kind of mason jars work best for fairy light centerpieces?
Wide-mouth mason jars are the best choice for fairy light centerpieces because their wider opening makes it much easier to insert and arrange both decorative fillers and fairy light strands without tangling or crushing. For sizing, quart-size (32 oz) jars are the most versatile — large enough to hold a generous amount of filler and a full strand of micro fairy lights, while still being compact enough to cluster together on a table. Half-gallon jars make a bold statement as a solo centerpiece or focal piece. Pint-size jars are perfect as accent pieces placed around the edges of a cluster. Mixing all three sizes in one display creates the most visually dynamic and professional-looking mason jar centerpiece.
- How many mason jars do I need for a table centerpiece?
For a single centerpiece cluster on a dining table, 3–5 mason jars grouped together is the sweet spot. An odd number (3 or 5) always looks more natural and balanced than an even number — this is a core principle in interior and table design. For a long banquet or farmhouse-style dining table, plan for 2–3 separate clusters of 3 jars spaced evenly down a table runner. For a buffet or dessert table, a single cluster of 5 jars at staggered heights makes a strong visual statement. For a large outdoor picnic table, you can get away with just 3 jars if you surround them with scatter decorations like star confetti and small flag picks.
- What can I use to fill mason jars for 4th of July decorations?
There are many great filler options for patriotic mason jar decorations, and layering different textures is what makes them look truly stunning. Popular fillers include: decorative colored sand in red, white, and blue; glass gems or river rocks; star-shaped confetti; silk florals like roses, baby’s breath, and daisies; small wooden or metal star ornaments; miniature American flag picks; burlap or fabric scraps; and red, white, and blue ribbon curls. For the most striking look, use a combination of a base filler (sand or rocks for weight and color), a middle layer (flowers or stars for texture), and a top accent (a flag pick or star wand poking above the rim). The key is layering materials of different textures, scales, and opacities so the glow from your fairy lights has interesting things to illuminate through the glass.
- What type of fairy lights work best inside mason jars?
Battery-operated micro LED fairy lights — also called “twinkle lights,” “firefly lights,” or “copper wire fairy lights” — are by far the best choice for mason jar centerpieces. Here’s why they outperform other options: their tiny LED bulbs (often just 2–3mm) create dozens of individual light points rather than a few harsh bright spots; the thin copper or silver wire they’re strung on is flexible enough to coil loosely inside the jar without breaking; and being battery-operated means no messy cords running across your table. For a warm, romantic, candlelight-like glow, choose warm white LEDs. For a more vibrant, electric patriotic look, choose multi-color or specifically red, white, and blue light sets. Aim for strands with 20–30 LEDs on a 6–7 foot wire for quart-size jars — this length gives enough to coil through your fillers without crowding.
- How much does it cost to make DIY mason jar centerpieces?
One of the biggest advantages of DIY mason jar centerpieces is their low cost. A basic set of 3 decorated, fairy-lit mason jars can be made for as little as $15–25 total, depending on what fillers and decorations you choose. Here’s a rough cost breakdown for a cluster of 3 jars:
– Mason jars (pack of 4): $8–12
– Fairy light strands (3-pack): $8–15
– Decorative sand, confetti, and stars: $5–8
– Ribbon and twine: $3–6
– Silk florals and flag picks: $5–10
Total: approximately $29–51 for a complete 3-jar cluster. Compared to purchasing pre-made holiday table centerpieces at a home decor store (which can run $40–80 for a single piece), the DIY version is dramatically more affordable — and far more personalized. Plus, the mason jars, fairy lights, and most fillers can be reused for future holidays. - Can I use real candles in mason jars instead of fairy lights?
While real candles inside mason jars create a beautiful glow, we strongly recommend battery-operated fairy lights or LED tealights as a safer alternative, especially for 4th of July celebrations. Independence Day events often take place outdoors, where wind can cause open flames to flicker unpredictably, potentially igniting nearby decorations like ribbon, paper flags, and tissue paper. Additionally, many outdoor venues, parks, and backyards have fire restrictions during summer months. If you have young children attending your celebration, open flames on a table at their eye level are a significant safety hazard. Battery-operated LED tealights placed inside the jar give a very convincing flickering candle effect with zero fire risk — these are the best compromise if you love the candle aesthetic but want peace of mind.
- How do I hide the battery pack from the fairy lights?
There are several easy ways to keep your mason jar fairy light centerpiece looking clean and wire-free. The simplest method is to thread the wire so the battery pack hangs just over the back rim of the jar, then position that side of the jar facing away from guests. You can also tuck the battery pack behind the jar if it’s sitting on a tray or inside a crate — the surrounding jars and decorations naturally hide it. For the neatest look, drape a piece of ribbon, burlap, or a large leaf over the battery pack, or tuck it underneath a folded section of your table runner. If multiple jars are clustered together, you can bundle all the battery packs together behind the group and hide them inside a small decorative tin or wooden box placed at the back of the arrangement.
- How long do the batteries last in fairy light mason jar centerpieces?
Battery life depends on the type of battery, the number of LEDs on the strand, and whether the lights run continuously or on a timer. As a general rule, a 30-LED copper wire fairy light strand running on 2 AA batteries will last approximately 40–72 hours of continuous use. For a 4th of July party that runs 4–6 hours, a fresh set of batteries will easily last the entire event. To extend battery life, look for fairy light sets that include a built-in timer function (common on many Amazon sets) — these run the lights for 6 hours, then automatically shut off for 18 hours, repeating the cycle. This is especially useful if you want to set up your patriotic centerpiece display a day or two before your party without draining the batteries. Rechargeable AA batteries are a great eco-friendly and cost-effective option for frequent crafters.
- Can I use plug-in fairy lights instead of battery-operated ones?
Yes, plug-in fairy lights can work for indoor mason jar centerpieces where you have easy access to outlets — for example, on a dining table near a wall or on a buffet table. However, for outdoor parties, picnic tables, or any table where running a cord would be impractical or a trip hazard, battery-operated fairy lights are the much better choice. If you do use plug-in lights, use a thin, inconspicuous extension cord and tape it flat against your table runner or guide it along the underside of the table to keep it out of foot traffic. Never exceed the wattage rating on your extension cord, and make sure all electrical connections stay dry if you’re using them in a damp outdoor environment.
- What colors should I use for 4th of July mason jar centerpieces?
The classic color palette for 4th of July mason jar centerpieces is red, white, and royal blue — directly reflecting the colors of the American flag. For sand and rock fillers, look for true red, clean white, and deep royal or navy blue shades for the most patriotic impact. For florals, red roses or carnations, white baby’s breath or daisies, and blue hydrangeas or cornflowers make a stunning combination. If you want to add a touch of elegance, incorporate gold as an accent color through star ornaments, gold ribbon, and metallic star confetti — gold complements red, white, and blue beautifully and adds a celebratory, festive feel that elevates the overall look of your Independence Day table decor.
- How do I make my mason jar centerpieces look professional?
Several small details separate a good-looking DIY mason jar centerpiece from a truly professional-looking one. First, vary your jar heights — stack shorter jars on overturned ramekins or small books hidden under your table runner to create a staggered height display. Second, always arrange an odd number of jars (3 or 5) — even numbers look static and commercial, while odd numbers feel more natural and curated. Third, layer your fillers with intentional texture contrast — smooth glass gems next to soft silk petals next to rough jute twine. Fourth, let some decorative elements extend above the jar rim (flag picks, star wands, flower stems) to break the hard horizontal line of the jar opening. Fifth, unify the cluster with a tray, crate, or table runner so the individual jars read as one composed centerpiece rather than a random collection of jars.
- Can I make mason jar centerpieces for other holidays using this same method?
Absolutely — the mason jar centerpiece framework is one of the most versatile decorating formulas there is. Simply swap out the filler colors and decorative accents to suit any holiday or occasion: for Christmas, use green and red sand with pine sprigs, red berries, and warm white lights; for Halloween, use black and orange sand with small plastic spiders and orange fairy lights; for Valentine’s Day, use pink and red glass gems with silk roses and rose-gold fairy lights; for a wedding, use white sand, greenery, and soft white fairy lights; for Thanksgiving, use amber and brown river rocks with dried leaves and warm copper-wire lights. The mason jars and fairy lights themselves are fully reusable, so your investment in this craft pays off across every season of the year.
- How far in advance can I make 4th of July mason jar centerpieces?
You can fully assemble your DIY mason jar centerpieces up to 1–2 weeks before your event with no issues. The decorative sand, glass gems, stars, and silk florals are all stable and will not wilt, fade, or deteriorate in that timeframe. Store assembled jars upright in a cool, dry location away from direct sunlight — prolonged UV exposure can fade ribbon, silk petals, and colored sand over time. Wait to insert the fairy lights until 1–2 days before the event to preserve battery life (or use fairy light sets with a built-in timer). If you’re using fresh flowers instead of silk, add those no more than 1–2 days before the event and keep them in water up until placement.
- What if my fairy lights keep falling down into the jar and bunching at the bottom?
This is a common issue when the wire strand is too heavy or the jar fillers are too loose to anchor the lights in place. Here are a few easy fixes: first, make sure you coil the lights loosely in a spiral as you lower them in rather than dropping them in all at once — a coiled strand distributes its weight more evenly; second, pack your base filler (sand or rocks) firmly enough that the bottom coils of the fairy light strand are nestled into it and held in place; third, if the wire is still slipping, use a small piece of removable poster putty or a clip on the outside rim of the jar to hold the wire at the top and prevent it from sliding down; fourth, choose lighter-gauge copper wire fairy light strands — the ultra-thin wire is more flexible and stays where you coil it better than thicker wire sets.
- Can kids help make these mason jar centerpieces?
Yes — DIY mason jar centerpieces are one of the most kid-friendly craft projects you can do together, with a few simple age-appropriate task assignments. Children aged 4 and up can pour decorative sand and confetti into jars (use a funnel to minimize mess), place silk flowers and star ornaments, and scatter confetti around the finished display. Children aged 7 and up can help tie ribbon bows around the jar necks, insert flag picks, and coil fairy lights into jars. An adult should always handle the battery pack installation and any steps involving hot glue. Making these centerpieces as a family activity is a wonderful way to get kids excited about the 4th of July celebration — and they’ll be extra proud to see their handmade decorations on display at the party.
- Are these centerpieces safe for outdoor use?
Yes, DIY mason jar centerpieces with fairy lights are well-suited for outdoor use with a few precautions. Since you’re using battery-operated LED lights rather than open flames, there is no fire risk. However, be mindful of wind — lightweight decorative elements like paper confetti, thin ribbon, and small paper flag picks can blow away in a breeze. Secure these with a dab of tacky putty or floral wire. For the ribbon, use wired ribbon rather than satin ribbon outdoors — wired ribbon holds its bow shape even in wind. If your event is near water (a pool, lake, or sprinkler zone), keep the battery packs dry and elevated. Finally, if there’s any chance of rain, move your outdoor mason jar centerpiece display under a covered area — while the glass jars themselves are waterproof, water can seep into the battery compartment and damage the fairy lights.
- My colored sand layers are mixing together — how do I keep them separate?
Sand layer blending usually happens when the jar is moved or jostled after assembly, or when the sand is poured too quickly. For cleaner, more defined color bands, pour each sand layer slowly and evenly, then gently tap the bottom of the jar on the table to settle the sand flat before adding the next color. After pouring all three layers, avoid tipping or shaking the jar. If you want permanently defined layers that won’t shift at all, you can lightly mist each layer with a small amount of clear acrylic spray (available at any craft store) and let it dry before adding the next color — this locks each layer in place. Note that sealed sand layers cannot be easily changed afterward, so this method is best if you’re happy with the look and want it to last multiple seasons.
- Where is the best place to buy supplies for DIY mason jar centerpieces?
You can find all the supplies for DIY mason jar centerpieces at a range of retailers depending on your budget and timeline. For in-store shopping, Michaels, Hobby Lobby, Joann Fabrics, and Walmart carry wide-mouth mason jars, decorative sand, silk florals, patriotic ribbon, and most craft supplies — and all regularly offer 40–50% off coupons. For the best prices on bulk mason jars, Amazon and Walmart online are hard to beat, especially if you’re making centerpieces for multiple tables. Dollar Tree and Dollar General are fantastic for patriotic accents like small American flags, star confetti, ribbon, and decorative fillers at a fraction of the craft store price. For fairy light strands specifically, Amazon offers the best selection of battery-operated micro LED copper wire lights in a wide range of lengths, bulb counts, and color temperatures — check the reviews for battery life ratings before buying.